Posted by Ondrej M on 21st Feb 2025
Building the dream
Reviving a Legend: My Year-Long DIY Honda S2000 Restoration Journey
It all started with a simple clutch job. At least, that was the plan. has turned to completely dismantling the car down to the nuts and bolts and turned to a full-blown restoration project—one that would test my relationship, my wallet, and I would learn so many new skills.
I had to expand my set of tools, and geared with the knowledge from endless watching of YouTube channels, and the sheer determination to see this through, I embarked on a year-long journey to bring this once-tired S2000 back to life and more than it's former glory, I wanted to build the S2000 of my dreams, car that keeps it's spirit, adds some modern touches and improves on already excellent handling.
I have broken the process to multiple articles as reading everything in one would be quite tiresome and very very long.
- Stripping the car to bare metal, preparing and protecting the shell
- Rebuilding the engine and drivetrain with differential upgrade
- Refurbishing the subframes, all suspension components and Big Brake Kit
- Reassembling with restored or brand-new brackets and bolts
- Adding 20th anniversary package
- Modernizing the electronics to bring the car to the 2020s
- Designing and installing a custom sound system
- Completing a full respray for better than factory-fresh look
Of course, like any DIY restoration, it went over budget, over schedule, and way beyond what I initially expected—but that’s just part of the process, right?
Before we begin, I think it is time to introduce myself and, most importantly, the car itself.
The story begins in December 2011 when I got my hands on a car that had been described as my early mid-life crisis. I never imagined I would keep it for this long, let alone grow to love it so much that we would become inseparable. Although destiny has tested our bond on more than a couple of occasions, I’ll save those stories for another time.
And here I am 14 years ago, just as we arrived home—a much slimmer version of myself, with a lot more hair still on my head too. Do people still remember paper road tax discs?

The car is an AP1, made in the year 2000, Berlina Black with a red leather interior—just the perfect combination. It was one of the cheaper ones from an Autotrader advert, and I paid £4,500. That price feels like a distant past, as nowadays (as of 2025), it would be around £10k, especially given that it was completely stock, had only 80k miles, no rust, and no issues—at least, none that I knew of. But that’s a story for another time. It was the perfect weekend toy, which at that time also served as my daily driver—and what a daily it was.
Now, fast-forwarding to May 2022, and the car needed a new clutch—again. Although the clutch was replaced at 90k miles, it didn’t even last 20k miles. Partly, maybe, because of my driving style, but also because the garage recommended an Exedy clutch kit when they replaced it. If only I had known back then. Well, I’m taking it as a lesson learned, and...
And this is where the restoration project begins—with removing the gearbox from the car.
All I wanted to do was change the clutch so I could enjoy the car for the summer. However, once I had removed the gearbox and faced the prospect of having to go through the process again in a year or two (as I had always planned to restore the car eventually—just not that year), my mind was made up. I wasn’t going to go through that process again.
Without a ramp, it was quite a challenge, but I managed. However, it wasn’t the easiest of jobs, especially since I was trying to complete all the tasks myself.
Before I begin, I have a little confession to make. I'm not a trained or professional auto mechanic; however, I have been taking care of my cars for some years, so I do know a thing or two about cars.
Let's GO!!!!
Taking the gearbox out wasn’t the easiest of jobs, mainly due to having the car on just four jack stands. Even though they were at their highest level, I had just enough space to slide the gearbox out from under the car.
That was the breaking point for me—it was now or never. Instead of just replacing the clutch, I decided to go all "Ondrej" on it and started a full inspection. I checked everything—searched for rust, examined the condition of the bodywork (especially under the car), and, of course, took a close look at the dreaded wheel arches.
And yes, I found a rust spot. After poking with the screwdriver and it wend straight through, adding to the list, welding, body panel. 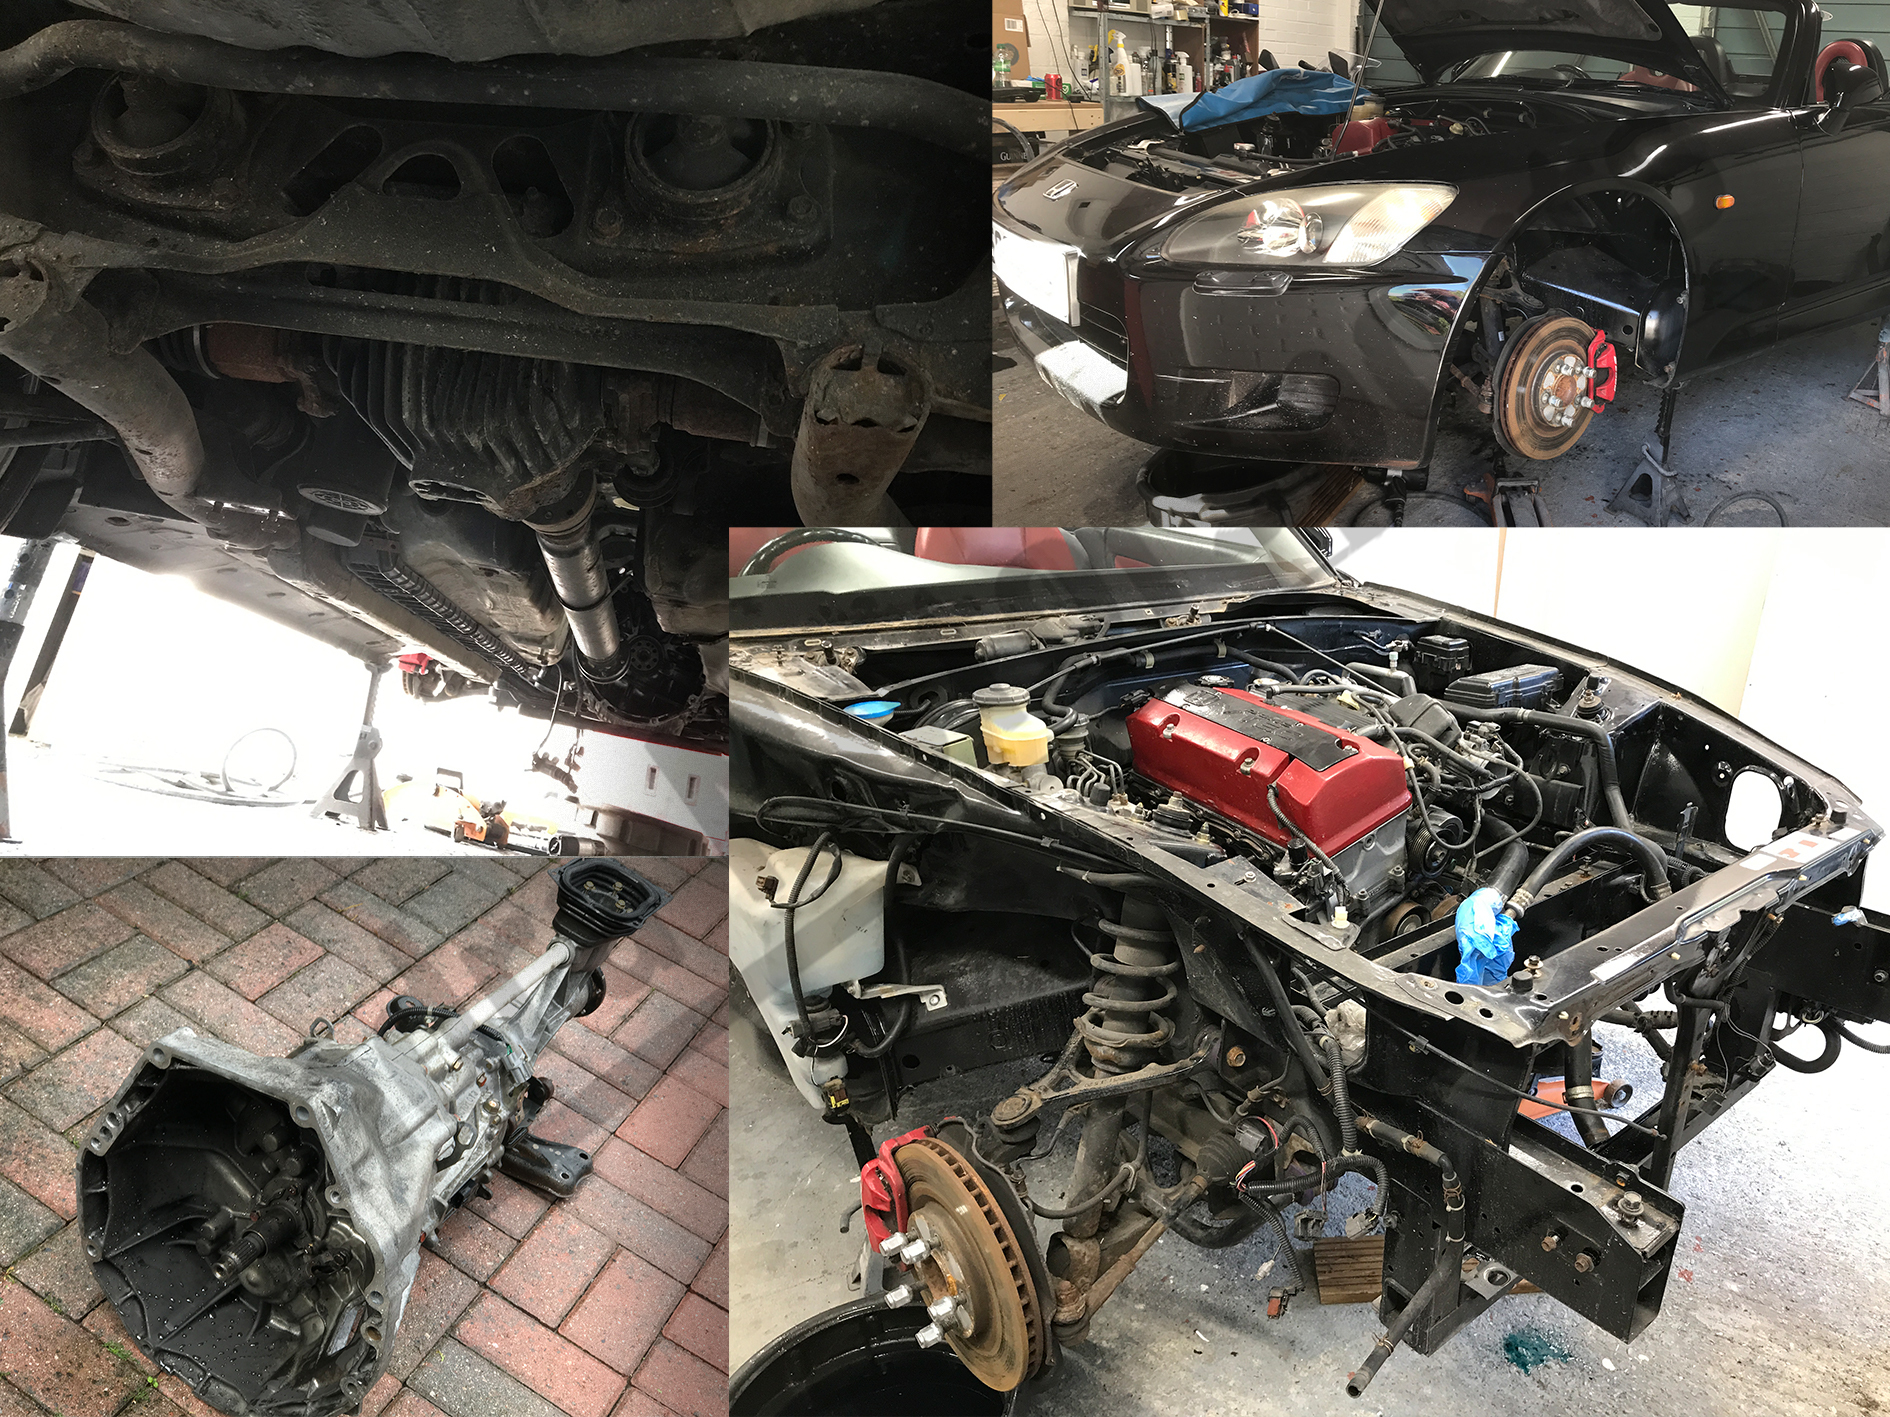
And here we go—starting to strip the car down. Everything must go—every panel, the engine, drive train, all suspension parts and subframes, all fixings, hoses, fuel tank, and the entire interior. I won’t stop until I’m left with just an empty shell.

These were my last moments of happiness—from this point on, the hard work began.
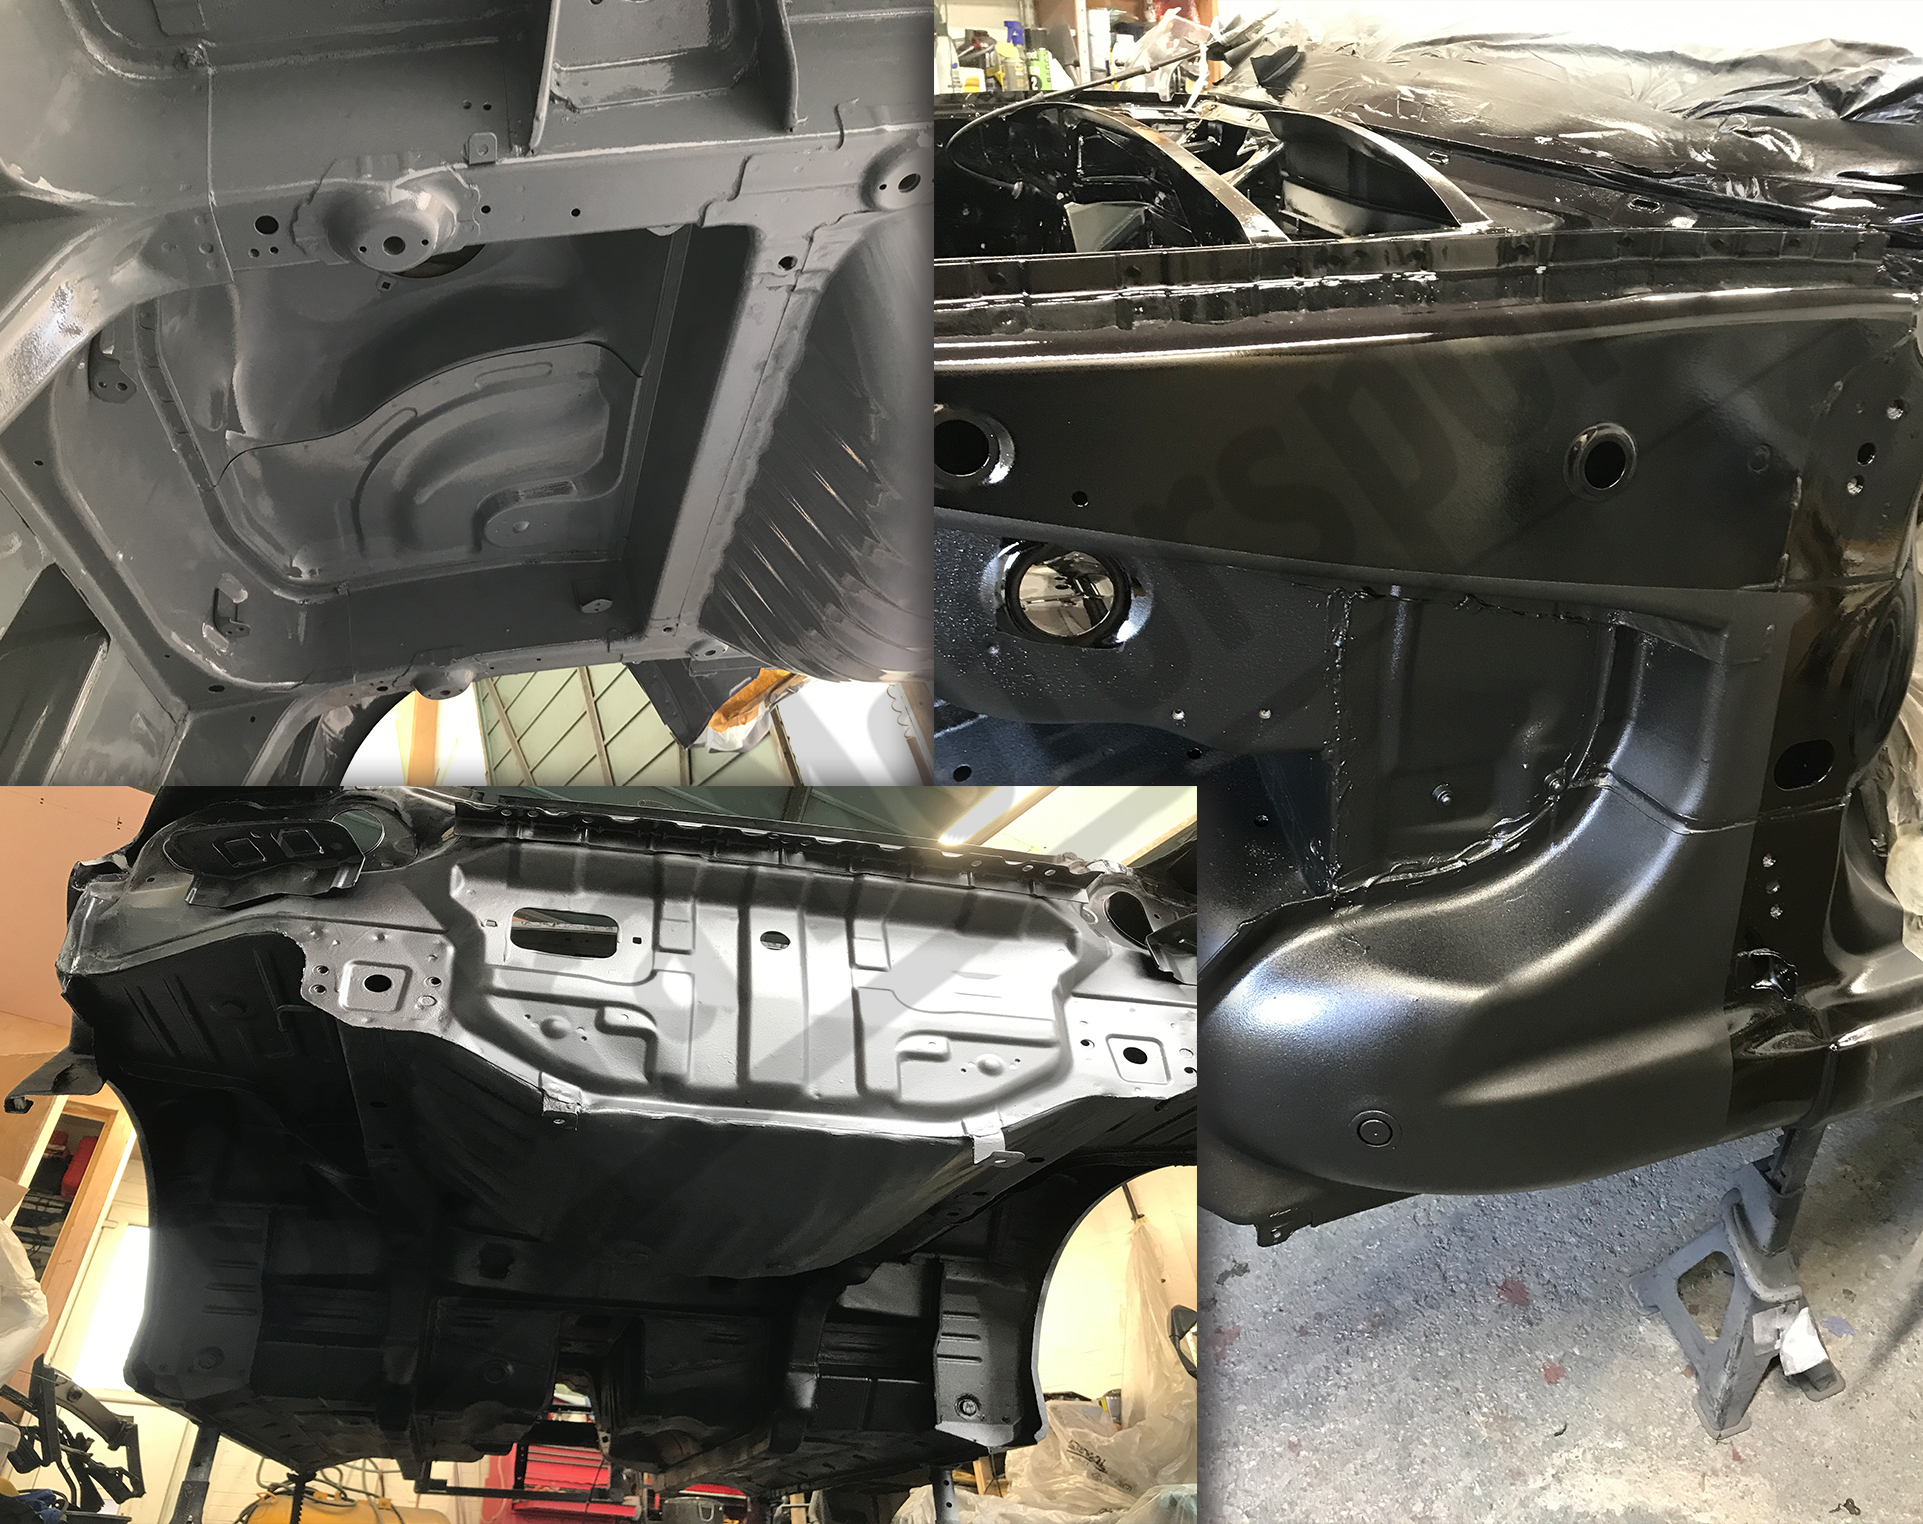
I started by removing the rubber coating from under the car, which revealed many spots of what, luckily, turned out to be just surface rust. I was able to clear it with a wire wheel on an angle grinder, treat it with rust converter to prevent further progression, and once the entire underside of the car, engine bay, wheel arches, and rear panel were stripped to bare metal, I applied U-Pol Raptor epoxy primer as a direct-to-metal primer.
I then used seam sealer on areas where panels overlapped to prevent water from getting in and causing issues a few years down the line—just as it was originally applied from the factory. Once that was complete, I applied a coat of U-Pol Raptor bed liner.
For the underside of the car, I used a bed liner applicator spray gun to create a thicker layer and add some texture. Inside the engine bay, I applied a base coat with a clear coat, while the wheel arches and lower sections of the engine bay were coated with slightly reduced U-Pol Raptor bed liner and sprayed with a 2.0mm spray gun to achieve a satin finish without too much texture.
As you have probably deduced from the write-up, I have used several different spray guns, so it’s time to cover my spray painting setup.
Spray painting is a very messy job, and breathing in vapors is harmful to the human body.
Let’s start with PPE (Personal Protective Equipment).
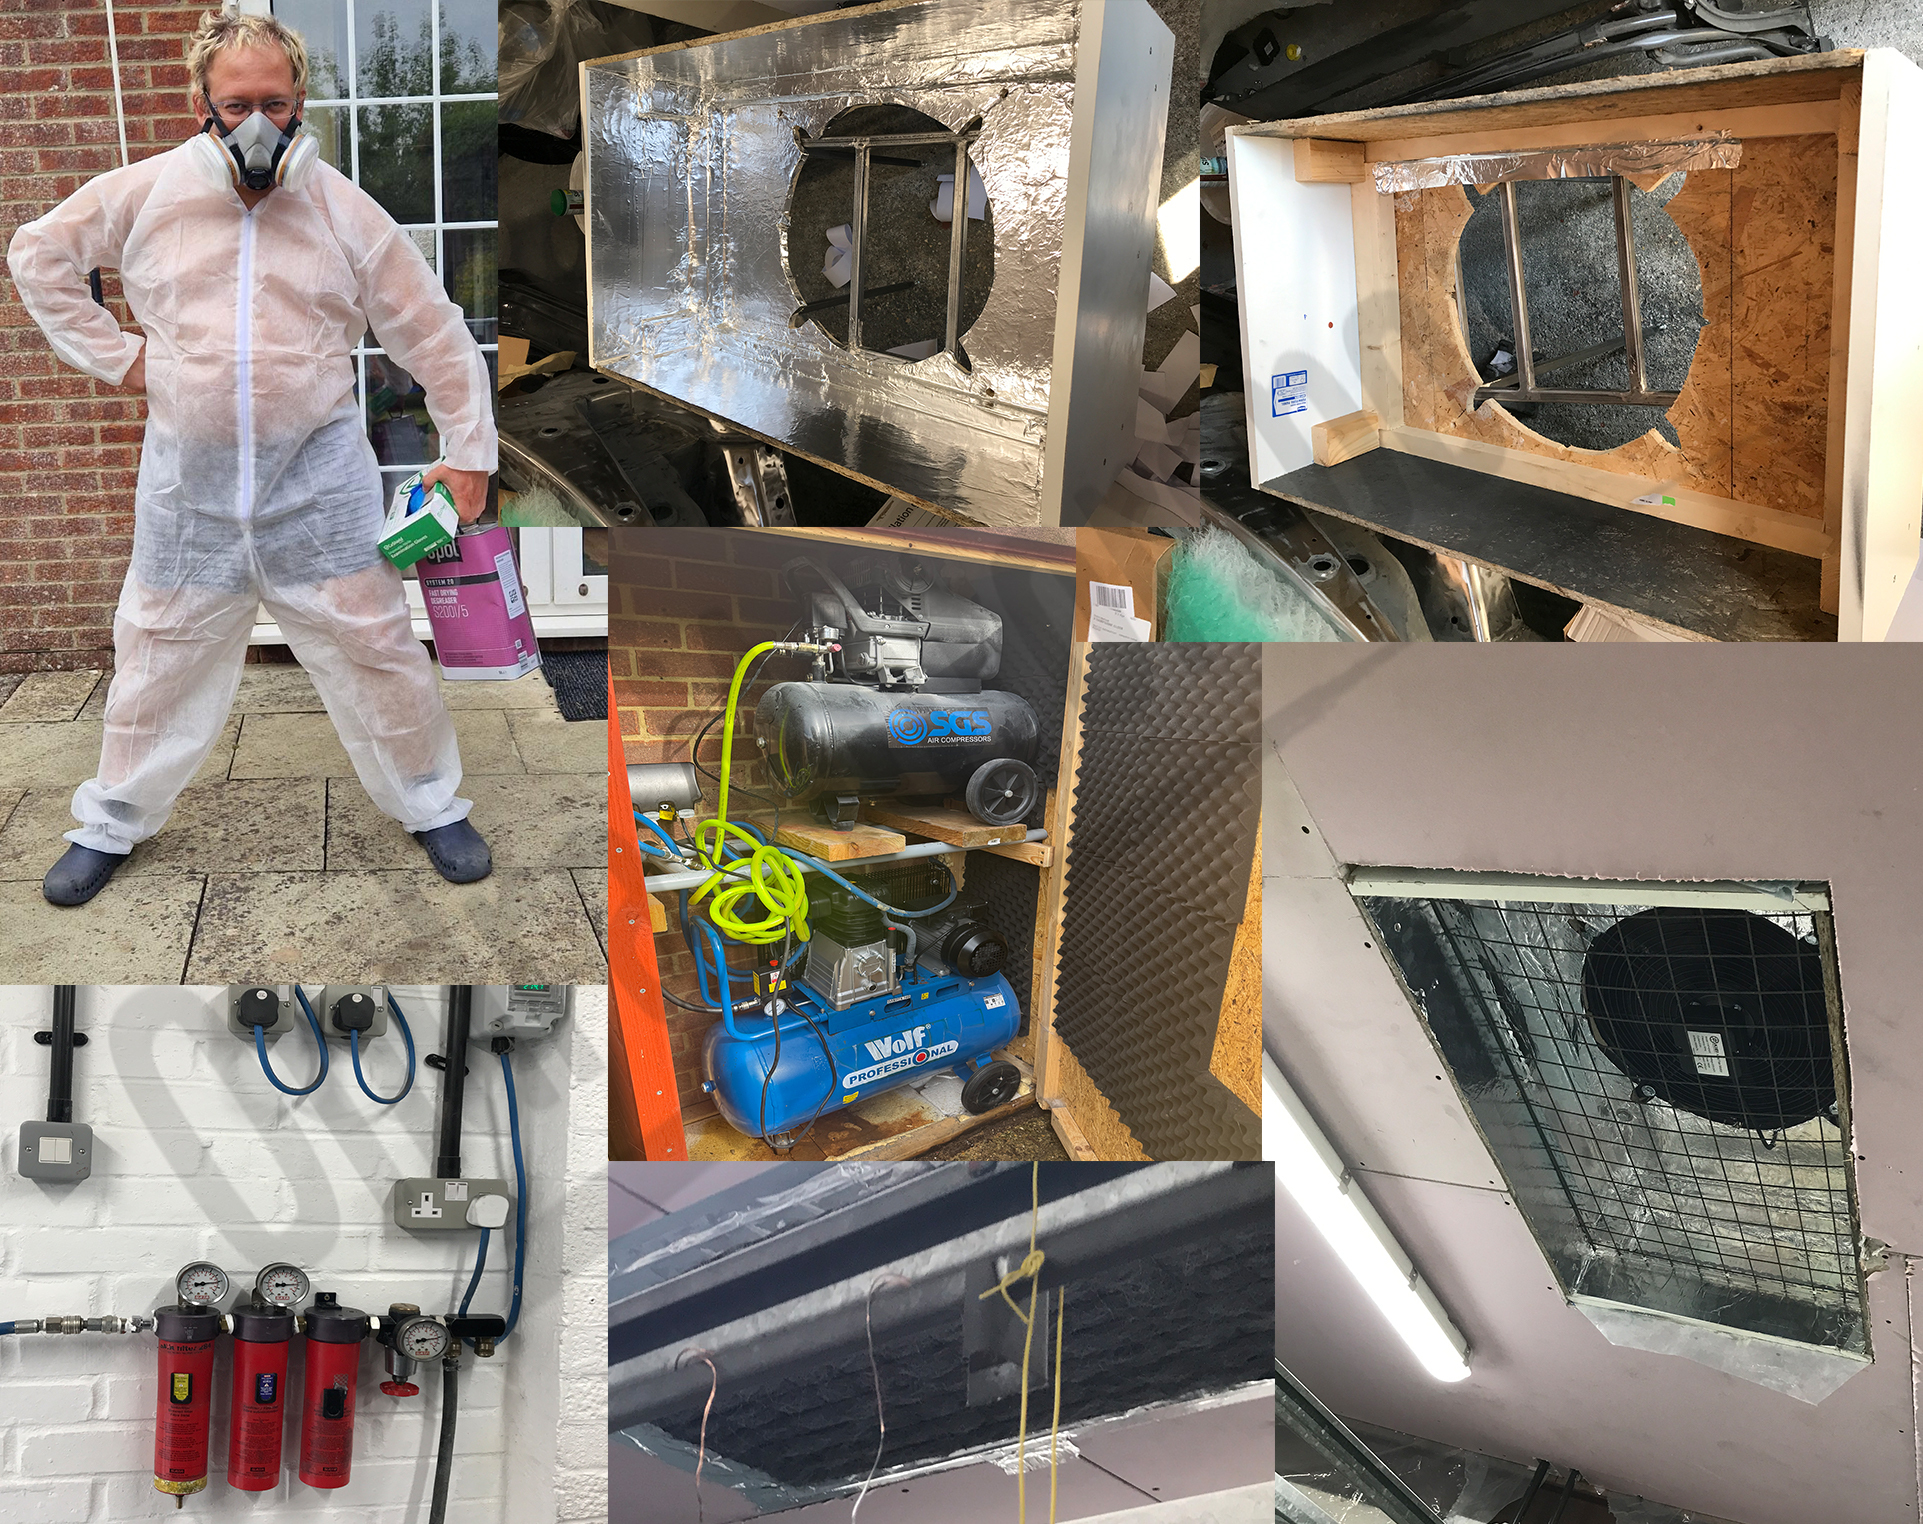
I always wear nitrile gloves, a painting suit, and one of two masks—either a half-face mask with B1 protection against isocyanate paint solvents and dust particles, or when spraying clear coat, I use an air-fed mask with carbon filtration.
Air Supply Setup
As for the air supply—since I don't have three-phase power in my house, I opted for two air compressors. Most of the time, I use only one, unless I need to boost the air supply when I also need to supply air to the mask. Having two compressors also acts as extra air storage.
- One compressor is a 90L belt-driven unit.
- The second one is a 50L direct-drive unit.
This setup might not be enough for a professional painting booth or for painting an entire car in one go, but I made it work by painting individual panels or just a couple of panels at a time.
I will revisit the topic of painting later when I begin prep work and apply the final coats. That process also involved a trip to one of my favorite YouTubers for a lesson in automotive spray painting—an amazing experience that I will write about later.
Air Filtration System
To complete the air supply setup, the air compressors are connected to a 3-stage SATA filtration system, which includes:
- A water separator
- A large particle filter
- A final carbon filter (to ensure the air is safe to breathe when filtered through the secondary air filter in the air-fed mask)
I also modified my garage to be safe for spray painting. I installed a large filtration system in the ceiling, which includes:
- A glass fiber filter, followed by
- A paper mist separator (to prevent mist particles from covering my parked cars).
This system is ventilated through a 16" extractor fan that pushes the air out. I also have a smaller fan to bring in fresh air. Ideally, I should have had two fans of the same size or set them up the other way around, but that wasn’t possible. For occasional painting, I found this setup to be relatively adequate—the spray mist clears quickly, and no overspray lingers long enough to fall back onto the panels.
My Spray Guns for Shell Preparation
-
Iwata W400 BellAria with two size air caps
- 1.3mm for base and clear coat
- 1.8mm for primer
-
Cheap Sealey HVLP742 Gravity Feed Spray Gun 2.0mm for reduced Raptor bed liner
-
RAPTOR Schutz Application Gun for a textured bed liner finish
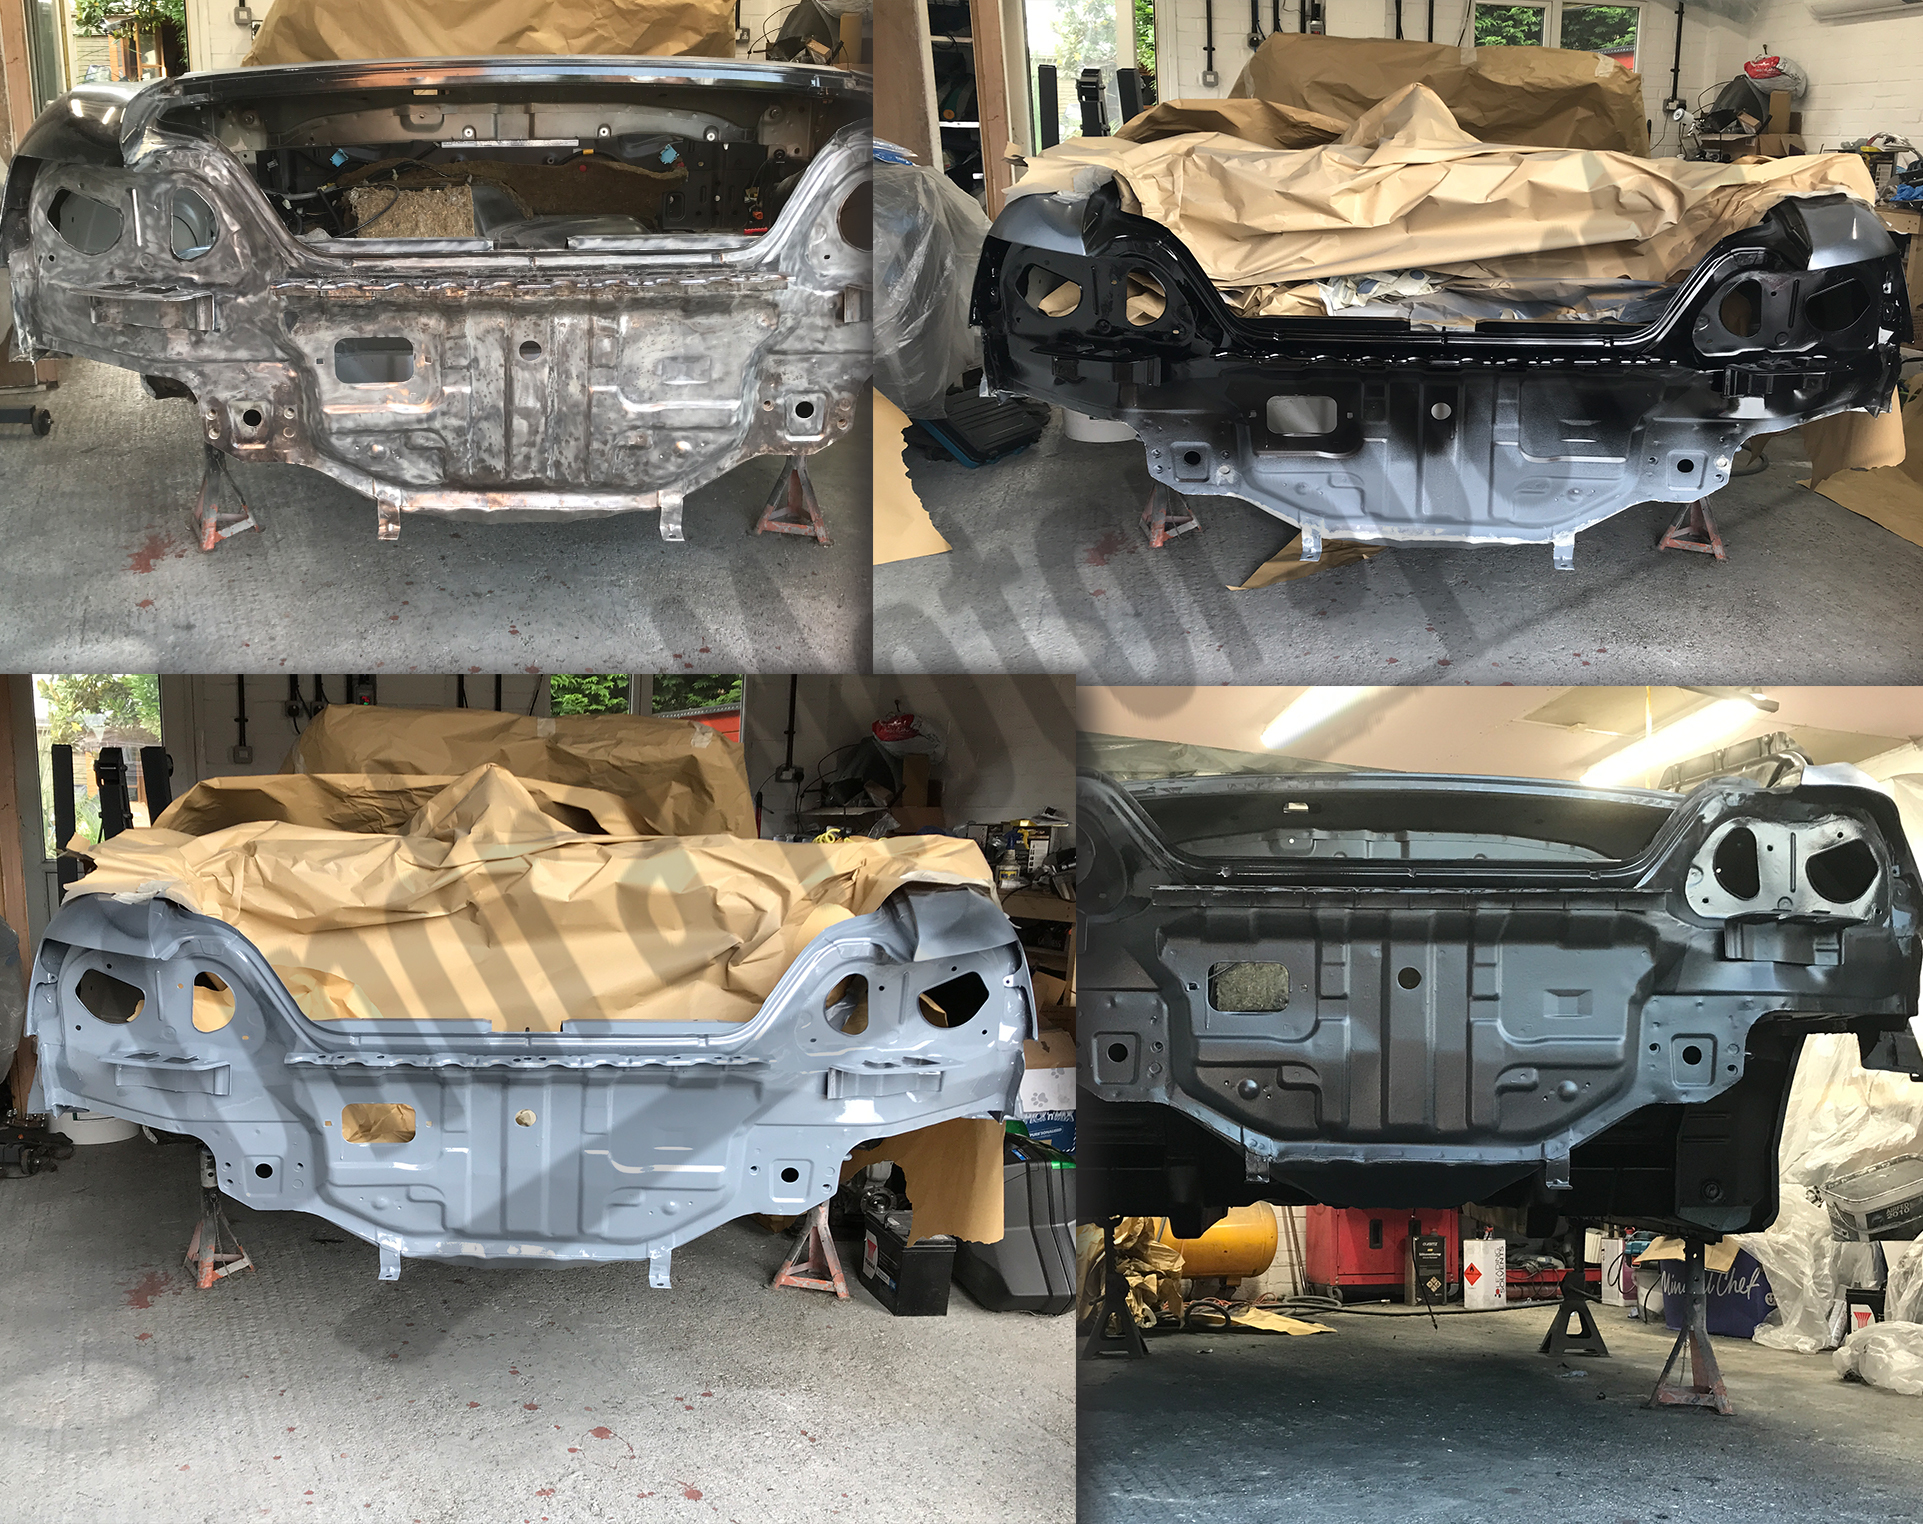
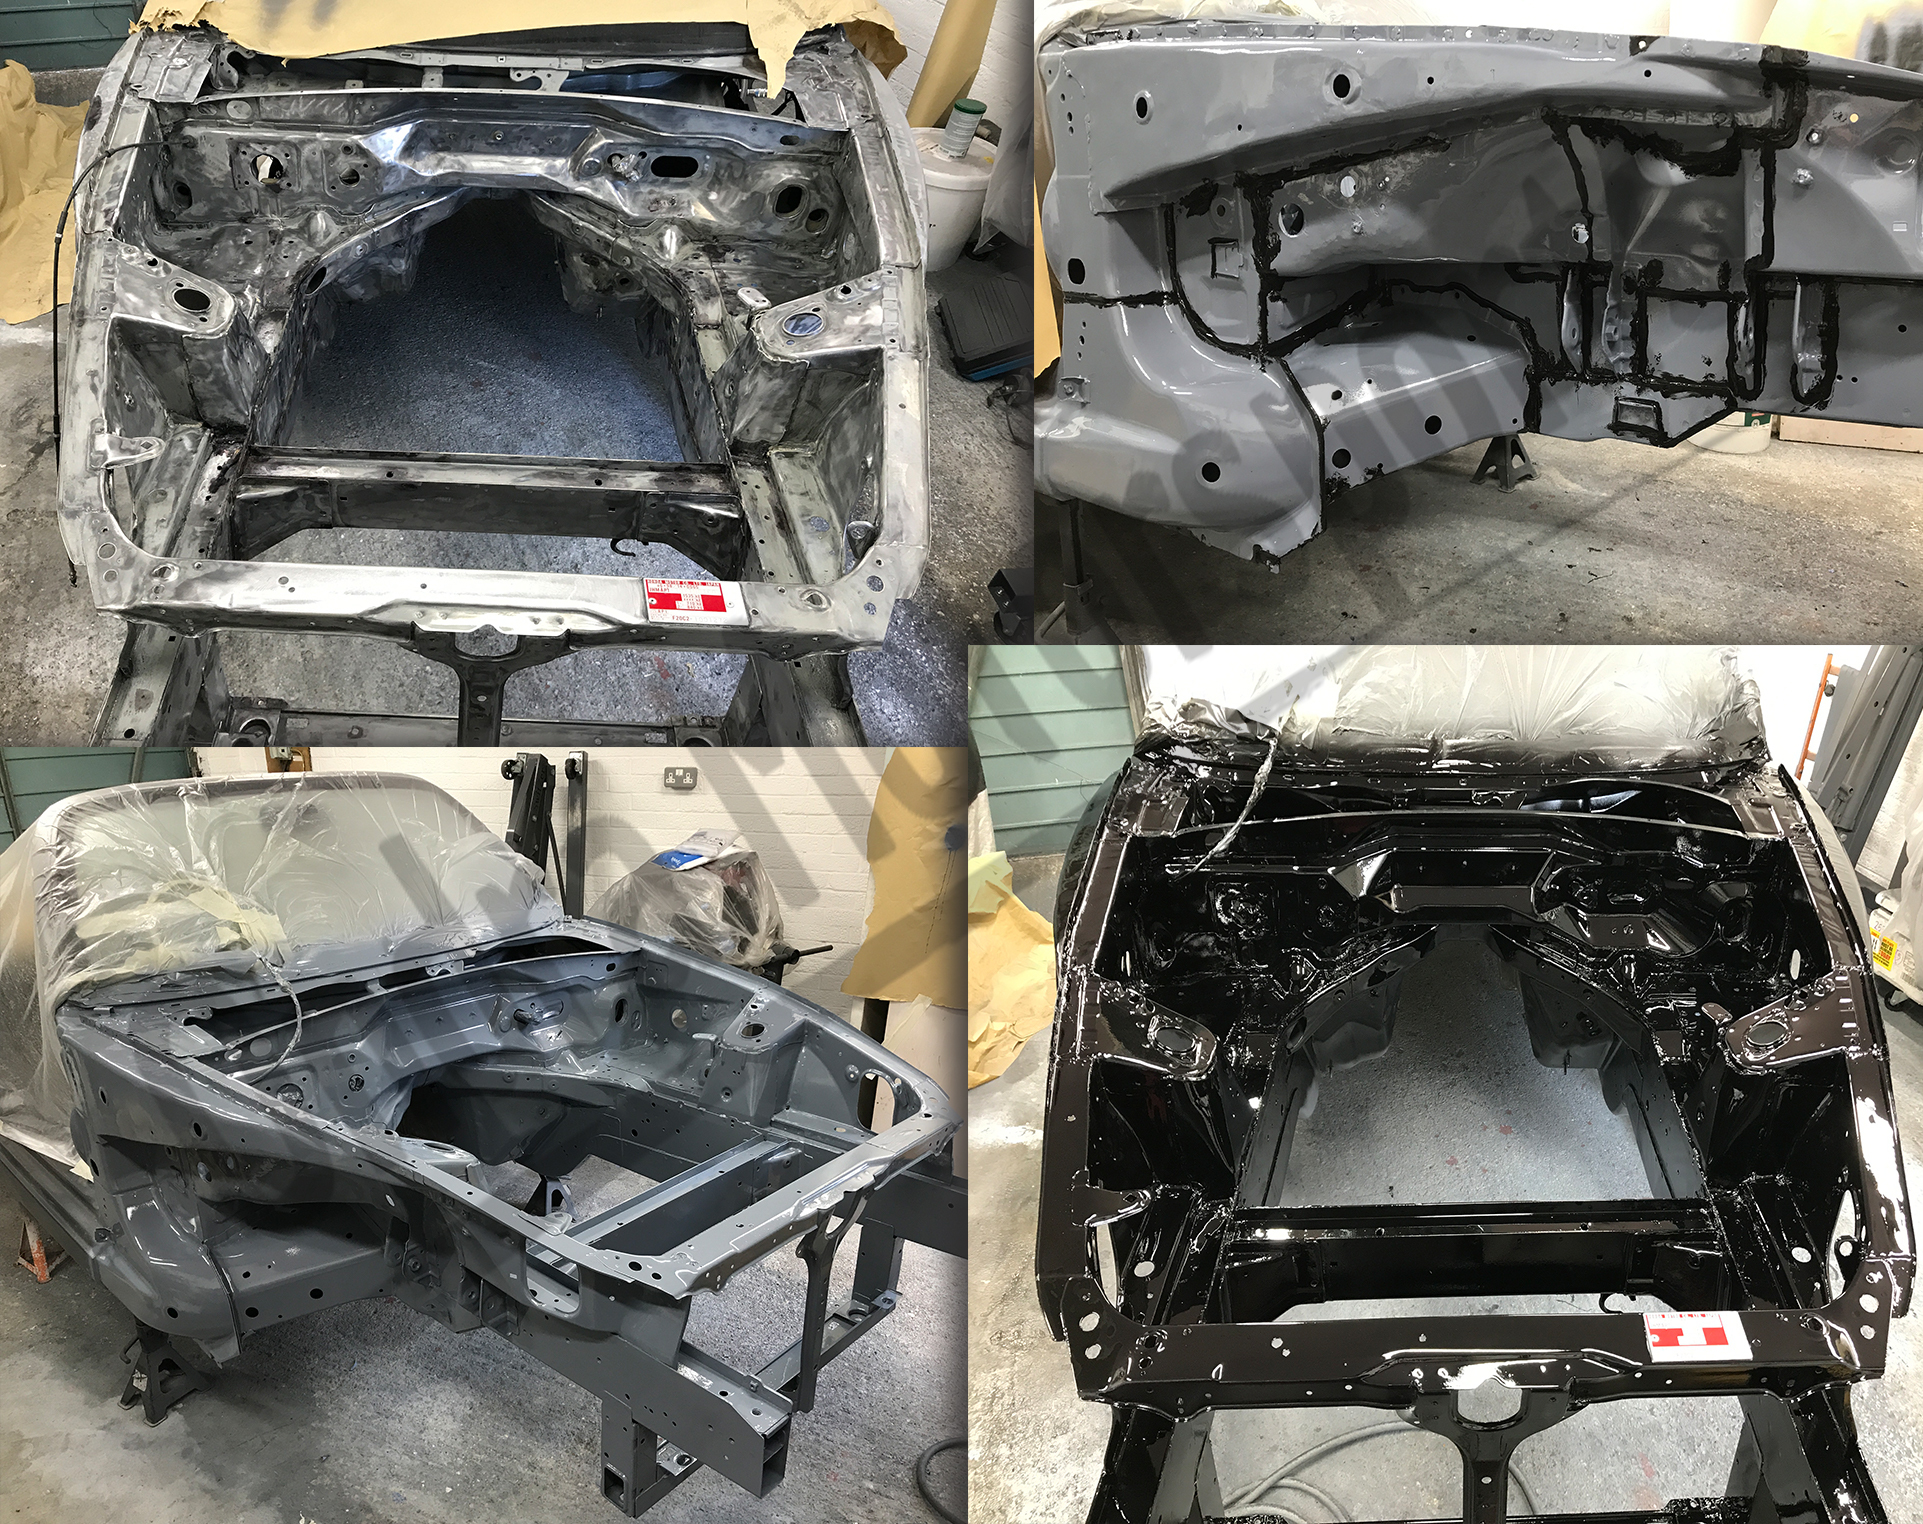
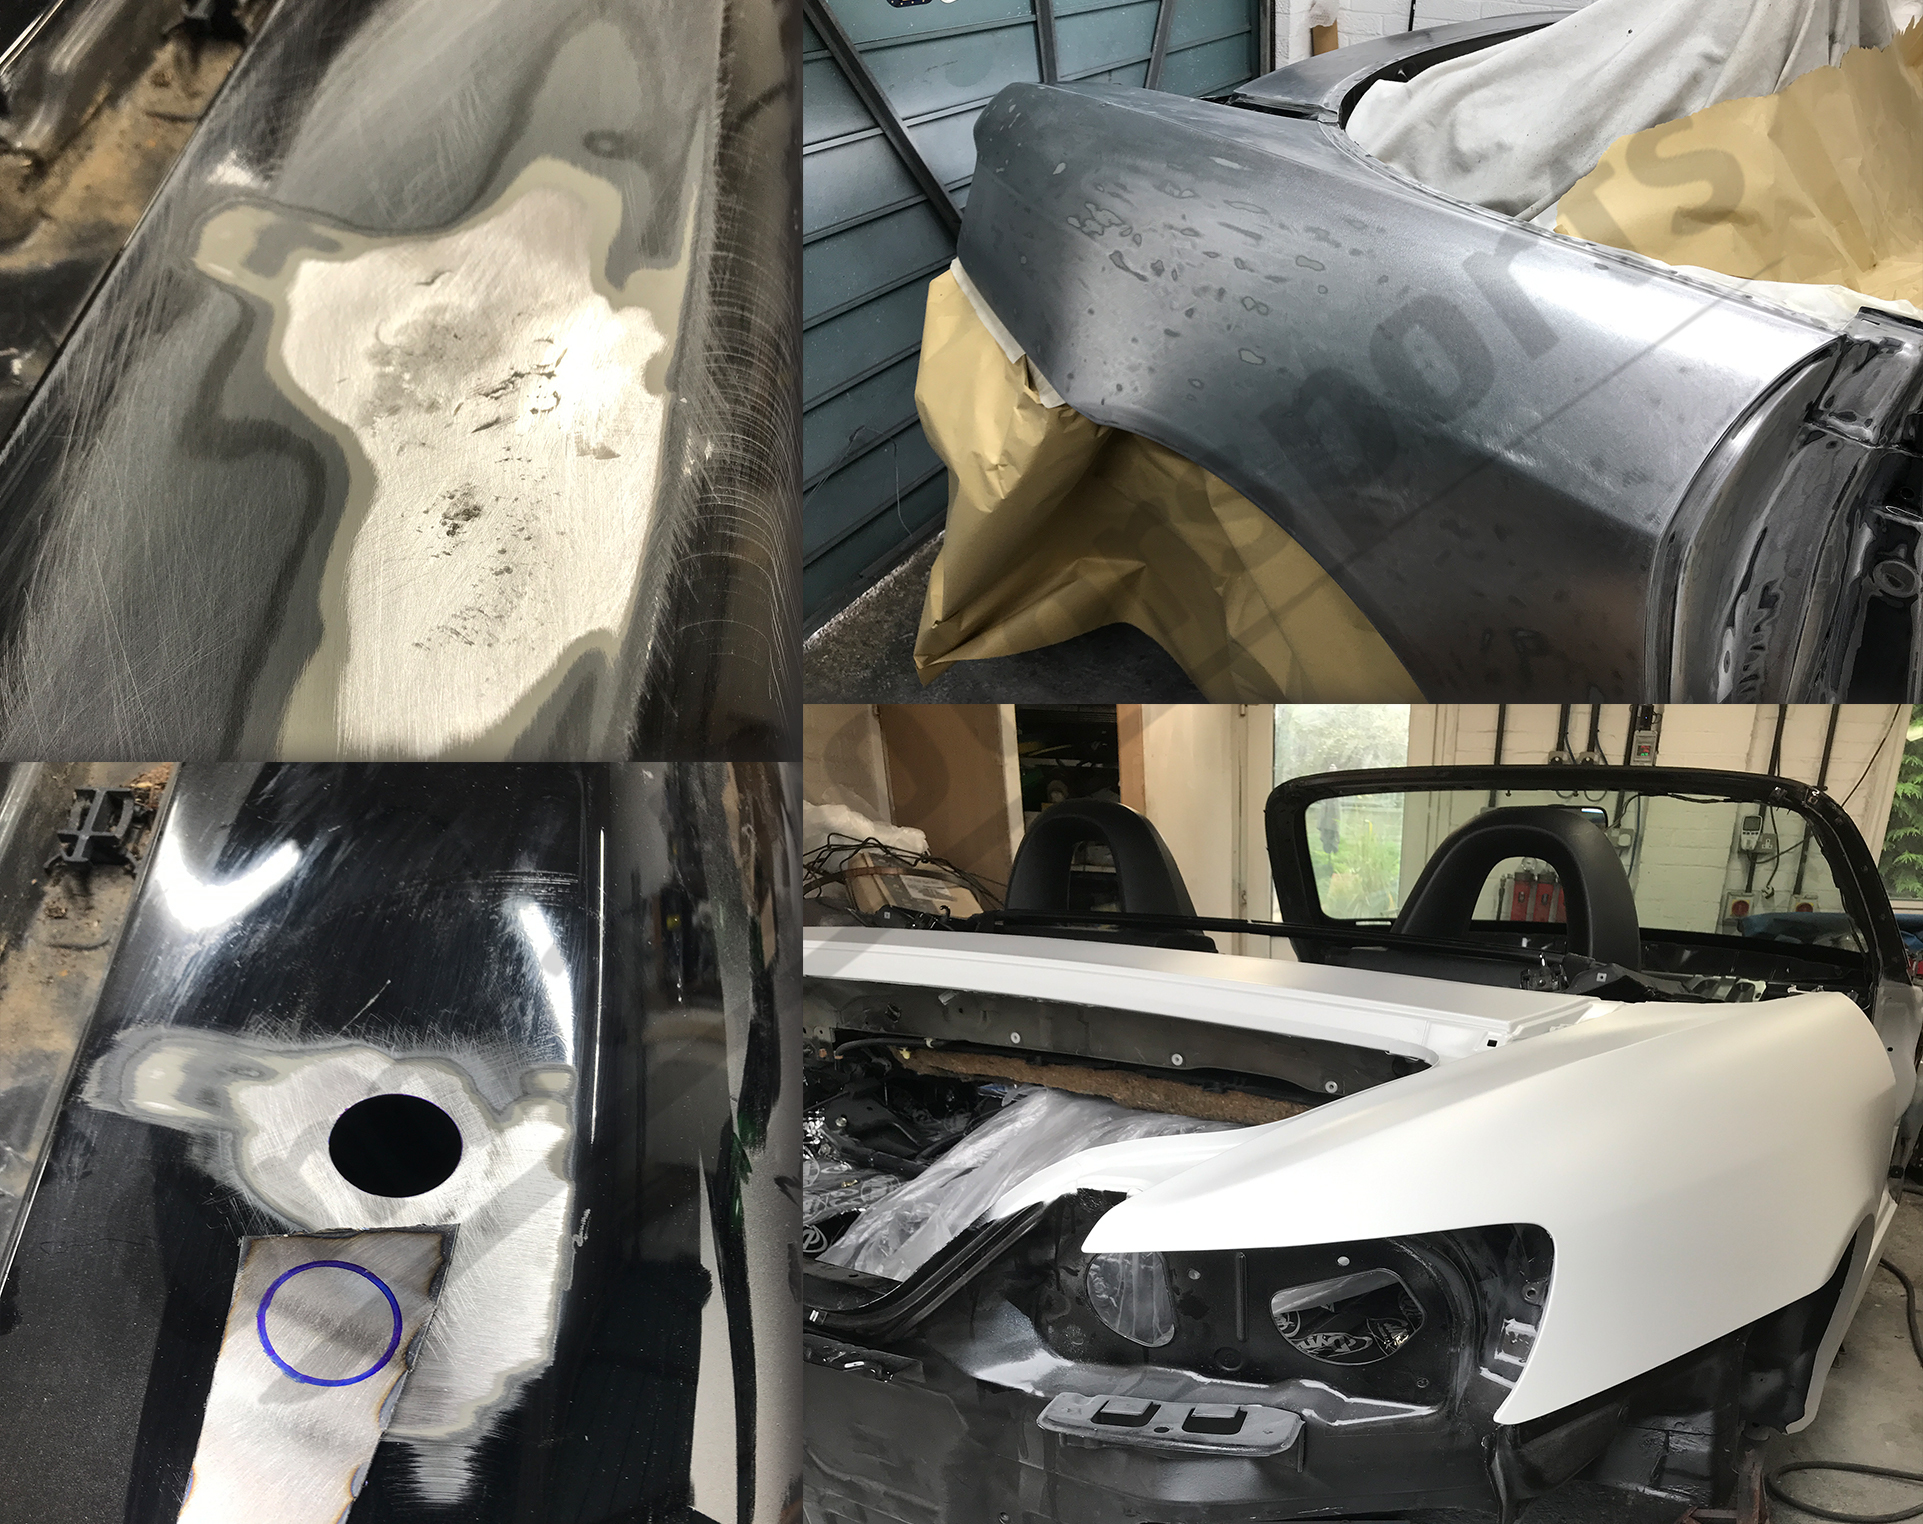
Once the underside of the car was finished and the engine bay was painted, I moved on to addressing the bodywork. However, I decided to only fix the rust hole by cutting out the affected area and welding in a patch. This was also the point when I decided to blank out the antenna hole and smooth it out.
Now to the other side to address the rust hole in passenger side.
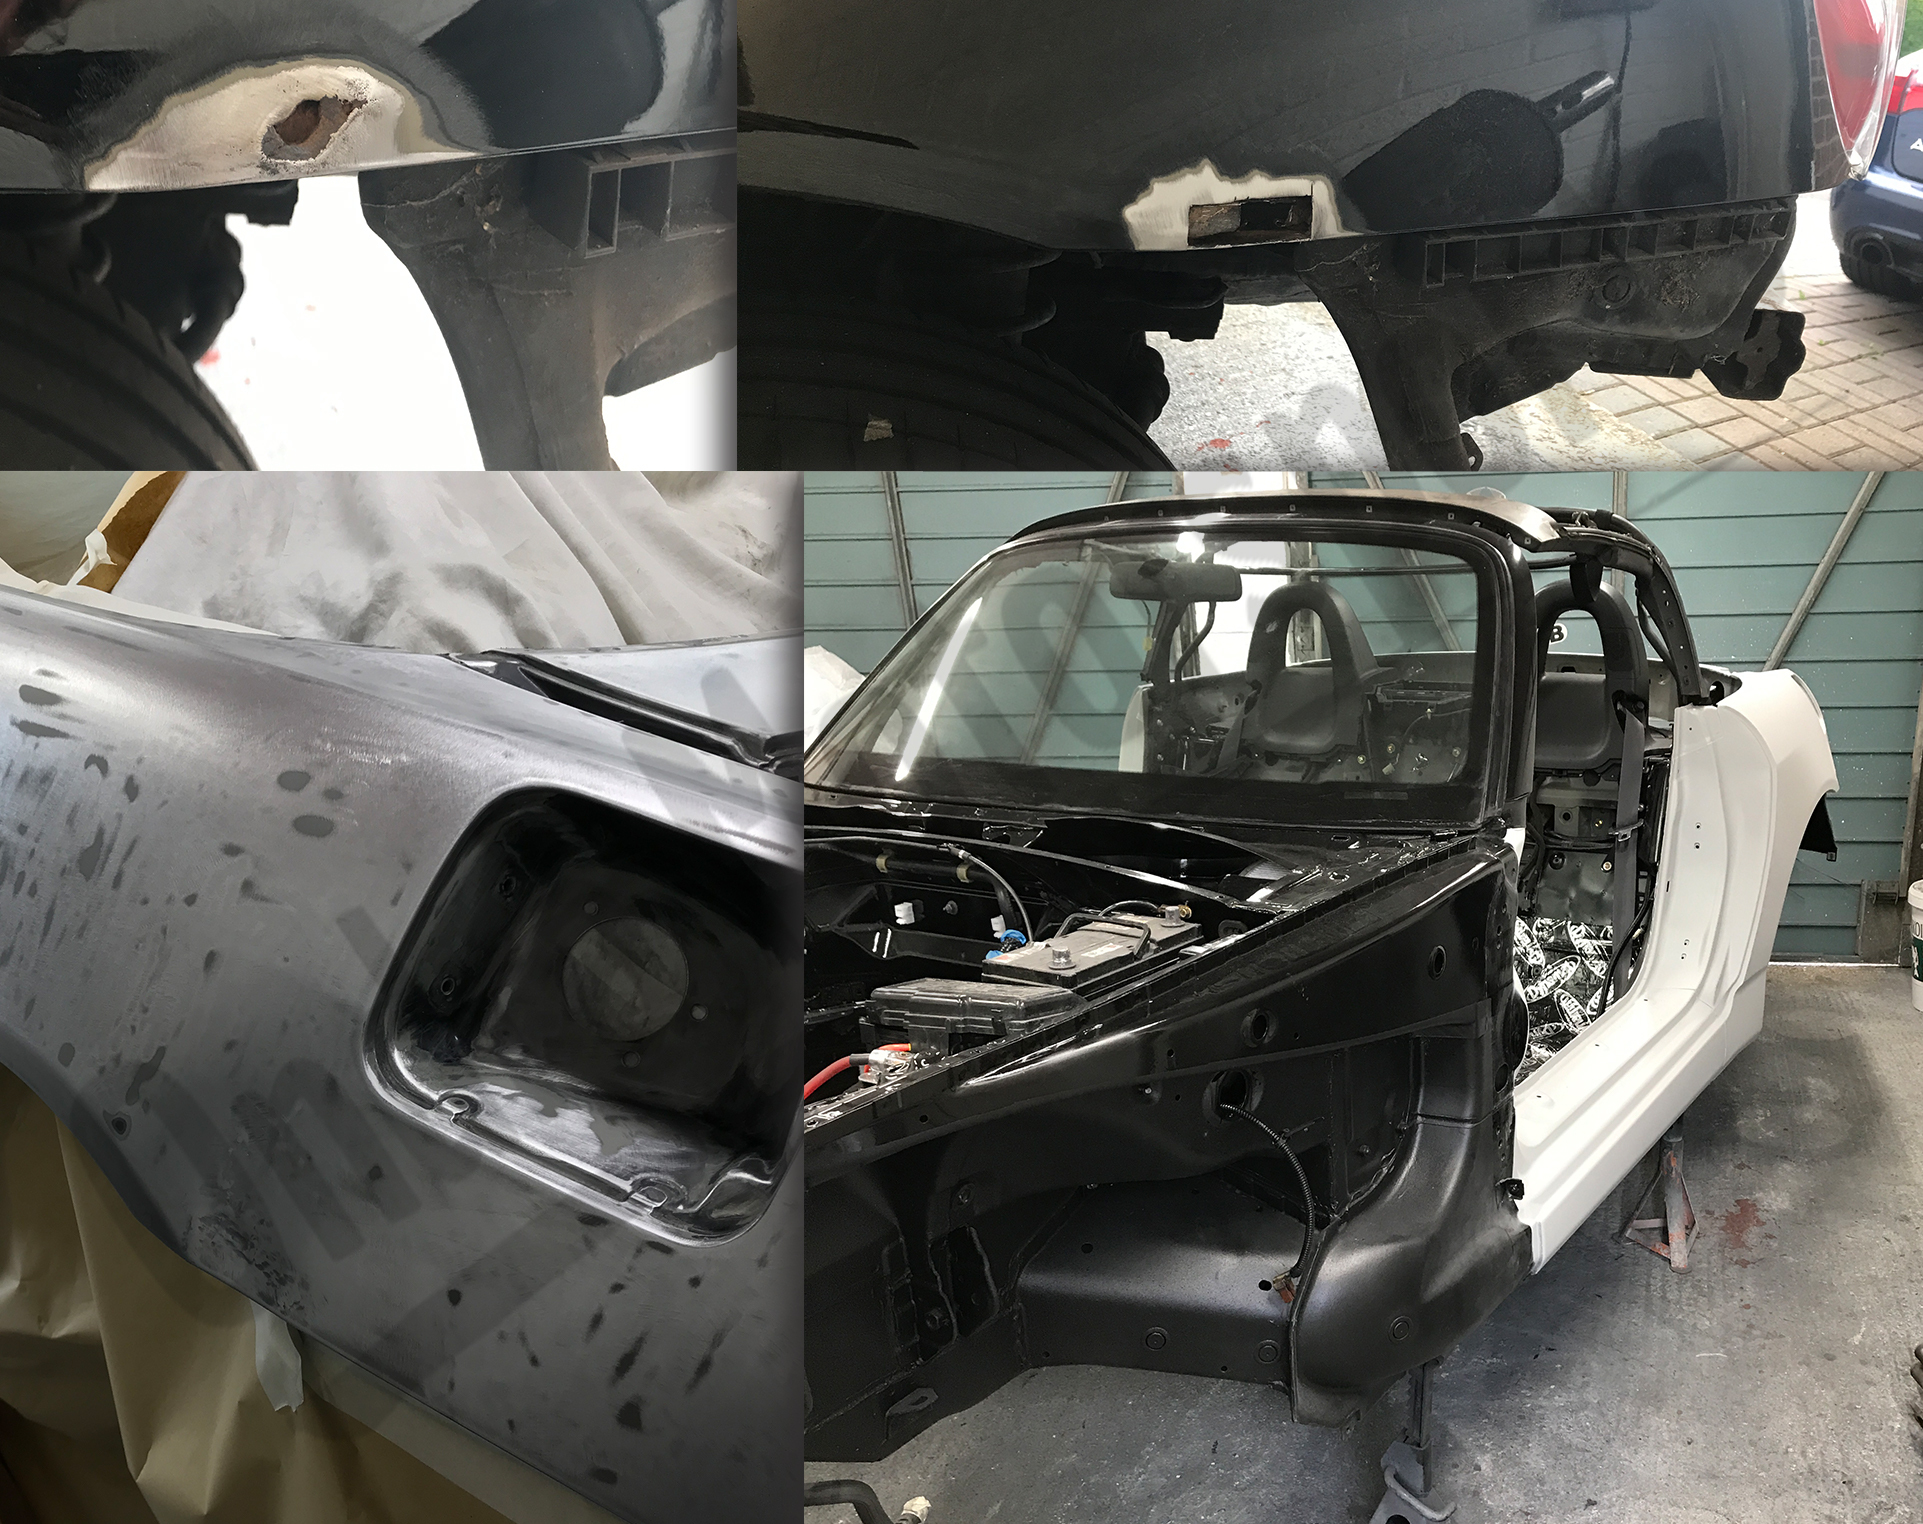
This has pretty much closed the first chapter. To recap: the car has been stripped down, the shell brought to bare metal and re-coated, and the rust addressed. Now, I can move on to the fuel tank, subframes, suspension parts, and start reinstalling the pipework for the brake lines. However, that will be for the next chapter.


