Posted by Ondrej M on 4th Mar 2025
Building the dream - Part 8 Interior
Interior Fitting: My Year-Long DIY Honda S2000 Restoration Journey
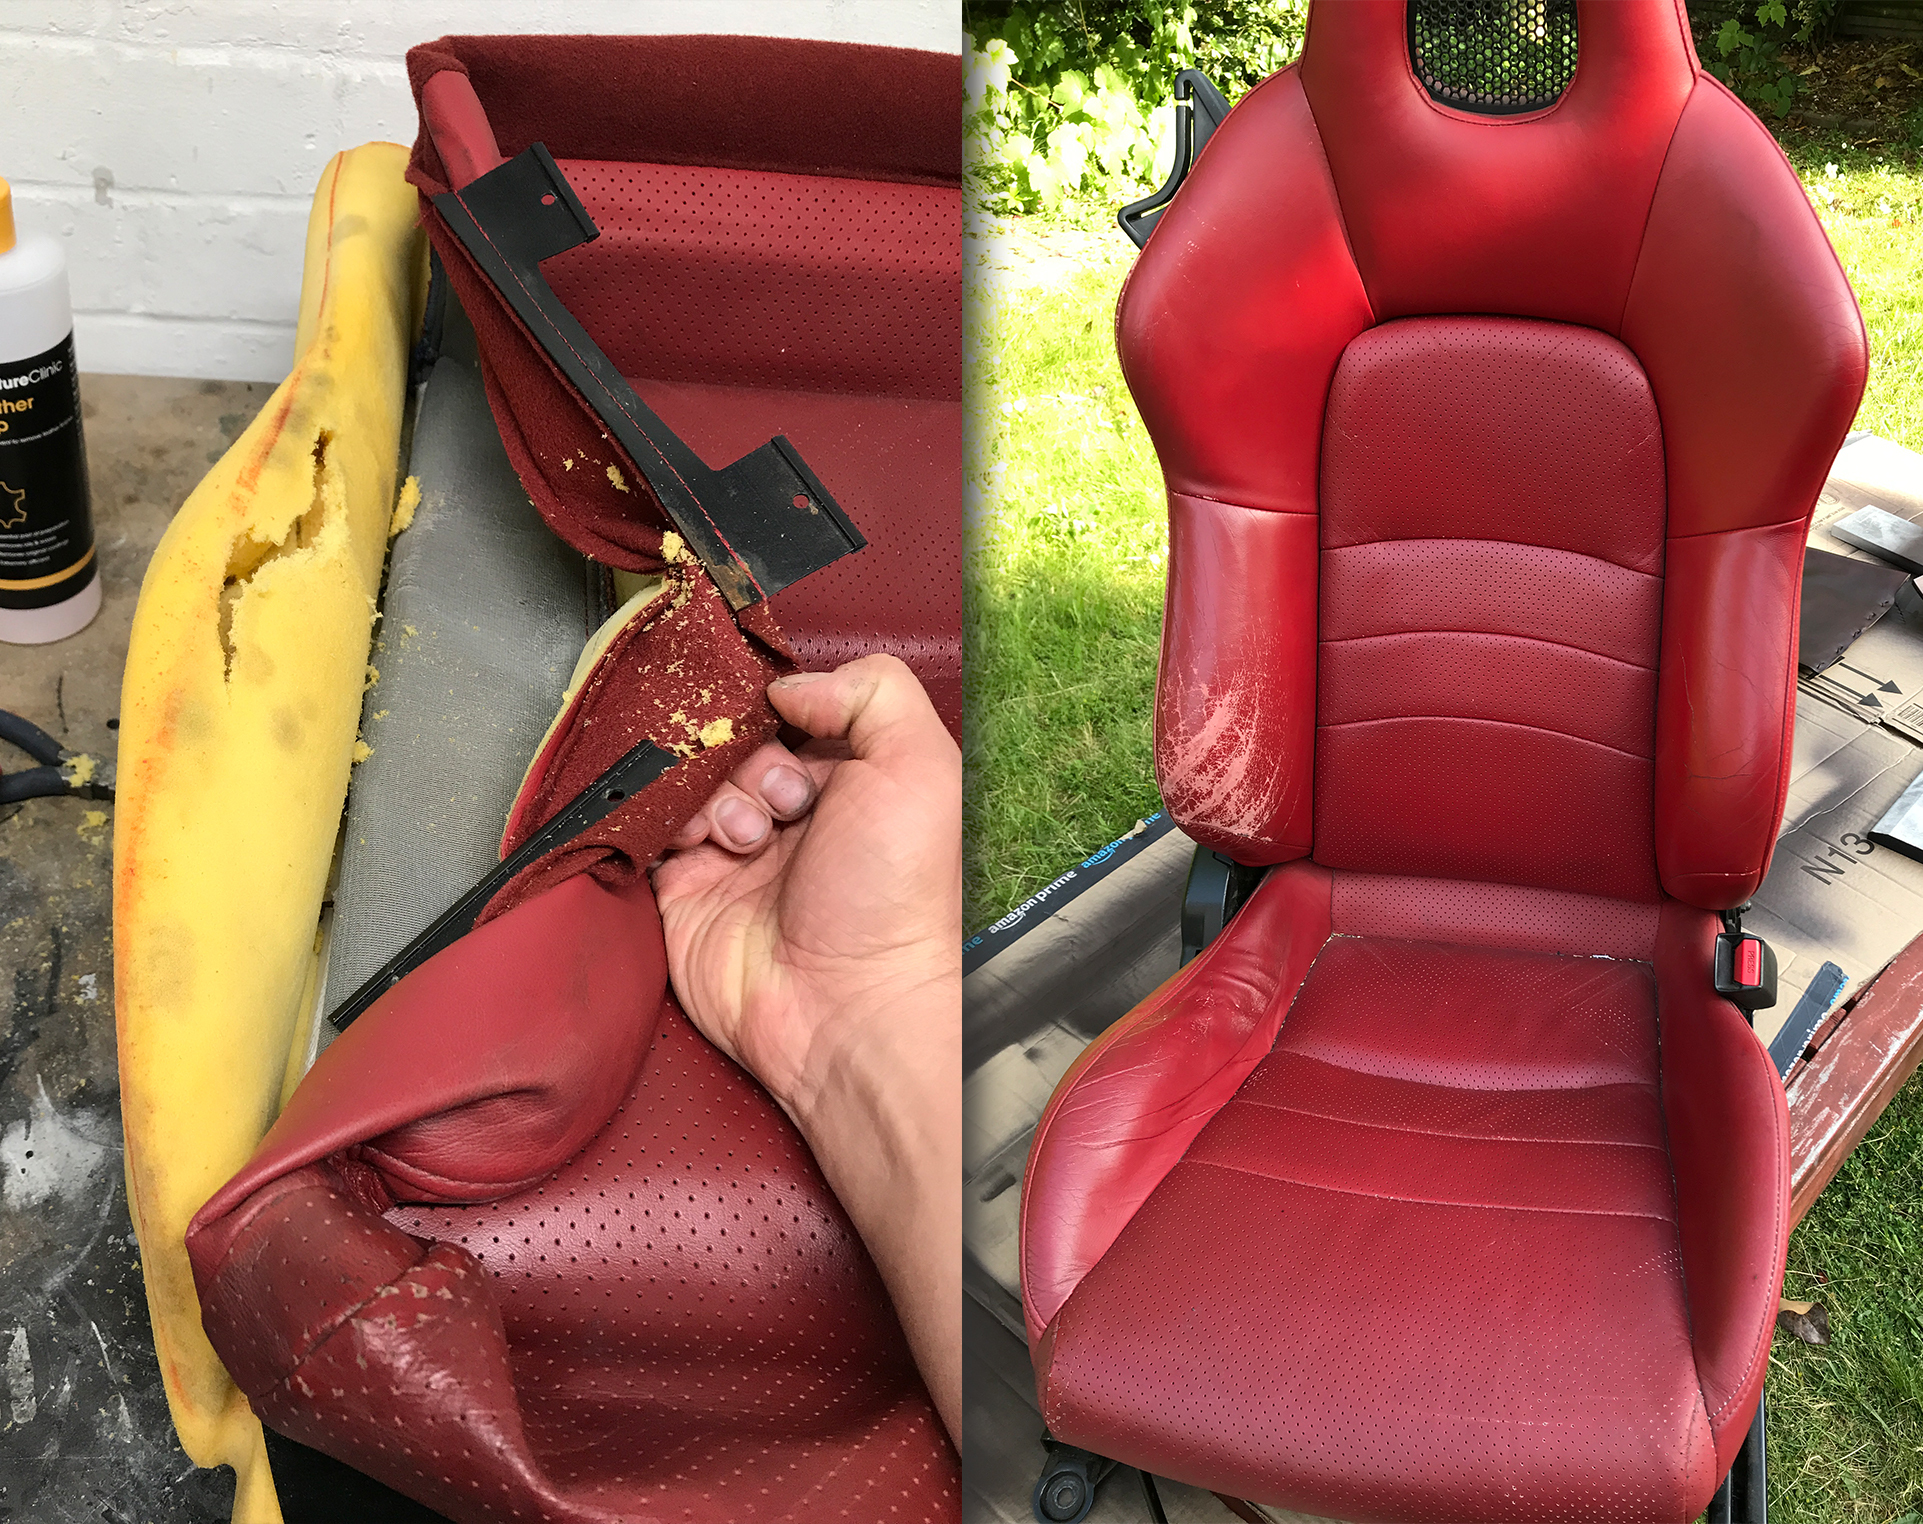
The interior looked exactly like you’d expect from a 20+ year-old car—worn seats with scratches and cracks, a collapsed side bolster on the driver’s seat, and a carpet that had seen better days.
Since this is an early-model S2000, it originally had a carpeted transmission tunnel, but I had some changes in mind.
A No-Compromise Build
From the start, this build was meant to be a no-compromise project—whatever I wanted, I would source and install.
Since the carpet was in rough shape, and OEM replacements weren’t available at the time (this was before a seller in the U.S. started offering reproduction carpets in a Facebook group), I managed to find a good-condition replacement on eBay.
Upgrades and Facelift Parts
A few other interior upgrades were also on the list:
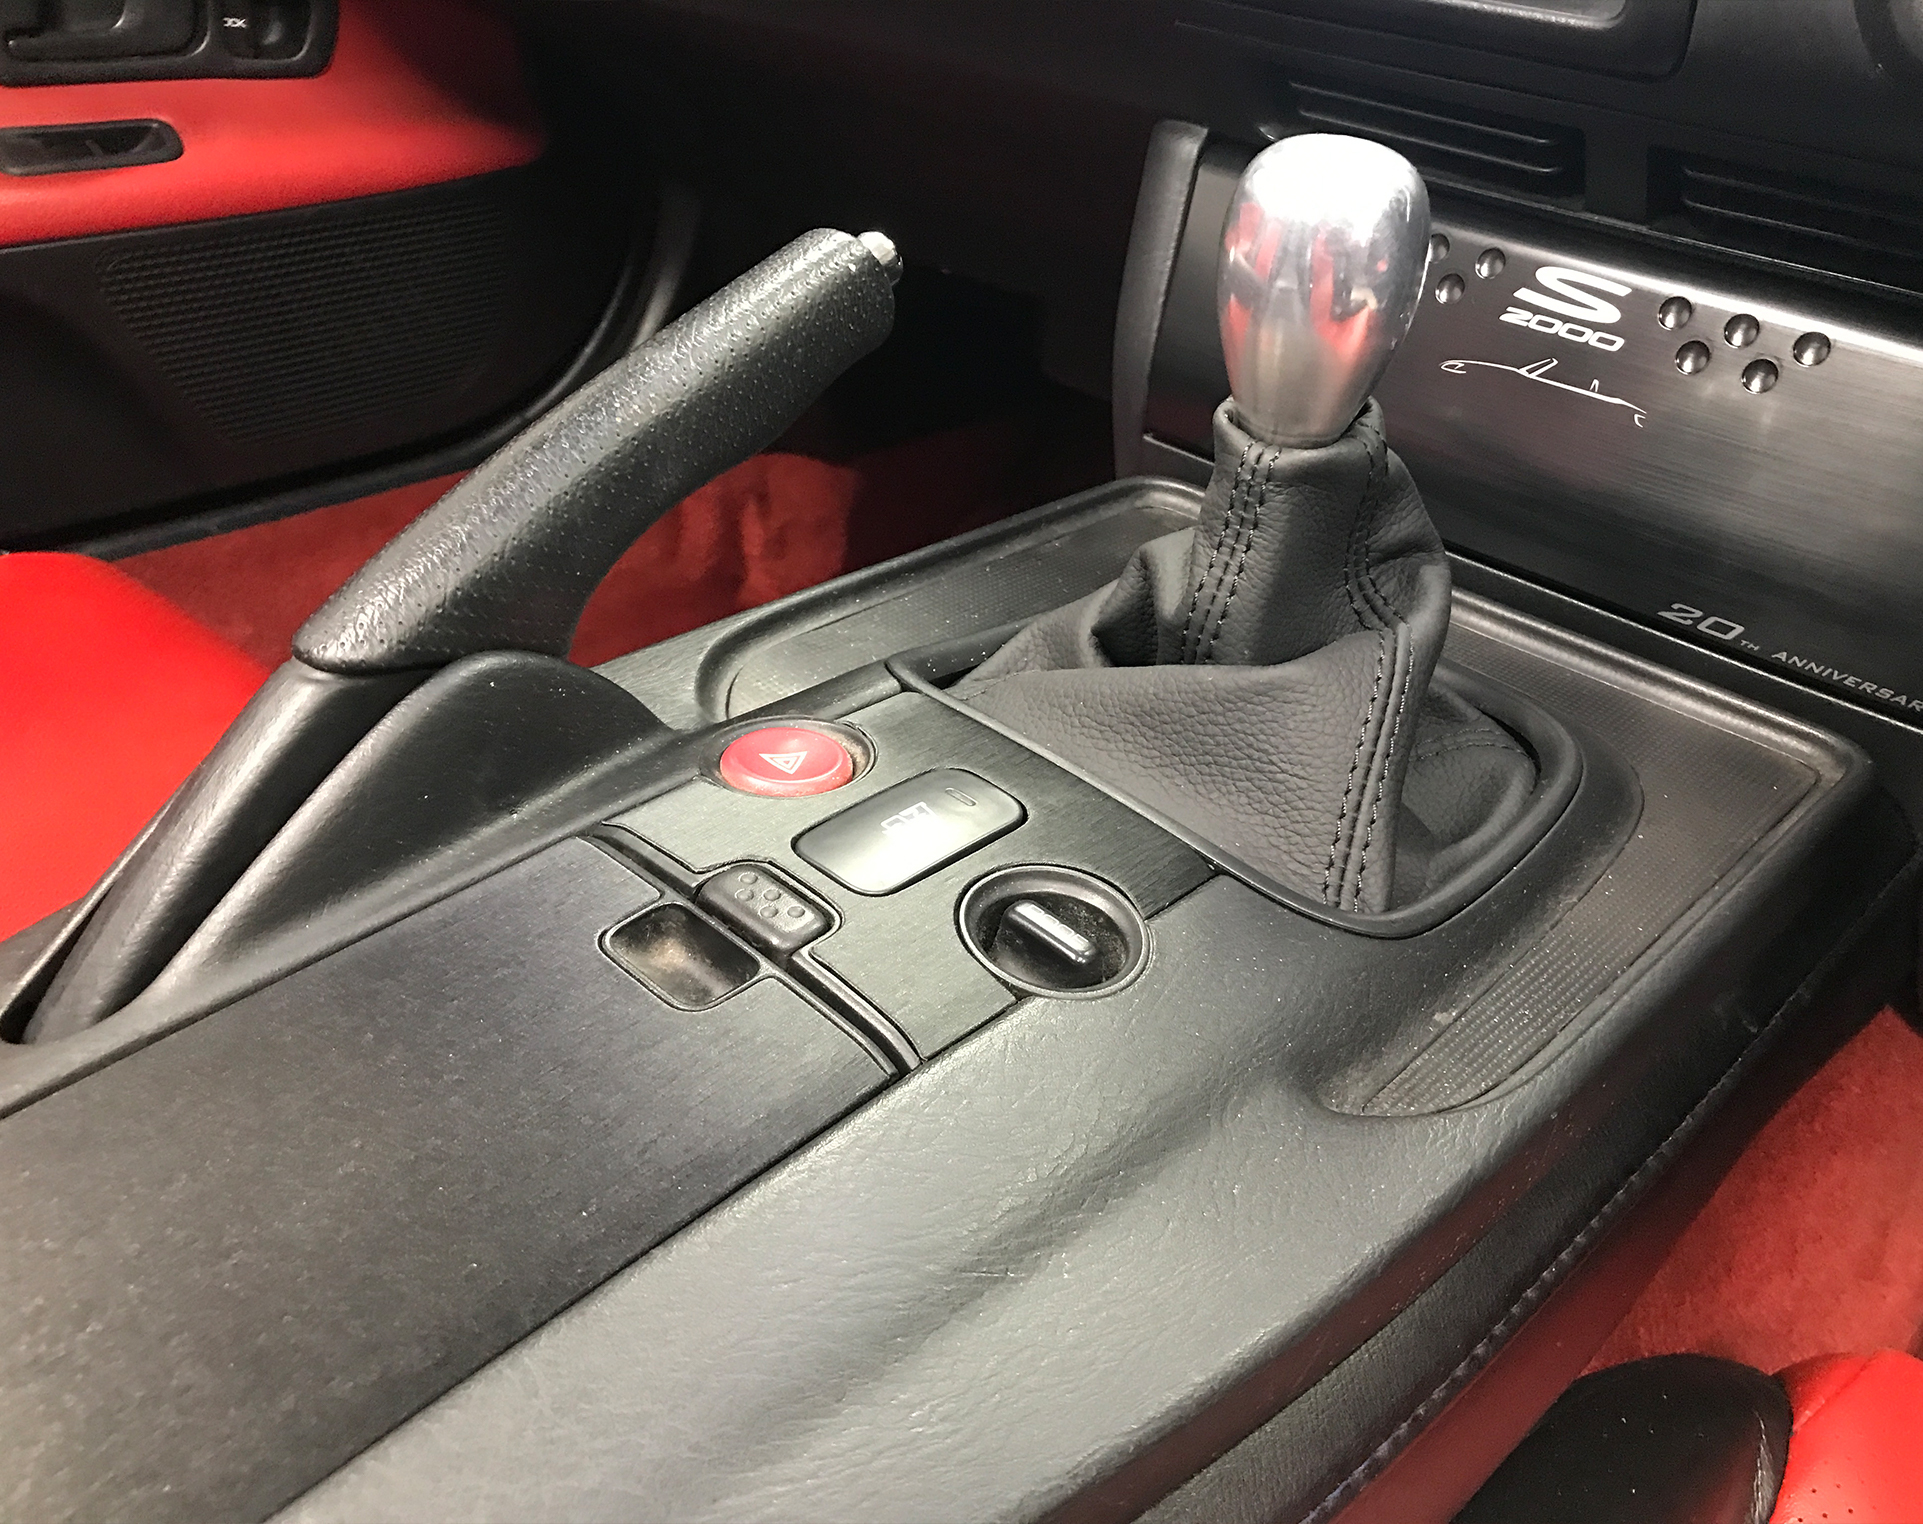
✅ Facelift center console for a cleaner, more modern look
✅ Genuine Honda S2000 titanium gear knob for a factory-fresh feel
✅ Upgraded footrest—the early models came with a black plastic footrest, but I was lucky enough to source a brand-new metal version
Seat Restoration: A Test for the Future
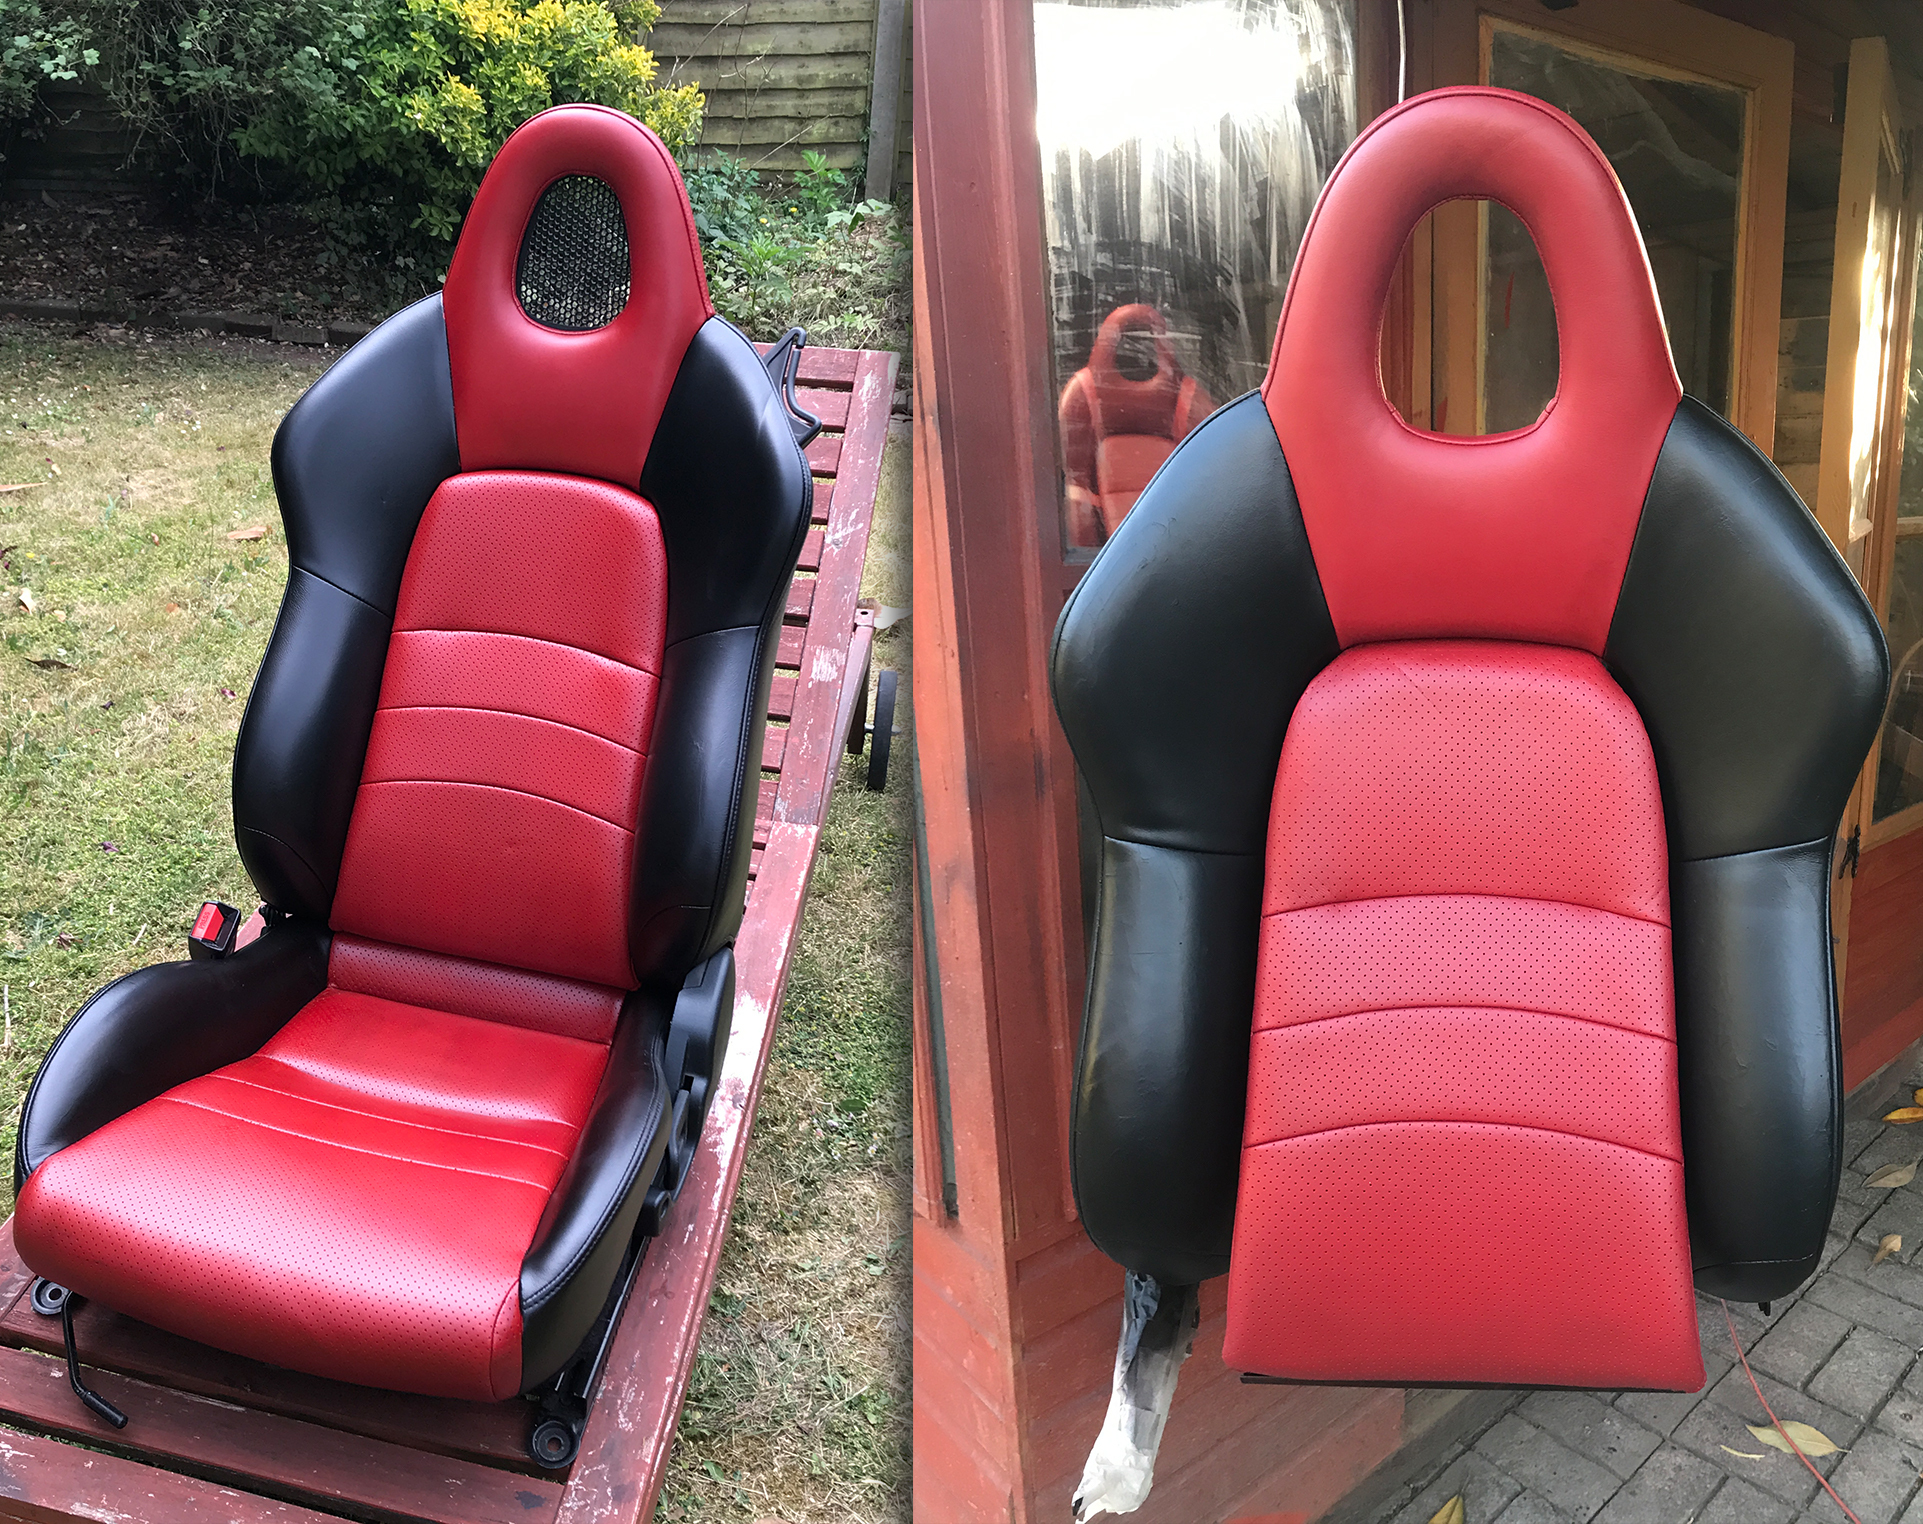
The seats were in particularly rough shape, and my long-term plan is to have them professionally reupholstered in a two-tone leather combination. However, before committing, I decided to experiment with the color scheme to see if I truly liked it before going all-in on the reupholstery.
This marks the next step in transforming the interior of my S2000, bringing it up to the same high standard as the exterior restoration. Stay tuned for more updates!
Restoring the Worn Leather Seats
After doing some research, I discovered that I could use a leather repair kit along with specialist leather dye to restore the seats to a like-new appearance.
Fixing the Collapsed Bolster
Before starting the filling and repainting process, I first needed to repair the collapsed side bolster. To do this, I used medium-density upholstery foam, cutting it into smaller pieces to rebuild the original shape. Once I had the structure right, I glued them in place to ensure a firm and lasting fix.
Leather Repainting Process
The painting process involved several key steps:
1️⃣ Degreasing & Thorough Cleaning – Ensuring the leather was completely free of dirt and oils for proper adhesion.
2️⃣ Applying Several Coats of Leather Paint – This took some time, especially since the seats had multiple colors, requiring careful masking. Luckily, masking tape worked well to keep the colors separated.
3️⃣ Final Protective Sealer Coat – This added durability and protection to maintain the finish over time.
Final Thoughts
In the end, I was relatively impressed with the results. While this was a temporary solution before a full professional reupholstery job, it brought the seats back to life and gave me a solid idea of how the final color scheme would look.
Another step closer to completing the interior restoration! ?✨
Reviving the Boot Carpet
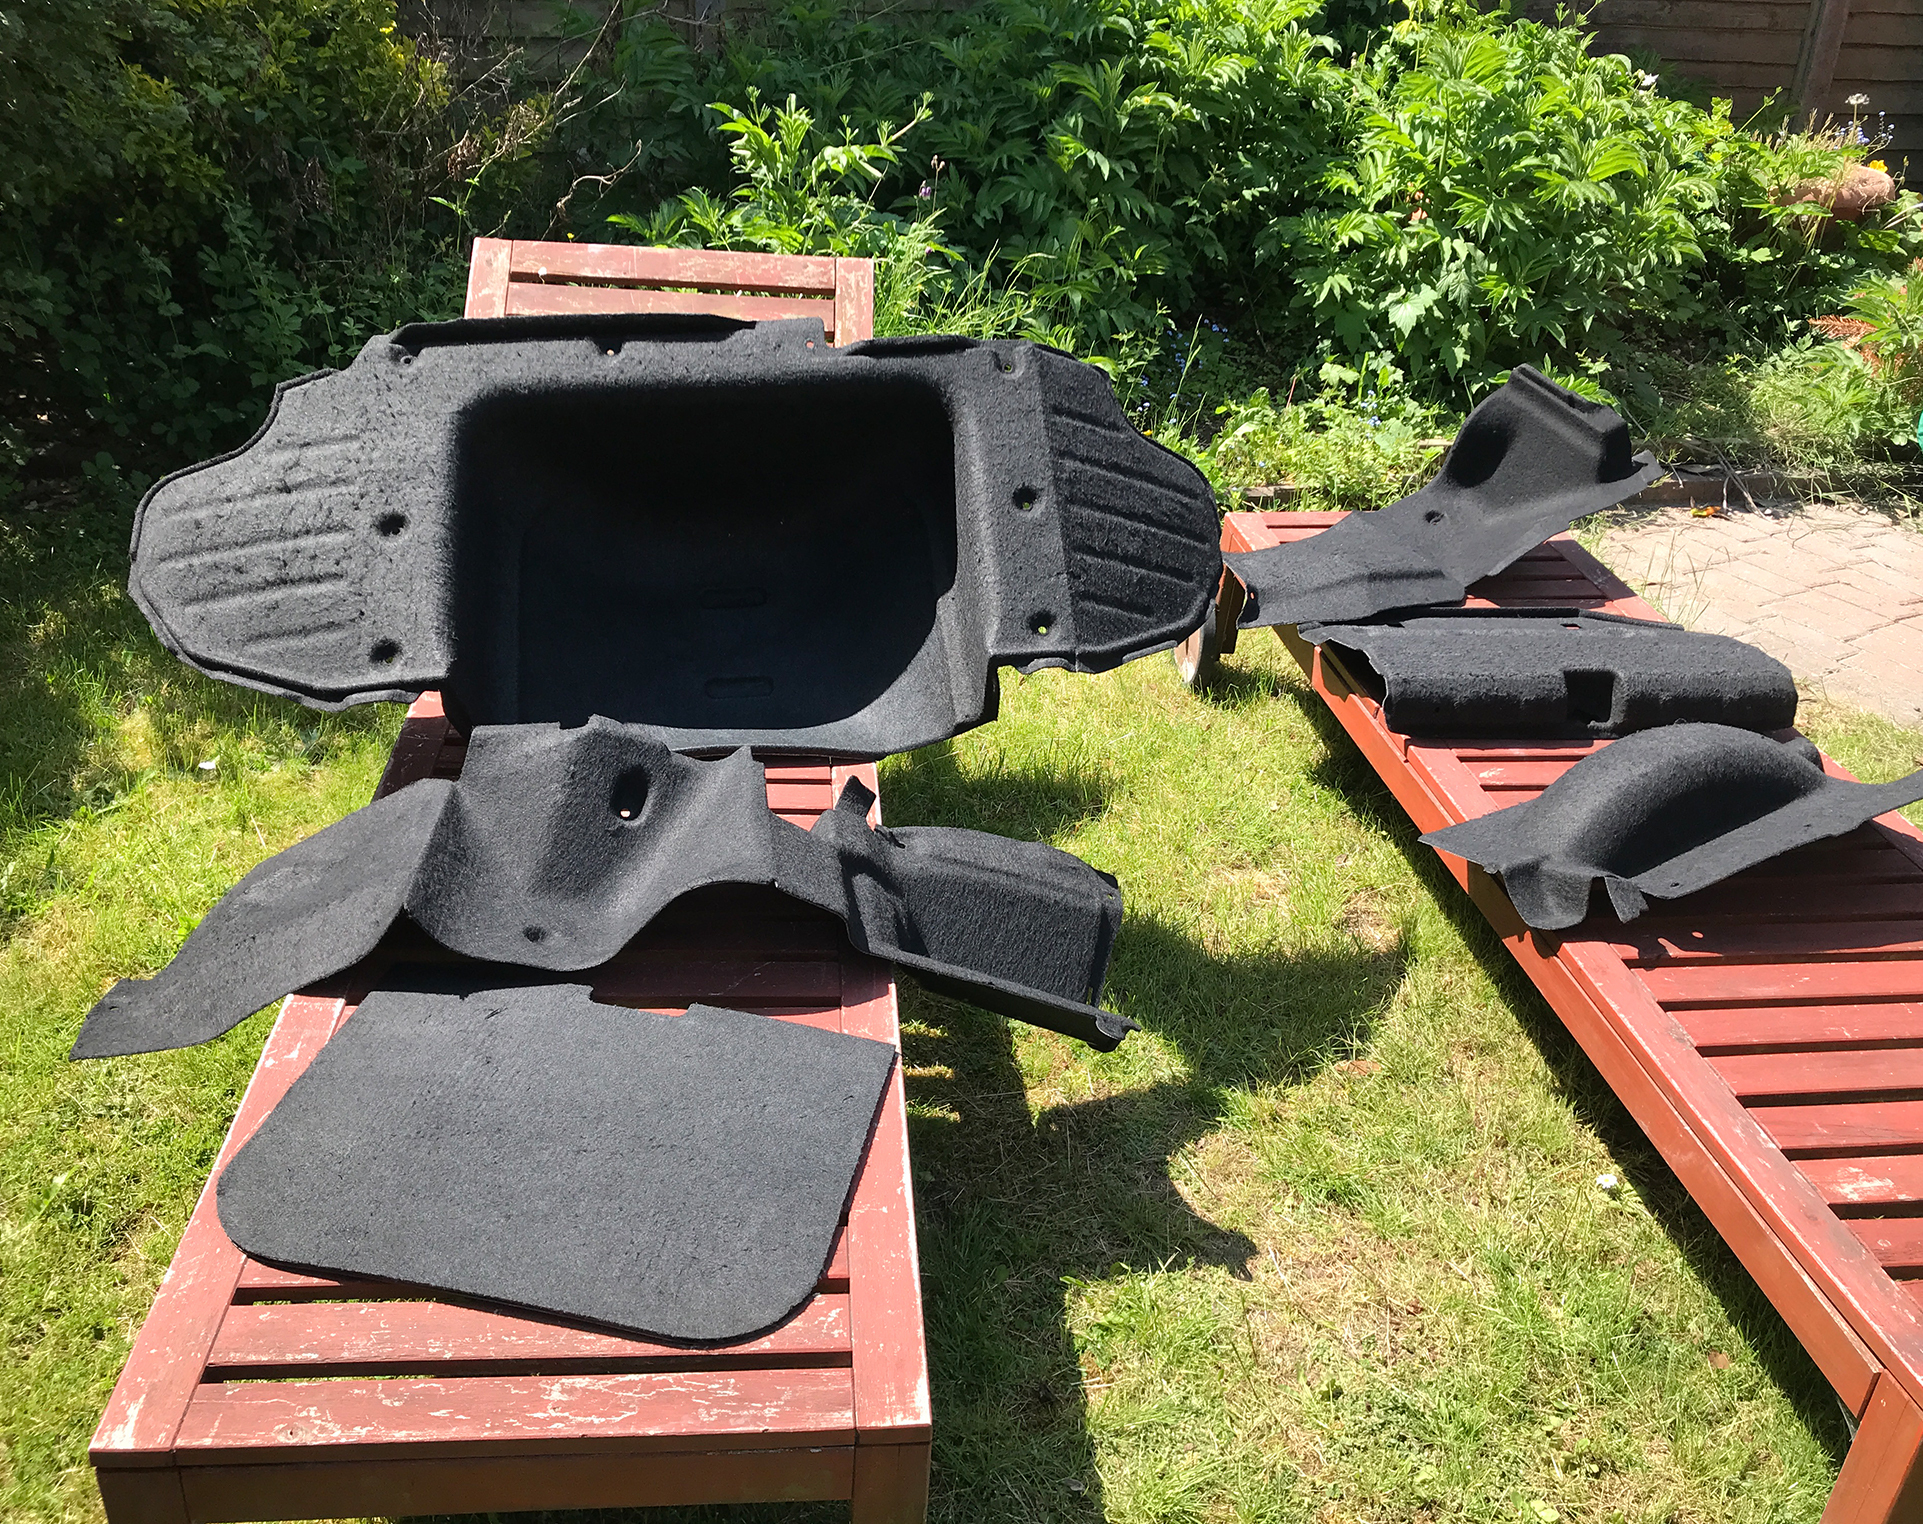
The boot carpet was looking a bit tired and worn, so I decided to refresh it using black fabric dye to restore its like-new appearance.
Applying the dye was a simple yet effective solution, bringing back the deep black color and making the carpet look clean and refreshed—a small but noticeable improvement in the overall interior restoration.
Dashboard Test Fitting & Cable Management
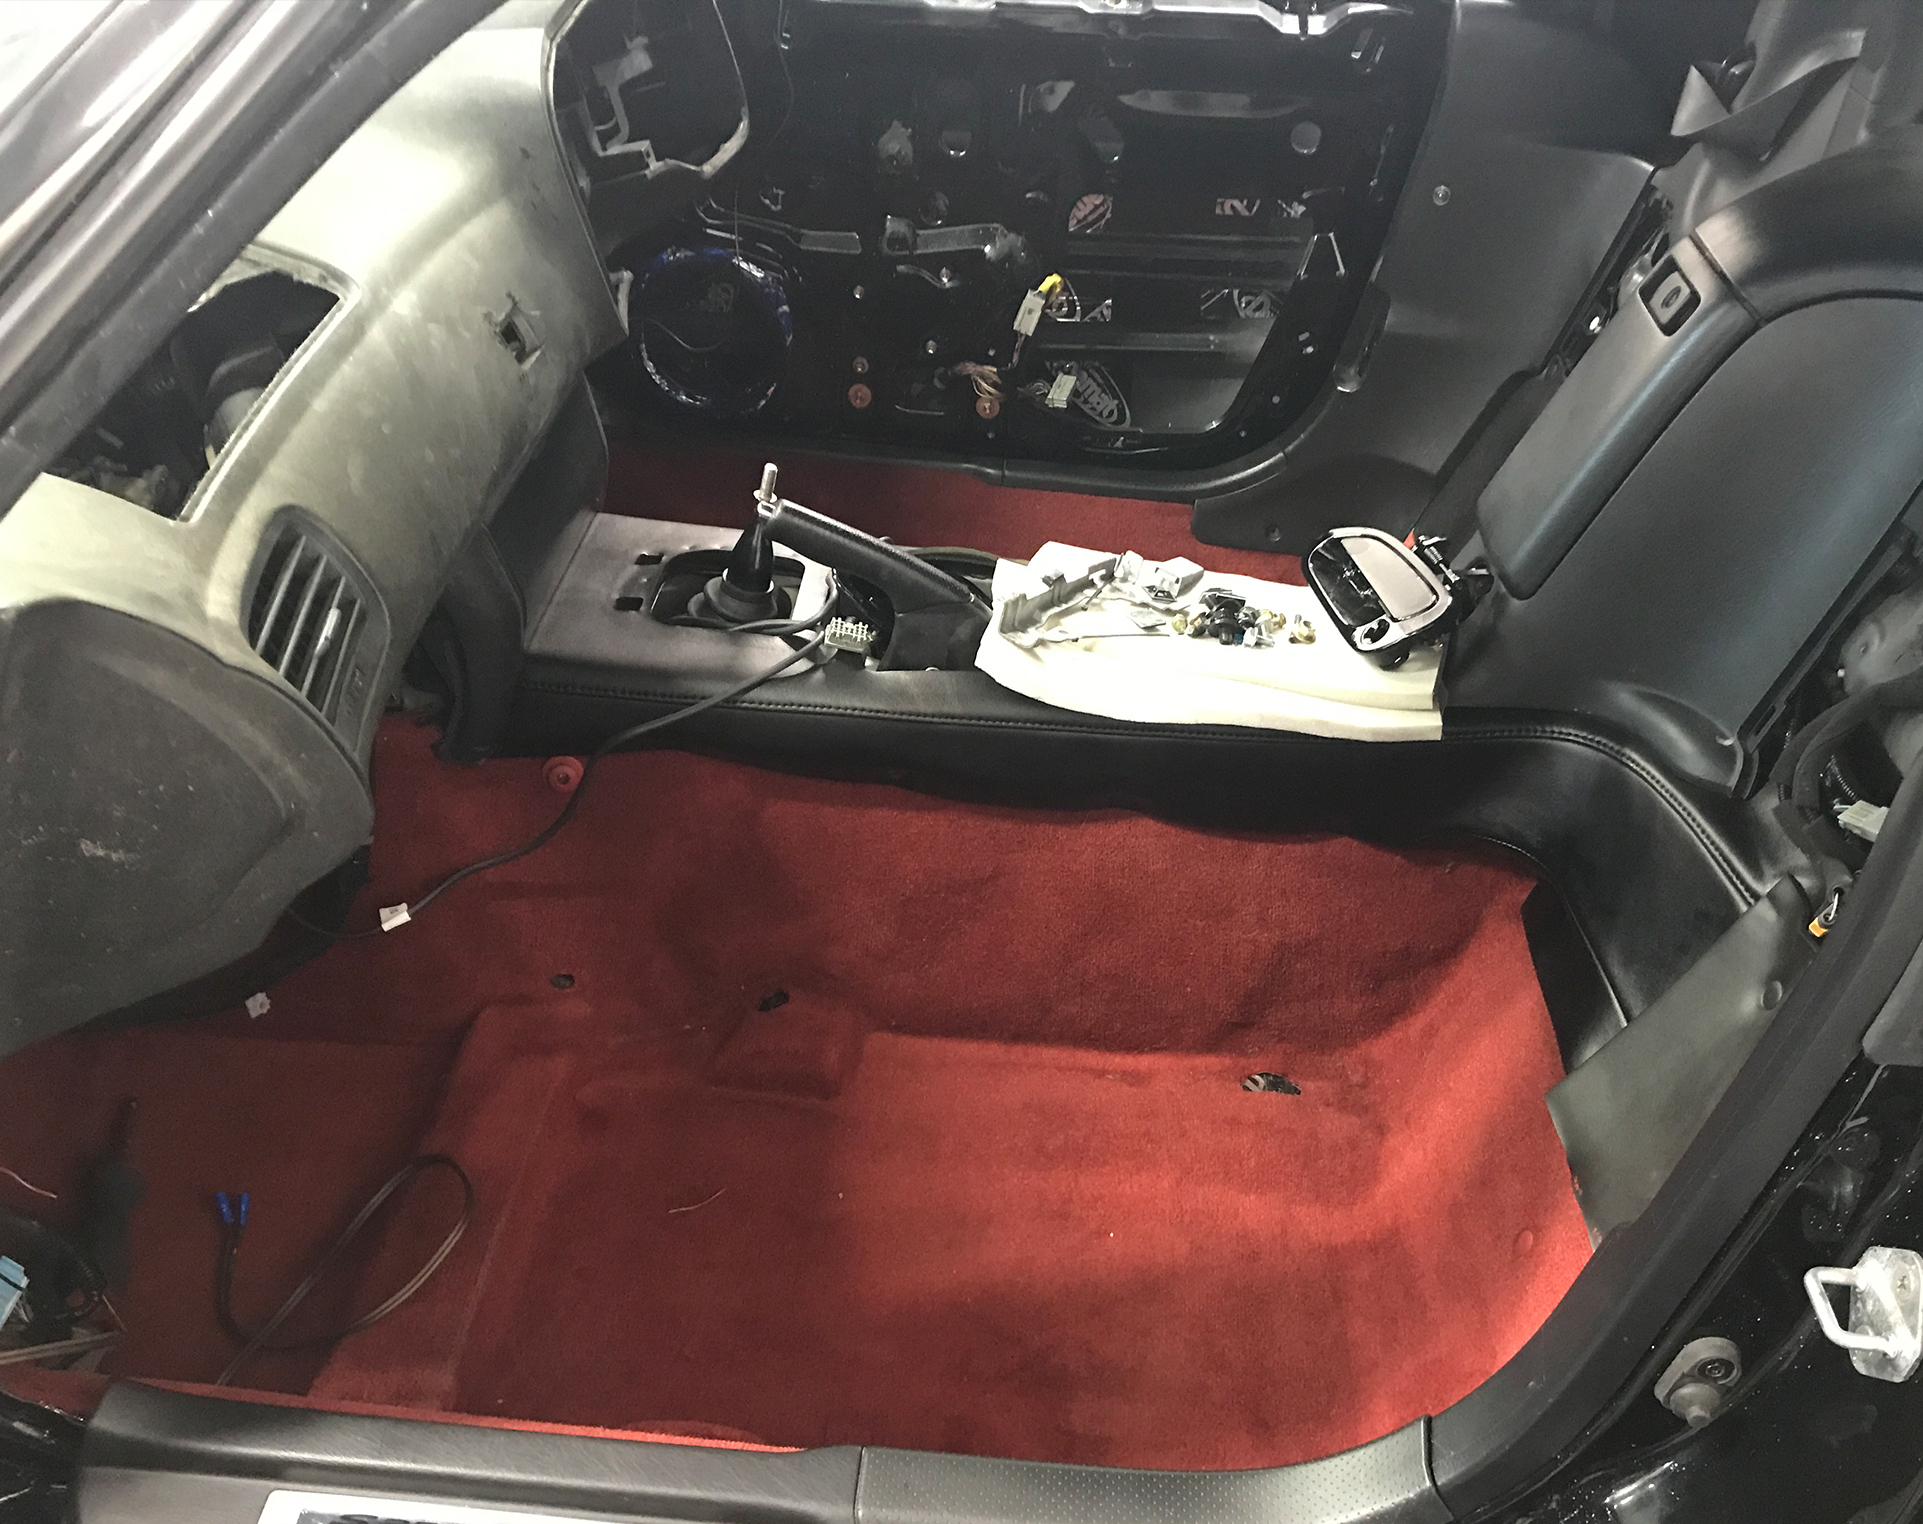
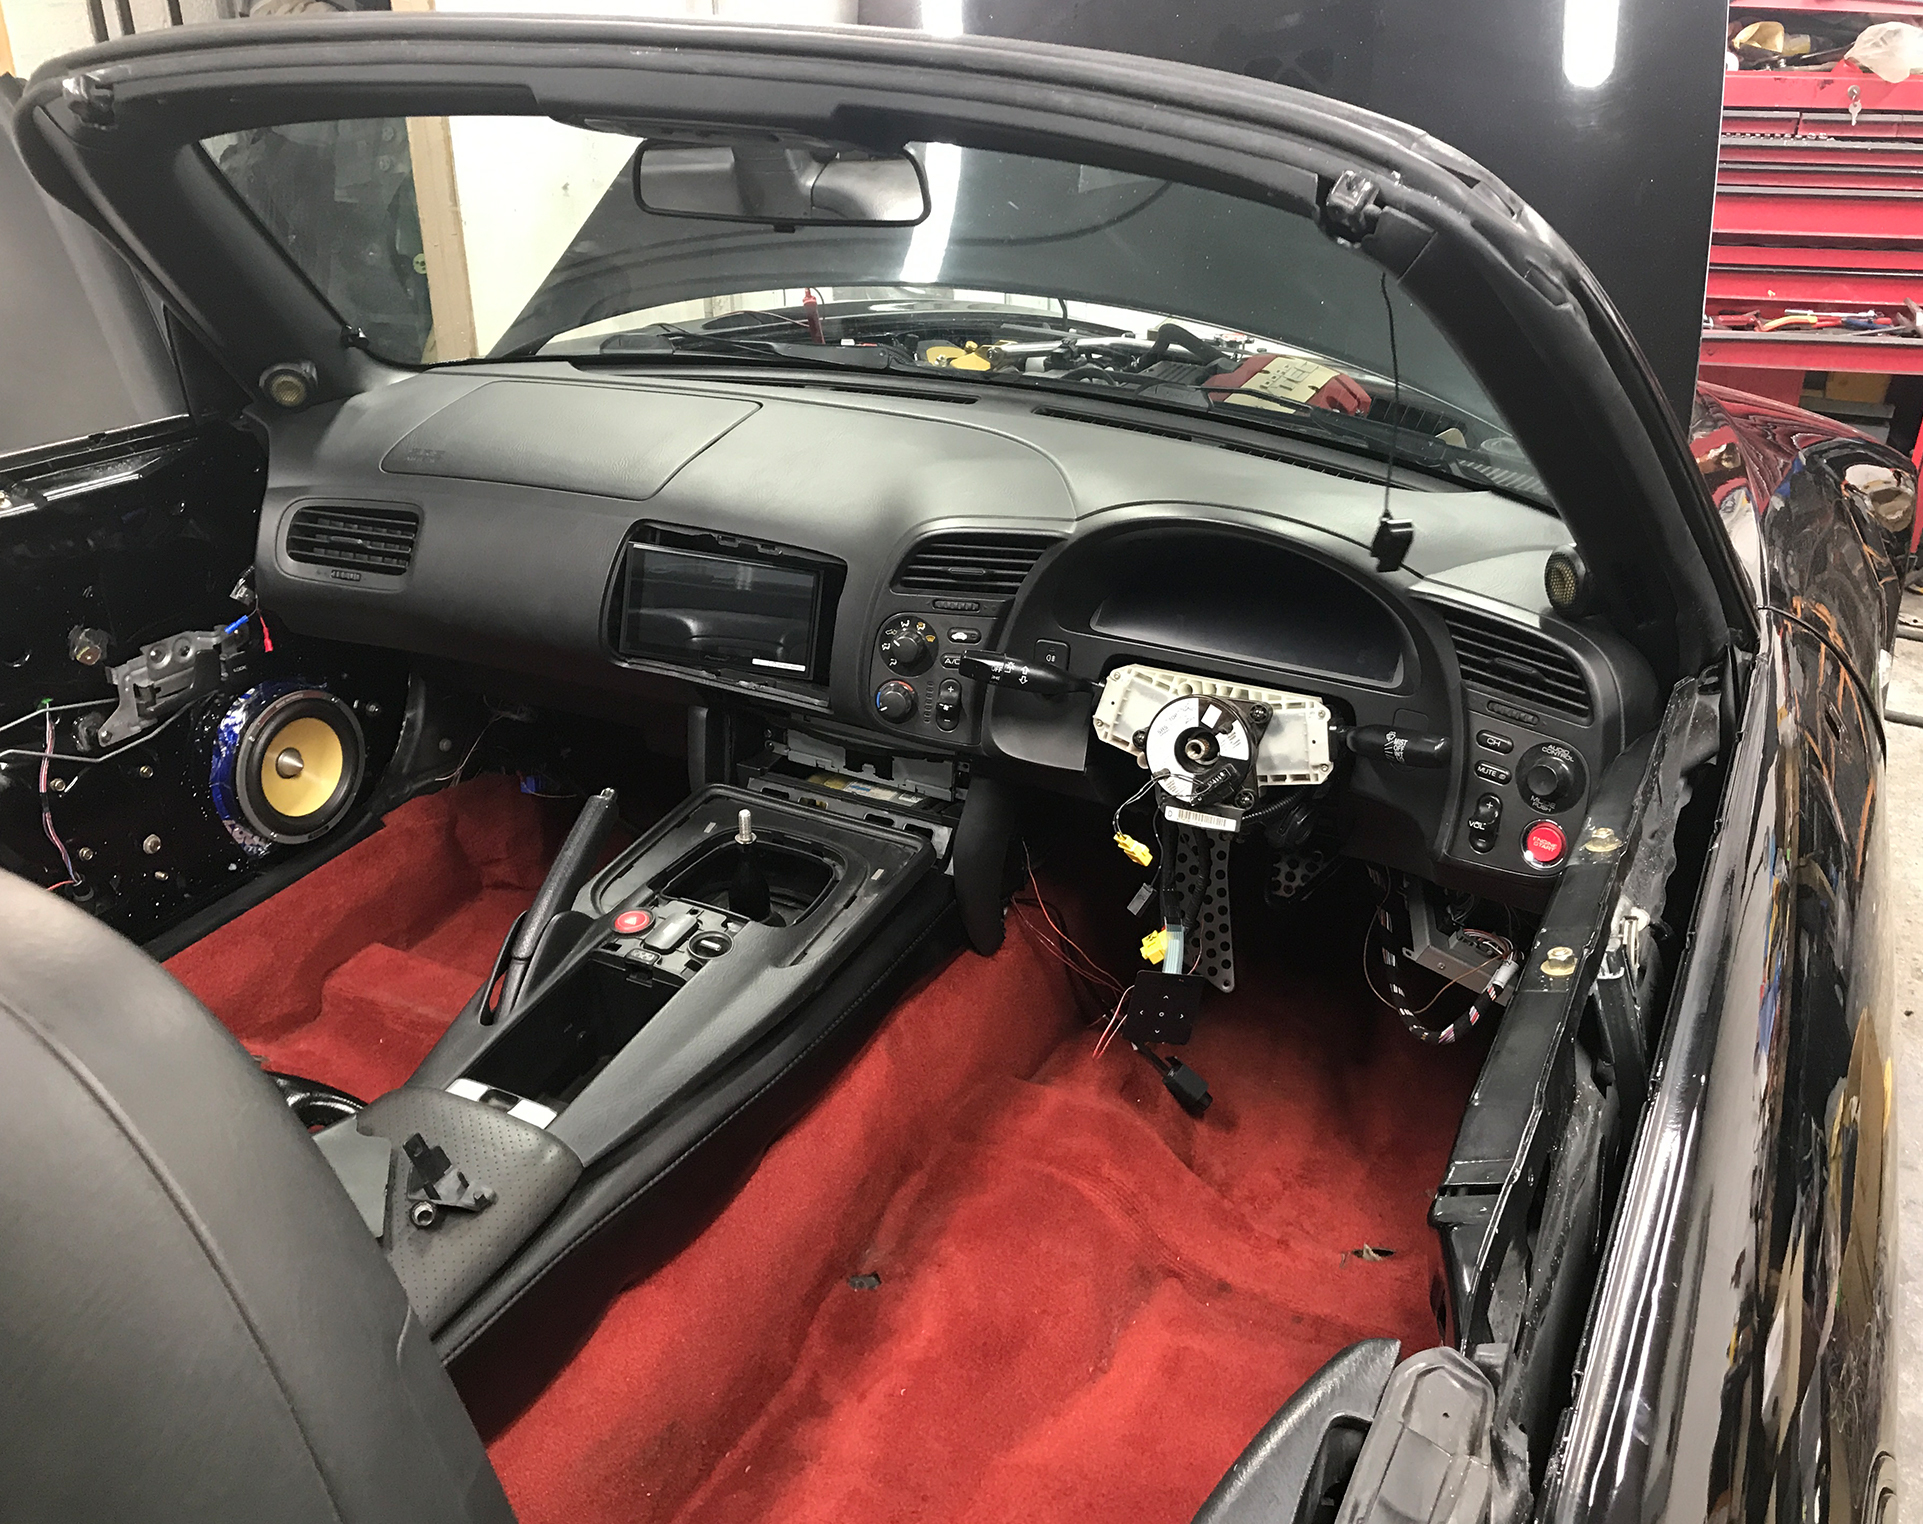
For the initial test fitting, I used the old dashboard to avoid any risk of accidentally damaging the new one. This allowed me to check alignment, mounting points, and overall fitment without worrying about potential scratches or marks.
At this stage, I also focused on tidying up the wiring. Cable management was a priority—everything needed to be hidden and neatly routed, ensuring a clean OEM-style appearance with no visible signs of modifications.
Installing Trackers for Security
Since the car was still disassembled, it was the perfect opportunity to install tracking devices. This way, they could be strategically hidden and completely inaccessible—any attempt to remove them would require disassembling large sections of the car. Security and stealth, all in one step.
Installing the Facelift Center Console & Relocating the Alarm LED
With the dashboard in place, it was time to install the facelift center console. This upgrade not only modernizes the interior but also improves the overall fit and finish.
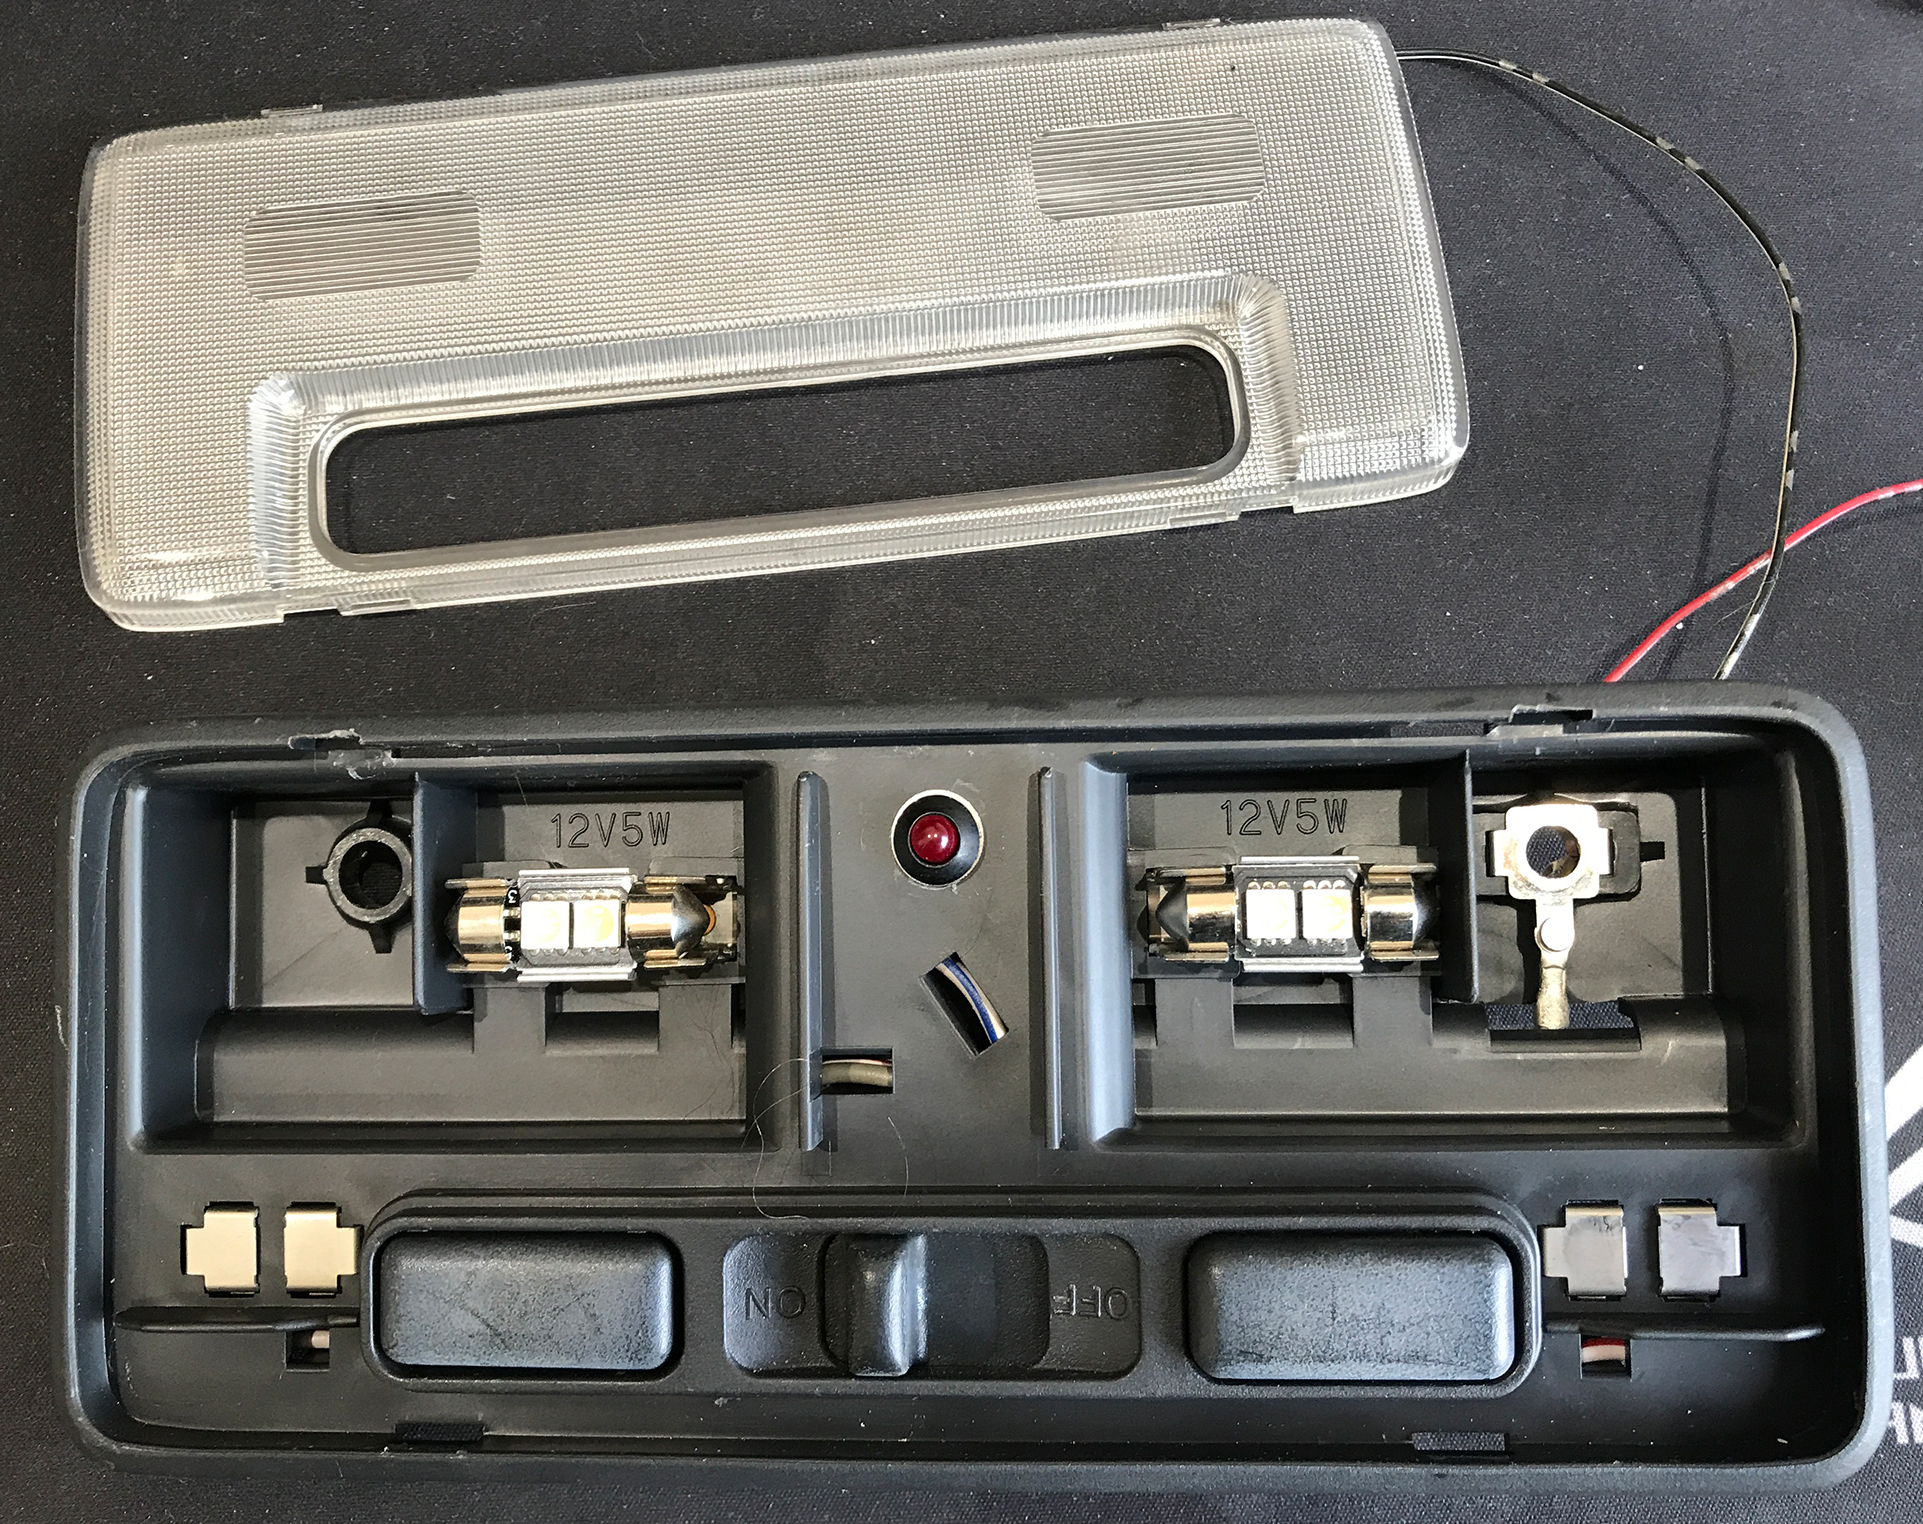
During the installation, I noticed an alarm LED awkwardly fitted right in the center of the trim above the defroster button. I have no idea why it was placed there, but it looked like someone had simply drilled a hole and called it a day—far from a clean factory look.
To fix this, I repaired the trim piece and relocated the LED wiring, tucking it neatly inside the interior light for a cleaner, OEM-style integration. Now, the center console looks flawless, without any unnecessary modifications ruining its aesthetics.
This relocation meant that there were no unsightly LEDs visible, maintaining a clean and factory-like appearance. However, the LED indicator is still perfectly visible when the immobilizer is active, ensuring full functionality without compromising aesthetics.
While working on the lighting, I also upgraded the interior lights to white LEDs. The original yellow halogen bulbs looked a bit dated, and the crisp white LED lighting gives the cabin a modern and fresh look.
The final result looks amazing—I couldn’t have asked for more. Every detail, from the facelift center console to the hidden immobilizer LED and modern LED lighting, has come together perfectly, giving the interior a clean, refined, and updated look. Another step closer to completing this no-compromise build! ?✨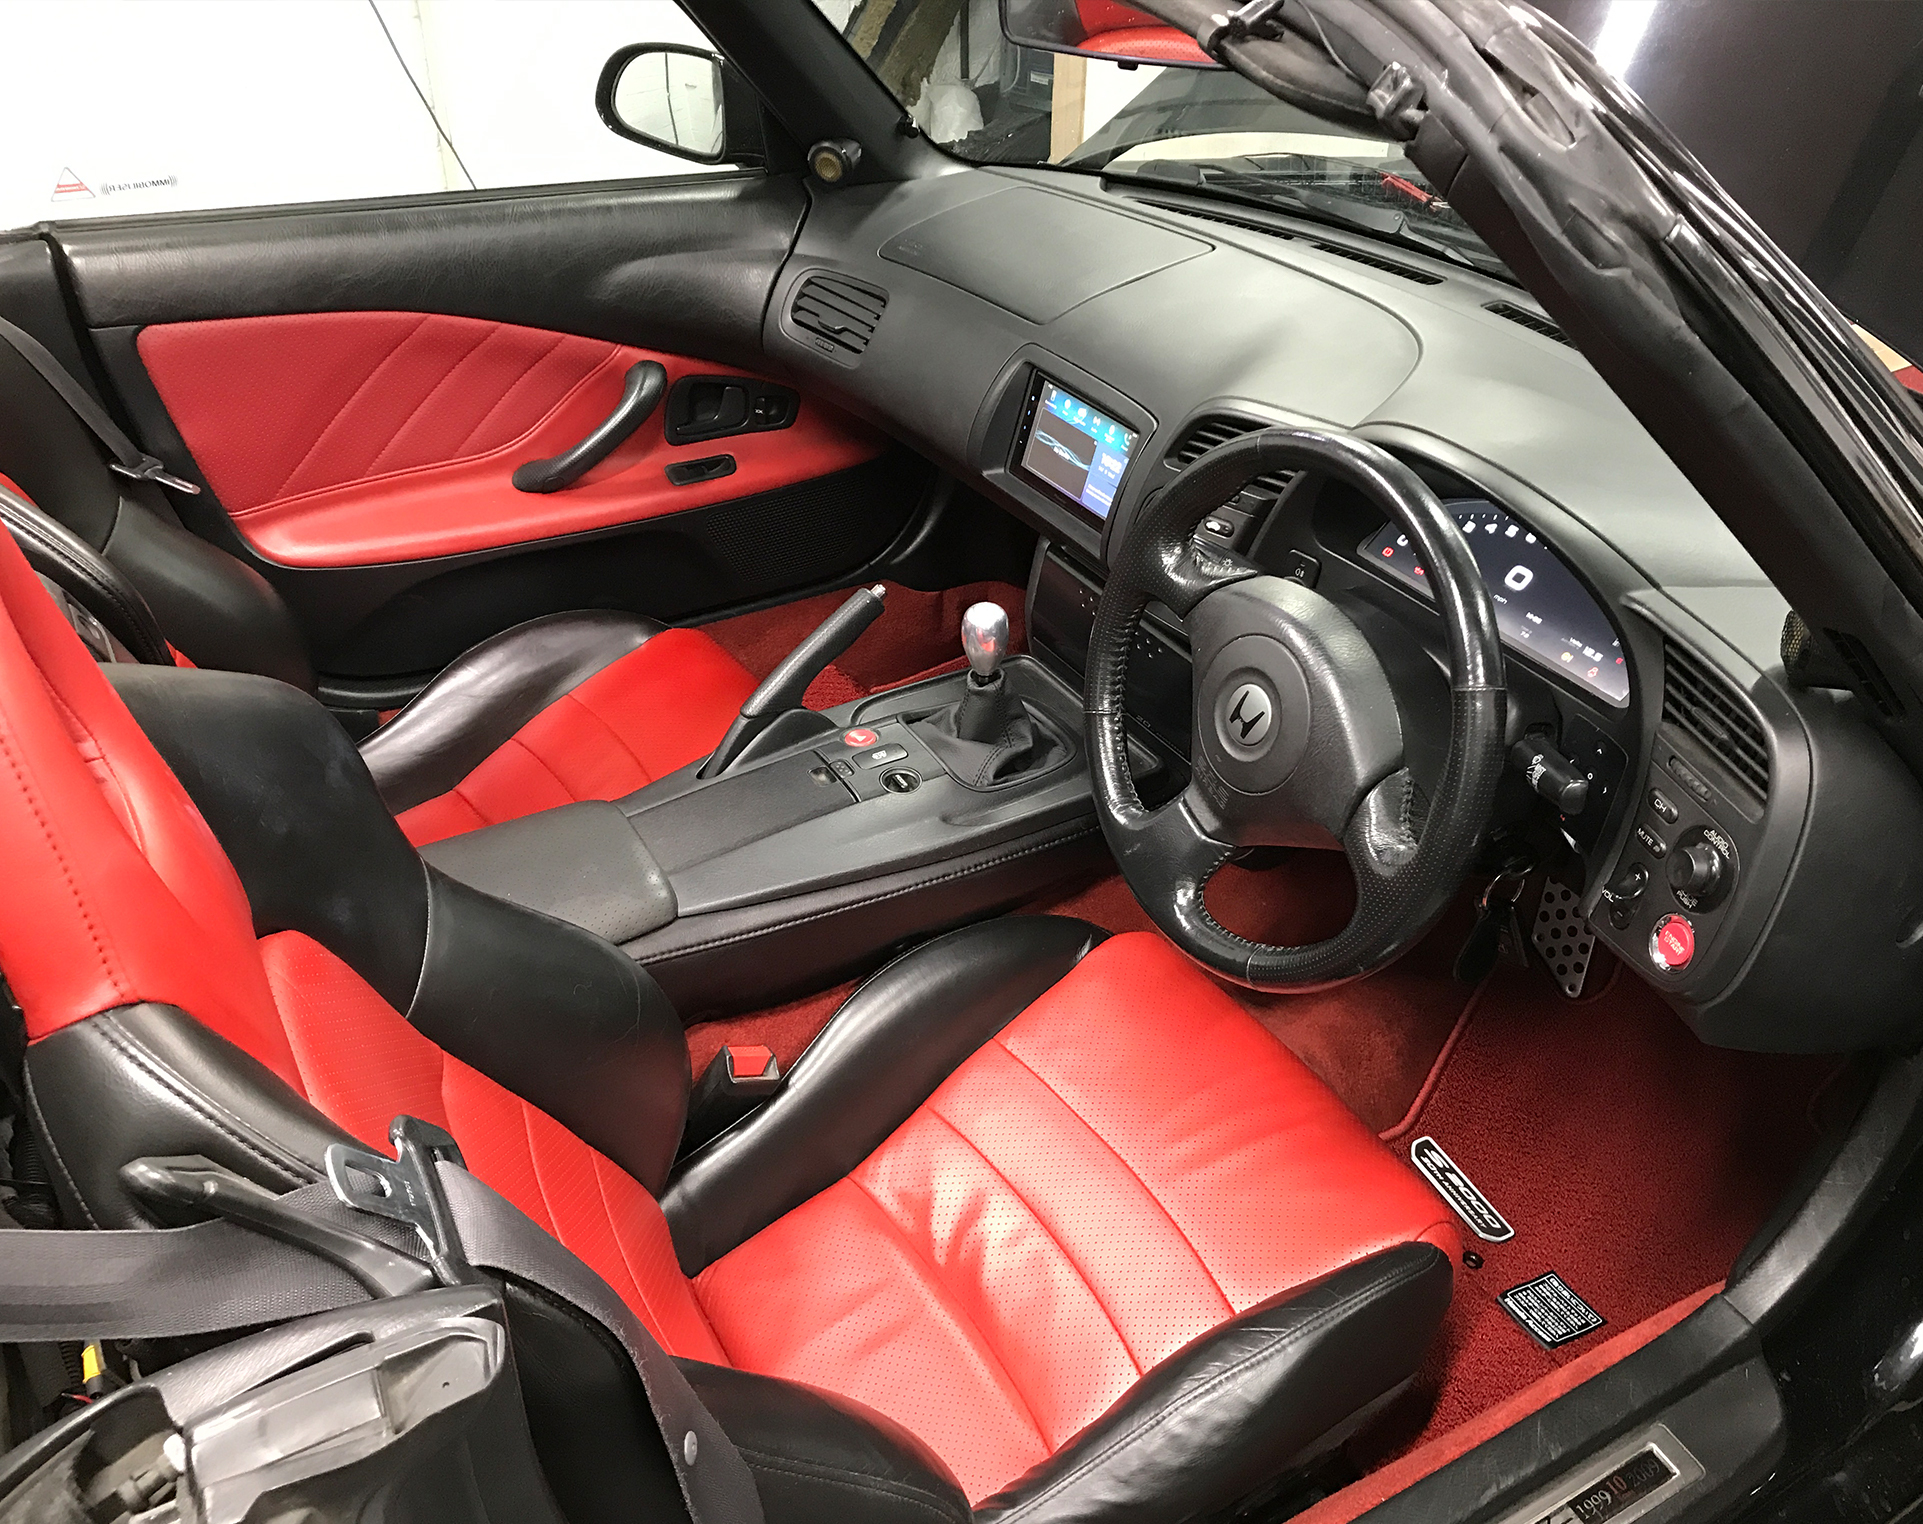
The metal footrest was another great addition, adding a sportier and more premium look to the interior. It not only enhances the aesthetics but also provides a more durable and functional upgrade over the original plastic version. A small detail, but one that makes a big difference in the overall feel of the cabin! 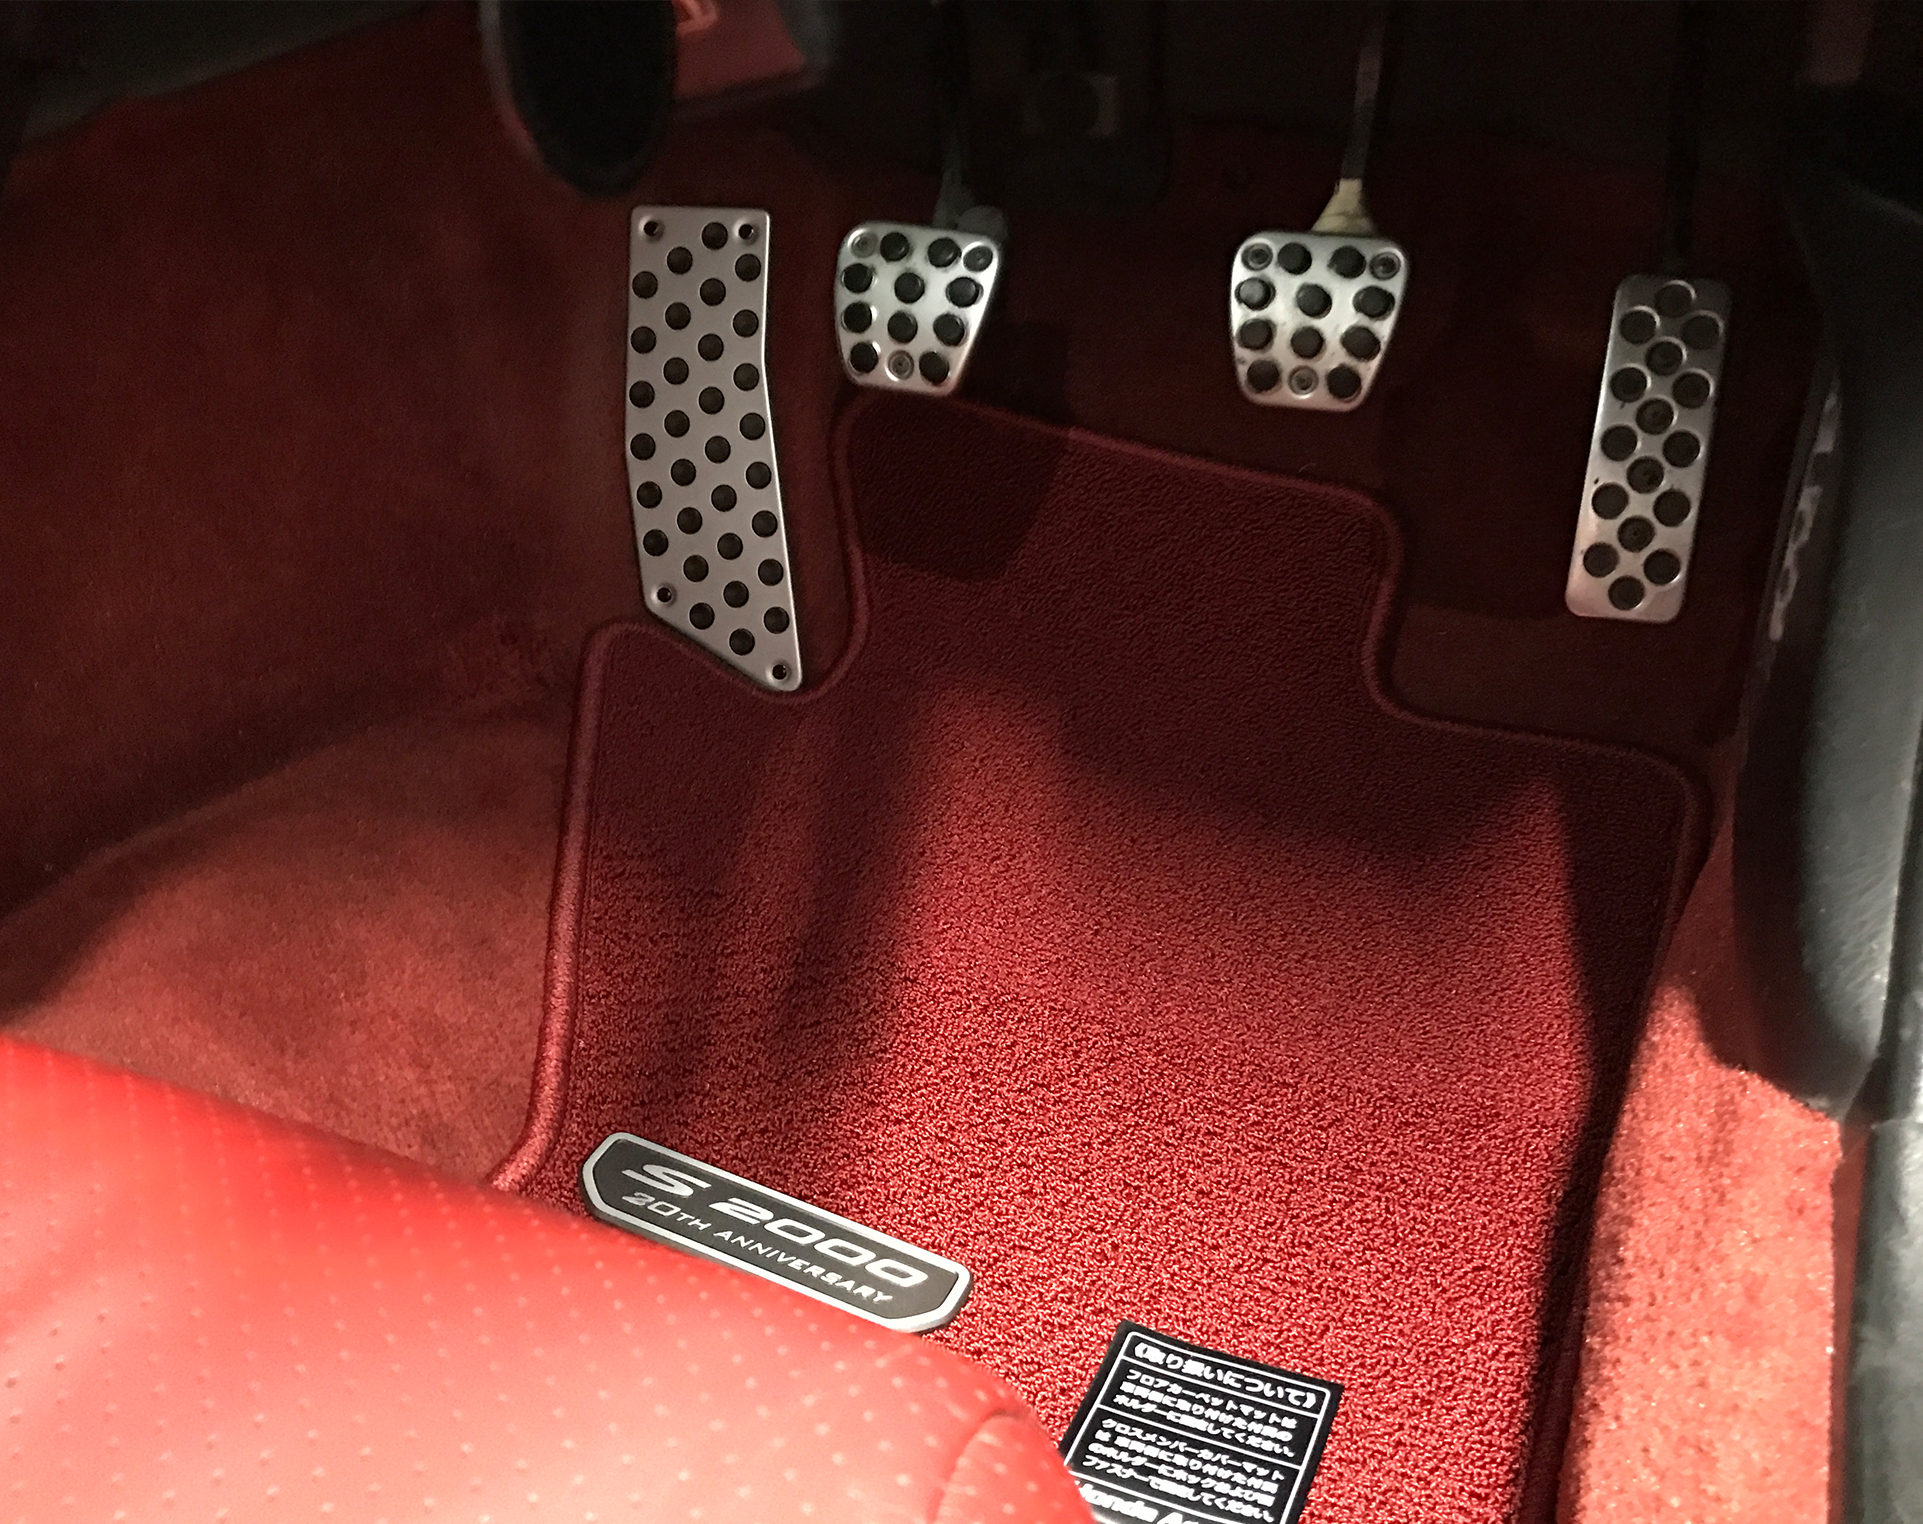
Finishing Touches: Center Console Wrap & Gear Shifter Upgrade
For the final touch, I decided to wrap the center console trim pieces with a black brushed aluminum-look vinyl. This gave the interior a sleek, modern, and premium feel, complementing the other upgrades perfectly.
To complete the look, I also fitted a new leather cover for the gear shifter, enhancing both comfort and aesthetics. These small details tie everything together, making the interior feel refined and high-quality—a perfect match for the rest of the build!
Final Checks & Preparing for the Road
The car is now almost complete—just a few finishing touches left. I’m going through a final double-check of all brake and suspension bolts, ensuring everything is torqued to spec. After that, it’s time for a full system test to make sure everything functions flawlessly before heading back on the road for its MOT test.
A Tight Deadline
Time is ticking, and there’s an actual deadline to meet. I’ve already booked a new soft-top installation with Jack Smith in Swansea, South Wales, and given how busy he is, I wouldn’t be able to get another slot anytime soon if I miss this one.
A Dedicated Chapter for the Digital Cluster
Throughout this build, there have been glimpses of the ID4Motion digital cluster, but instead of squeezing it into this section, I’ve decided to dedicate an entire chapter to it. It deserves detailed coverage, as it’s a significant upgrade that completely transforms the driving experience.

