Posted by Ondrej M on 24th Feb 2025
Building the dream - Part 4 Sound system
Sound System: My Year-Long DIY Honda S2000 Restoration Journey
Subframes, Brake Lines, and Engine Bay Components – Done! Now, Let’s Talk Sound System.
Last time, I installed the subframes, brake lines, and started putting back some of the engine bay components.
Well, this time, I’m covering something very exciting—at least, very exciting for me.
For me, the sound system is one of the most important parts of this build. It’s an opportunity to create a sound capsule—to experience music in its fullest.
When it comes to music, I like to listen to the entire spectrum. Ear-shattering bass isn’t something I’d enjoy. I appreciate a wide range of different music styles—and yes, sometimes I even listen to classical music, drum and bass, rock, pop, techno, and country. I want my sound system to perform well for all of it.
What Does the Stock Honda S2000 Sound System Offer?
Well… not much. The original S2000 came with two basic door speakers—not exactly an audiophile’s dream. The later models included tweeters in the door cards, but their location isn’t optimal, as I’ll explain later. They also came equipped with speakers in the crash hoops.
My Sound System Plan
I decided on the following setup:
✔ Mid-bass speakers in the doors
✔ Tweeters in the A-pillars
✔ Crash hoop speakers as a sound filler
✔ Active subwoofer
Choosing the Right Speakers & Amplifiers
Decisions, decisions… What combination of speakers and amplifiers would work best?
After some research, I pulled the trigger on the deepest door speakers I could find—the Focal ES 162 K2 from the Elite range.
Why Focal ES 162 K2?
✔ 2-way component kit with external audiophile-quality crossover
✔ Separate tweeters for more accurate sound staging
✔ Frequency response: 60Hz to 22kHz
✔ Nominal power: 100W RMS
✔ Impedance: 2Ω
✔ Aramid fiber cone for high-precision, dynamic sound
The Amplifier: JL XD400/4V2
✔ 400W 4-channel amplifier
✔ Individual channels for each woofer and tweeter
✔ Enough power to let the woofers shine
Active Subwoofer: Focal IBUS20
✔ 8" subwoofer
✔ Power: 130W RMS
✔ Frequency response: 45Hz - 150Hz (perfectly complements the door speakers)
✔ Compact size—easily hidden
The Secondary Amplifier
Having just a single 4-channel amplifier wasn’t enough for me—I also needed an amplifier to power the crash hoop speakers. Since these didn’t need anything too powerful or complex, I opted for the Focal FDS 4.430 (4 x 58W RMS).
The Head Unit: What Did I Choose?
Originally, my plan was to reuse my Pioneer DEH-80PRS—an absolute beast of a head unit. And by beast, I don’t mean it was super powerful—it was a beast in sound quality. The equalizer was unlike anything I had experienced from any other head unit. That’s because it’s a competition-class head unit with incredible components.
To my disappointment and surprise, not even Pioneer’s current flagship head unit could match it.
Why Didn’t I Use the Pioneer DEH-80PRS?
The main issue—it’s single DIN. That might be perfect for some, but my plans were bigger—much bigger. 2-DIN big.
What Did I Choose Instead?
The Pioneer SPH-EVO64DAB.
✔ Wireless Apple CarPlay connectivity
✔ Large touchscreen with decent response time
✔ Quality sound output with a solid equalizer
✔ Innovative design—the screen is separate from the head unit, allowing the head unit to fit into a single DIN port
Powering the Sound System
Now, two important questions needed to be answered:
1. How do I power all of this?
✔ Solution: A 4GA gauge multi-core wire—capable of handling 1,500W of power. That should be enough.
2. Where do I install all this gear?
This was probably the trickiest challenge yet. However, there was one place I could utilize—the spare wheel area.
Well… only if the spare wheel wasn’t there.
Do I Need a Spare Wheel?
A quick check of the legislation revealed that I don’t actually need a spare wheel.
Victory! No stopping me now—I could fully utilize that space.
Final Thoughts
I have to say, removing the spare wheel saved some weight… only to add all of it back (and more) with the sound system—not to mention the sound deadening I installed.
This was a long write-up, so here’s a quick summary of all the materials used so far:
✔ Speakers
✔ Amplifiers
✔ Head unit
✔ Wiring
✔ Sound deadening
✔ Power splitter
✔ Fuse holders
✔ Speaker spacers
✔ Wire connectors and accessories
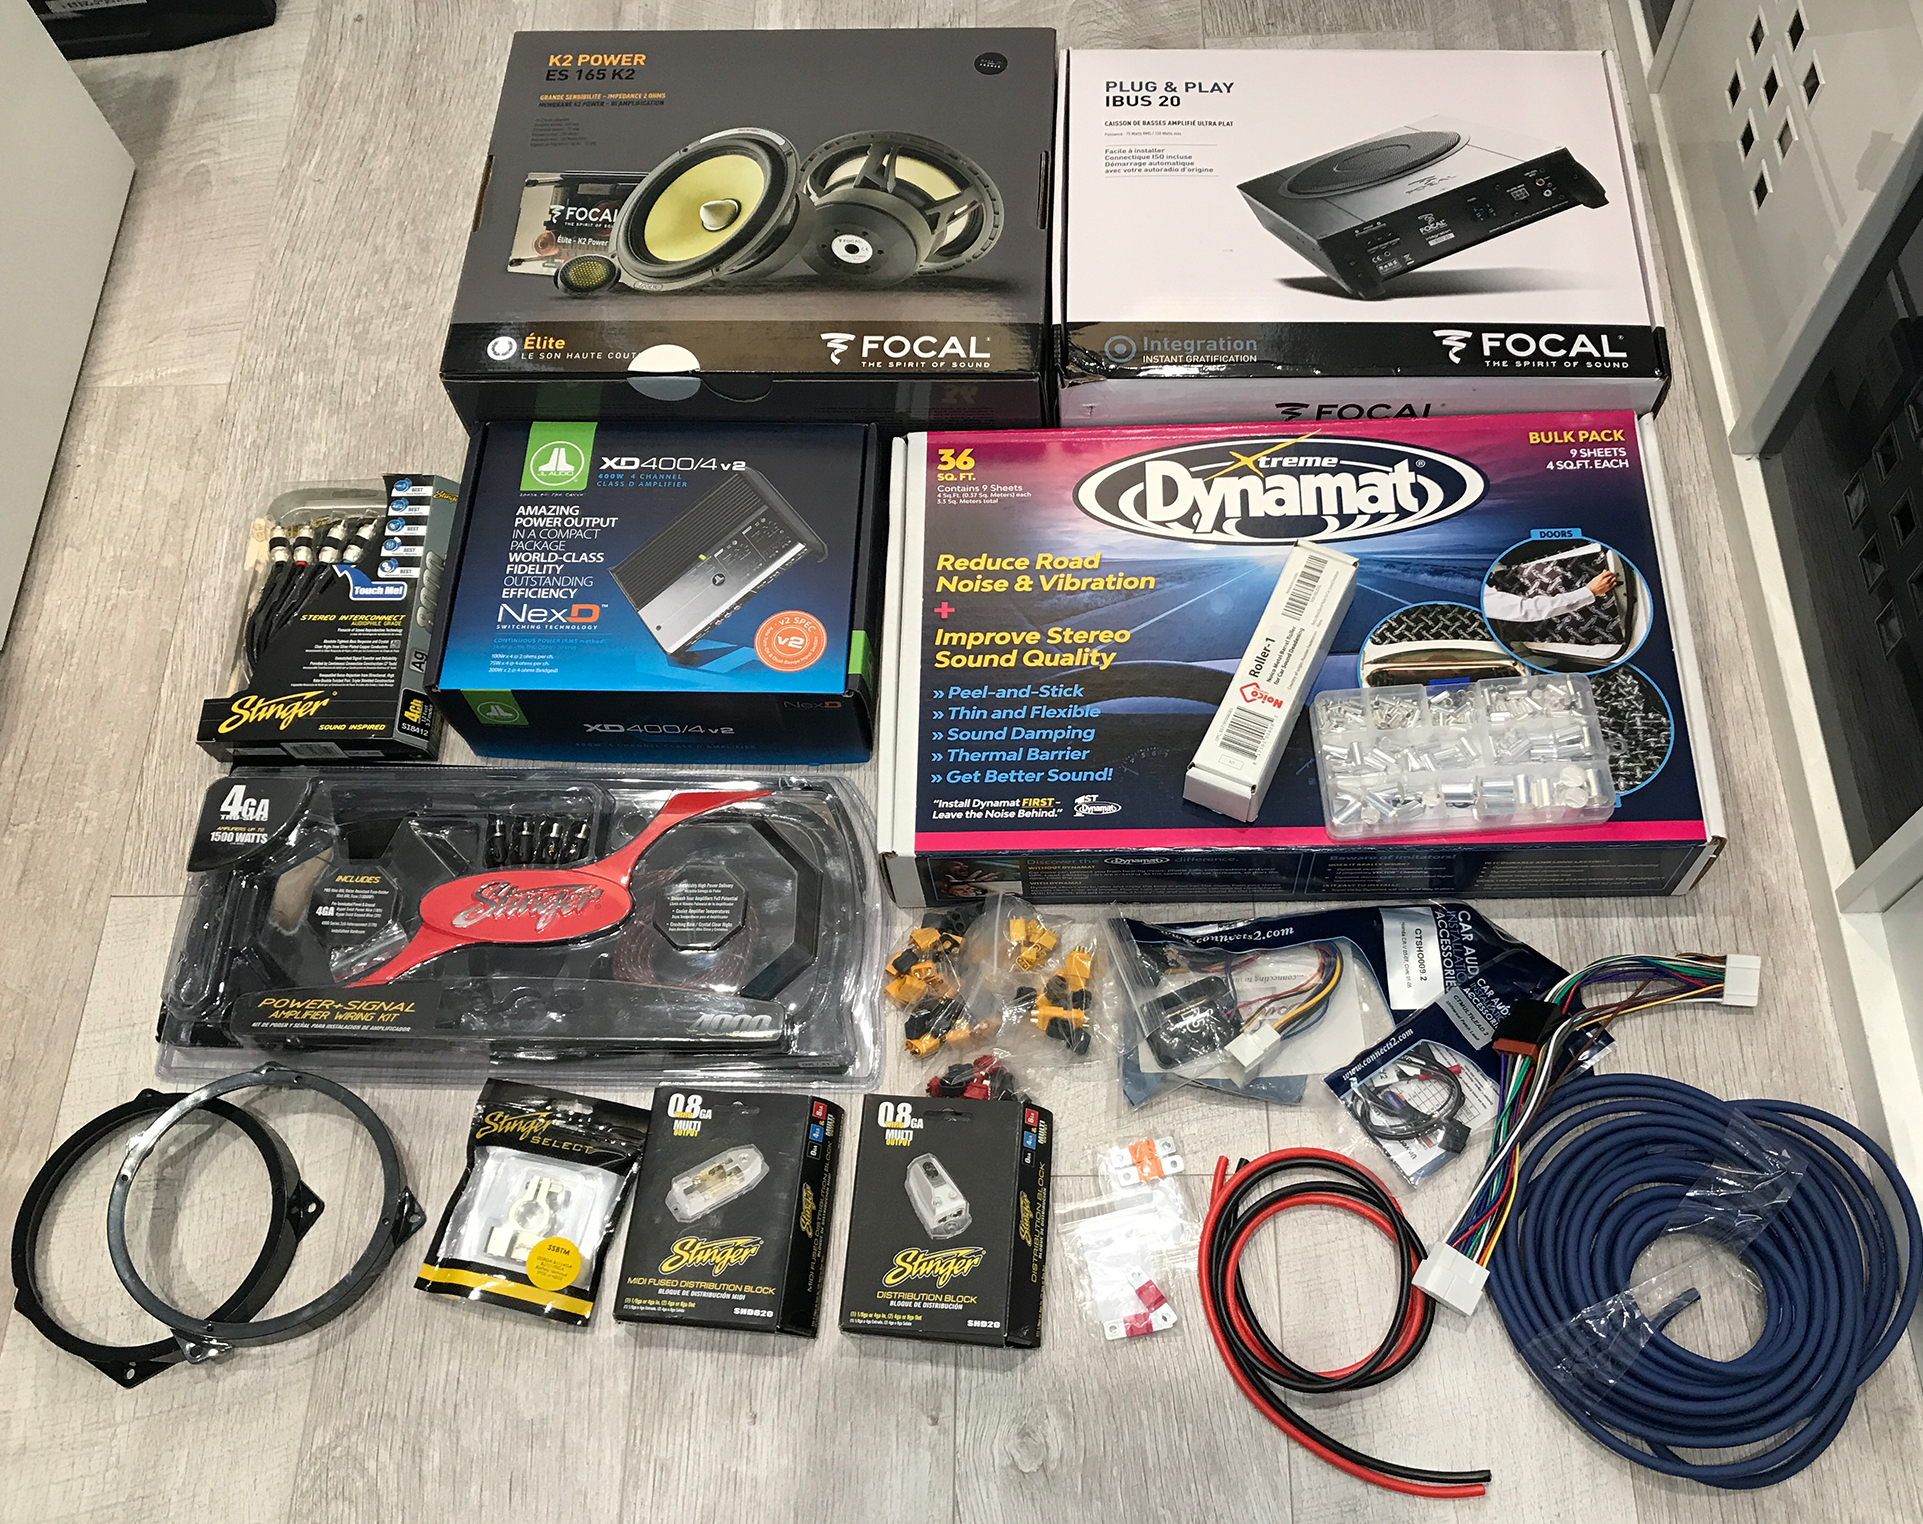
After receiving almost all the gear, it was time to start planning the installation process.
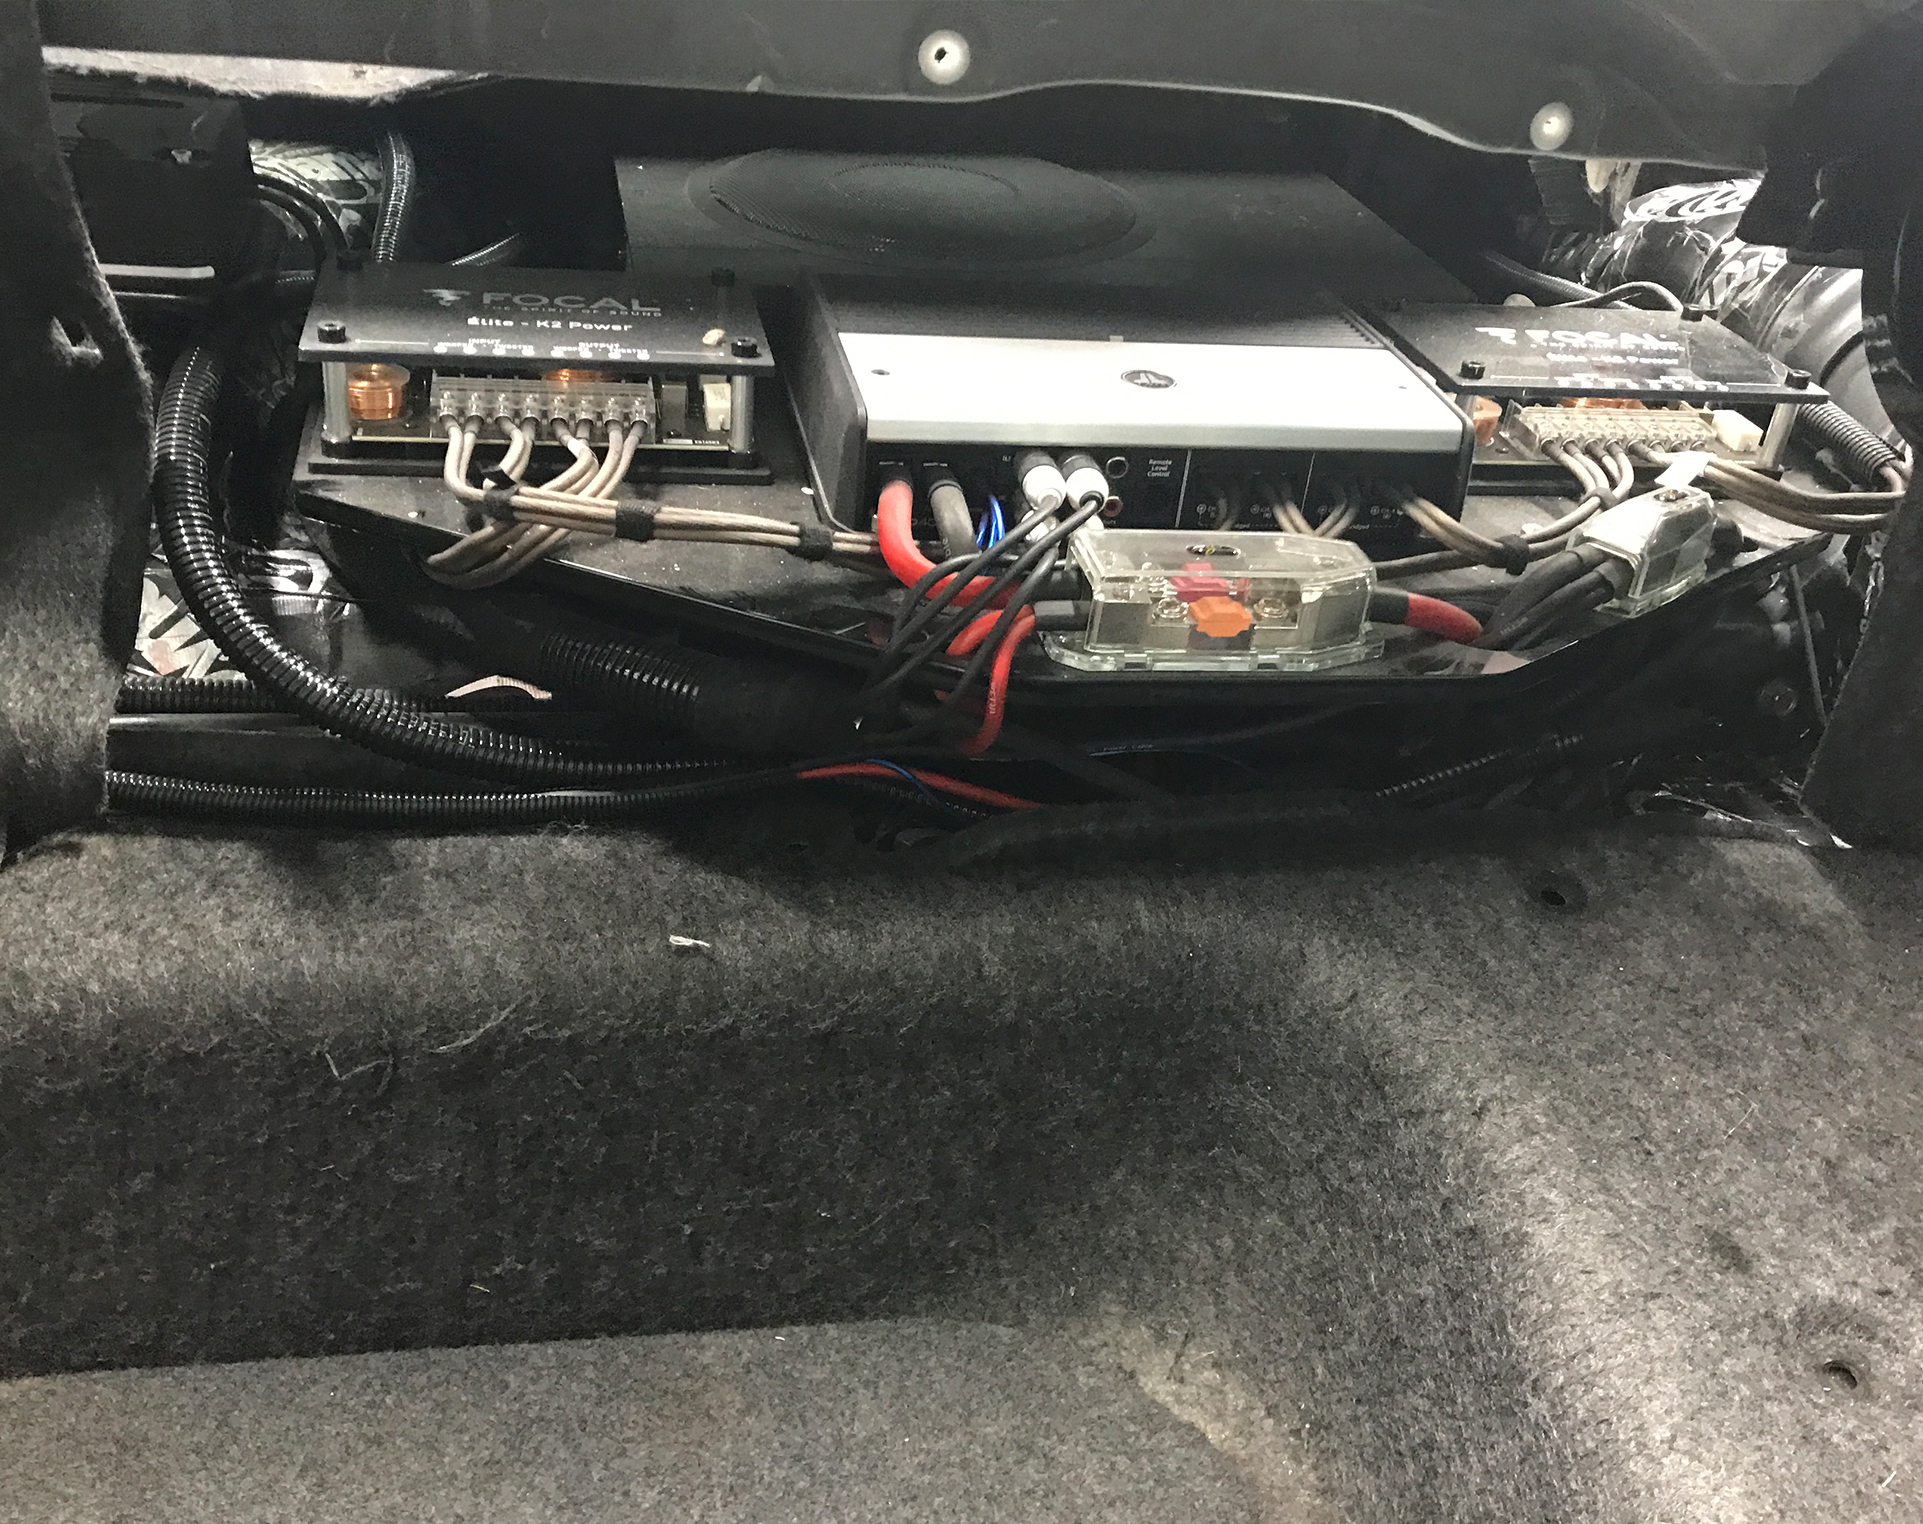
The idea was to have the amplifier, crossovers, distribution block, and fuses placed on a single board. For that, I decided to use a 10mm black acrylic sheet. Here’s why:
✔ I can cut threads into the acrylic sheet.
✔ It’s strong yet relatively flexible—able to withstand bumps from potholes.
✔ It looks great in glossy black (yes, I know it won’t be visible anyway).
First Phase: Planning the Physical Layout
Instead of cutting into the acrylic straight away, I decided to use MDF for prototyping and testing the layout. This way, I could fine-tune the design before committing to the final material.
And yes—this is all happening in the space where the spare wheel used to be.
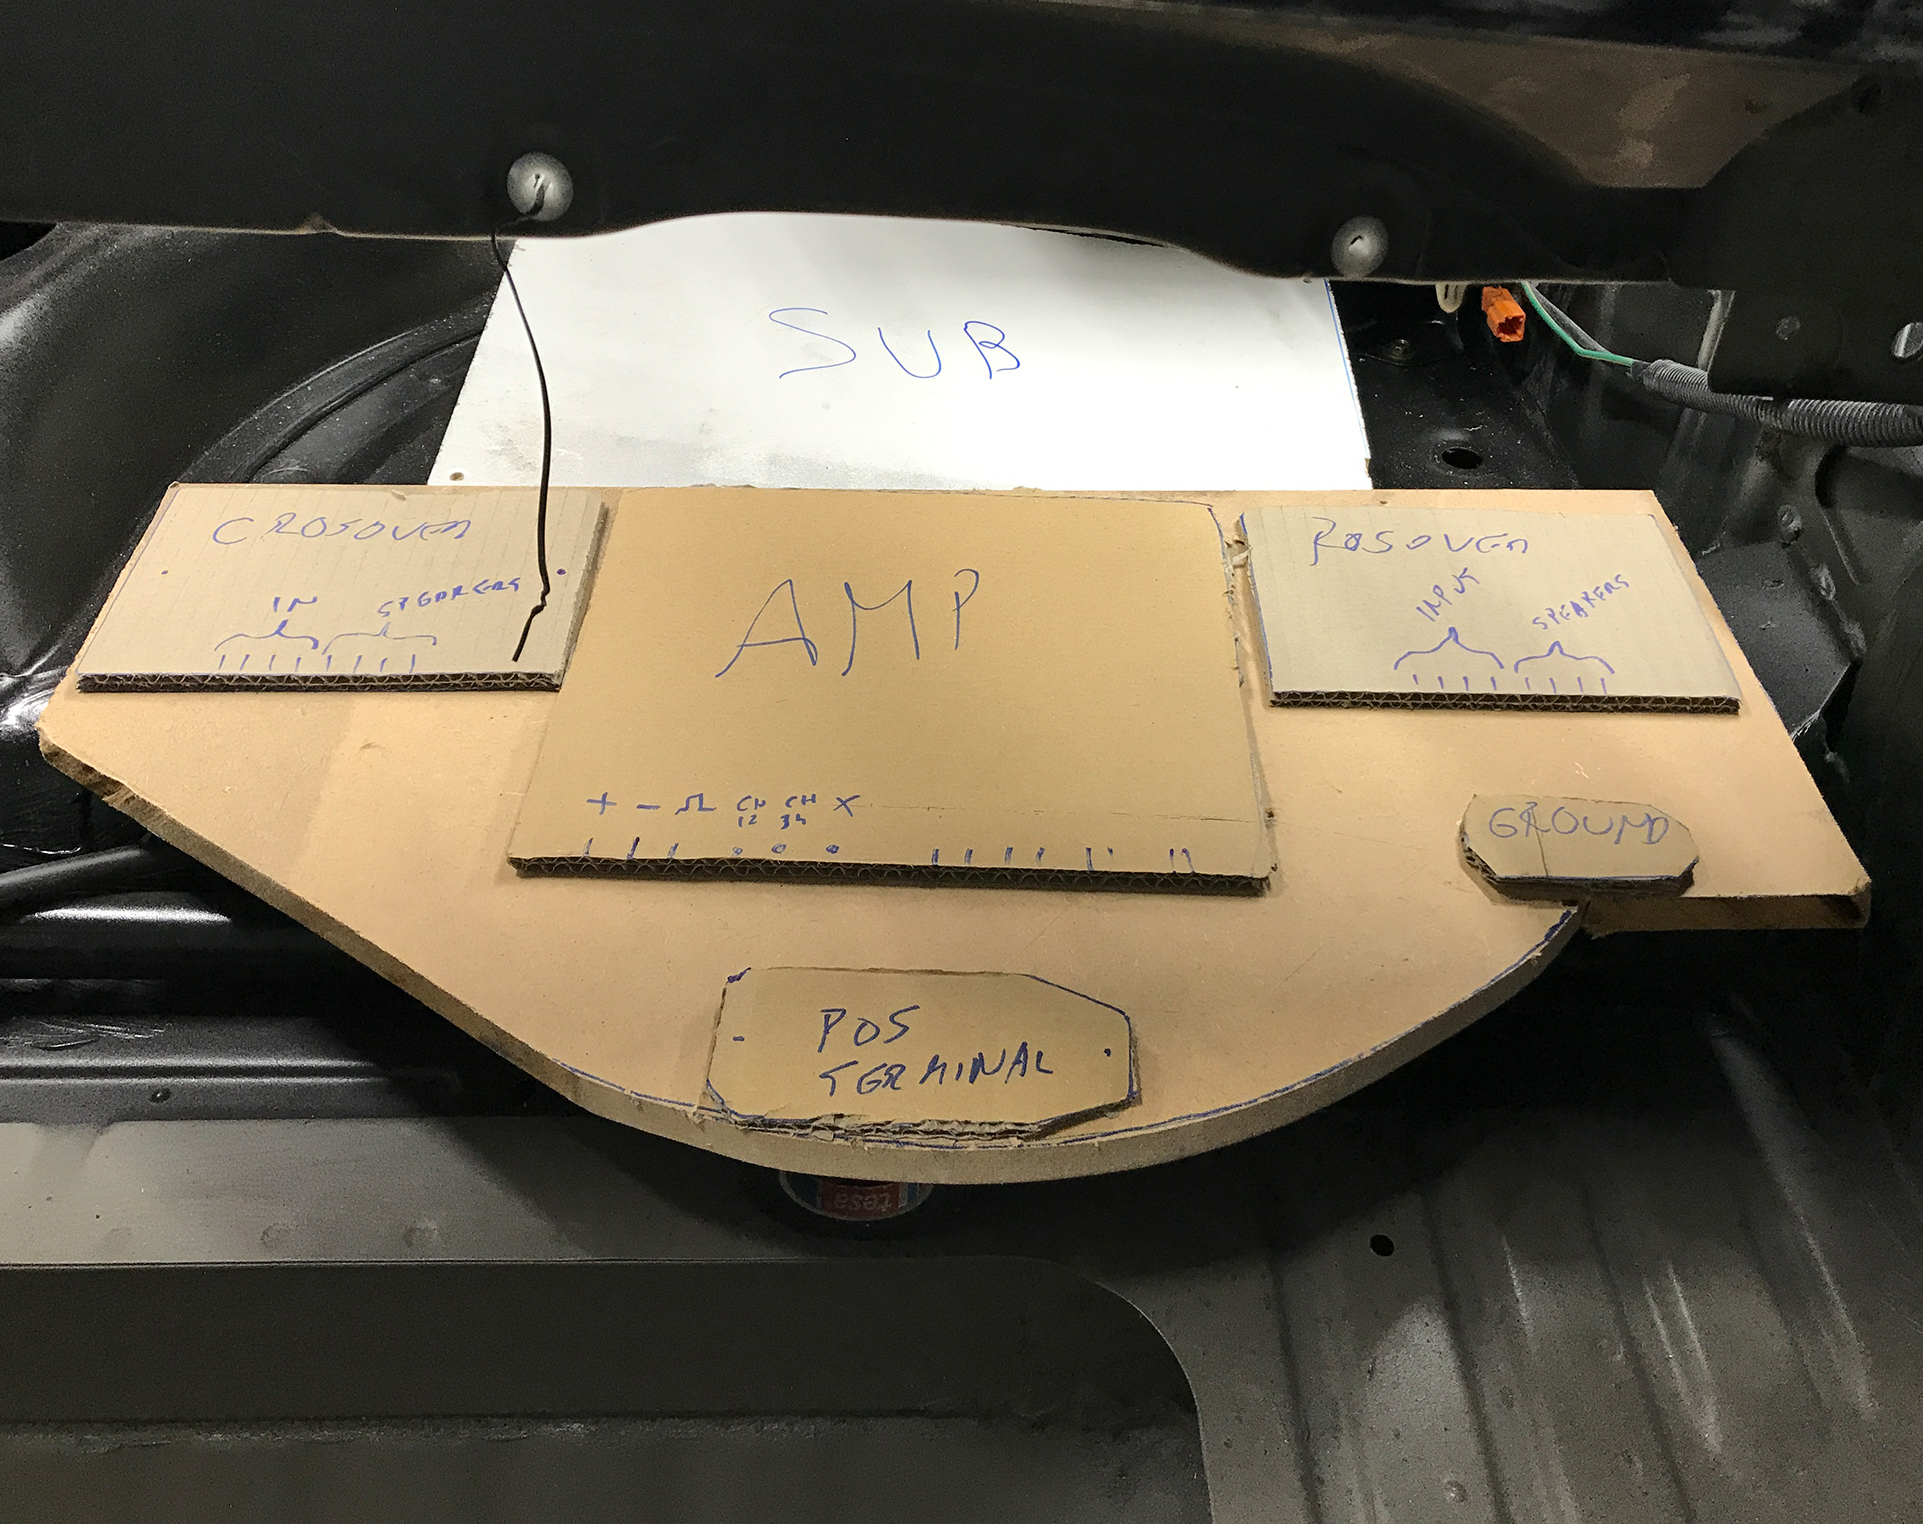
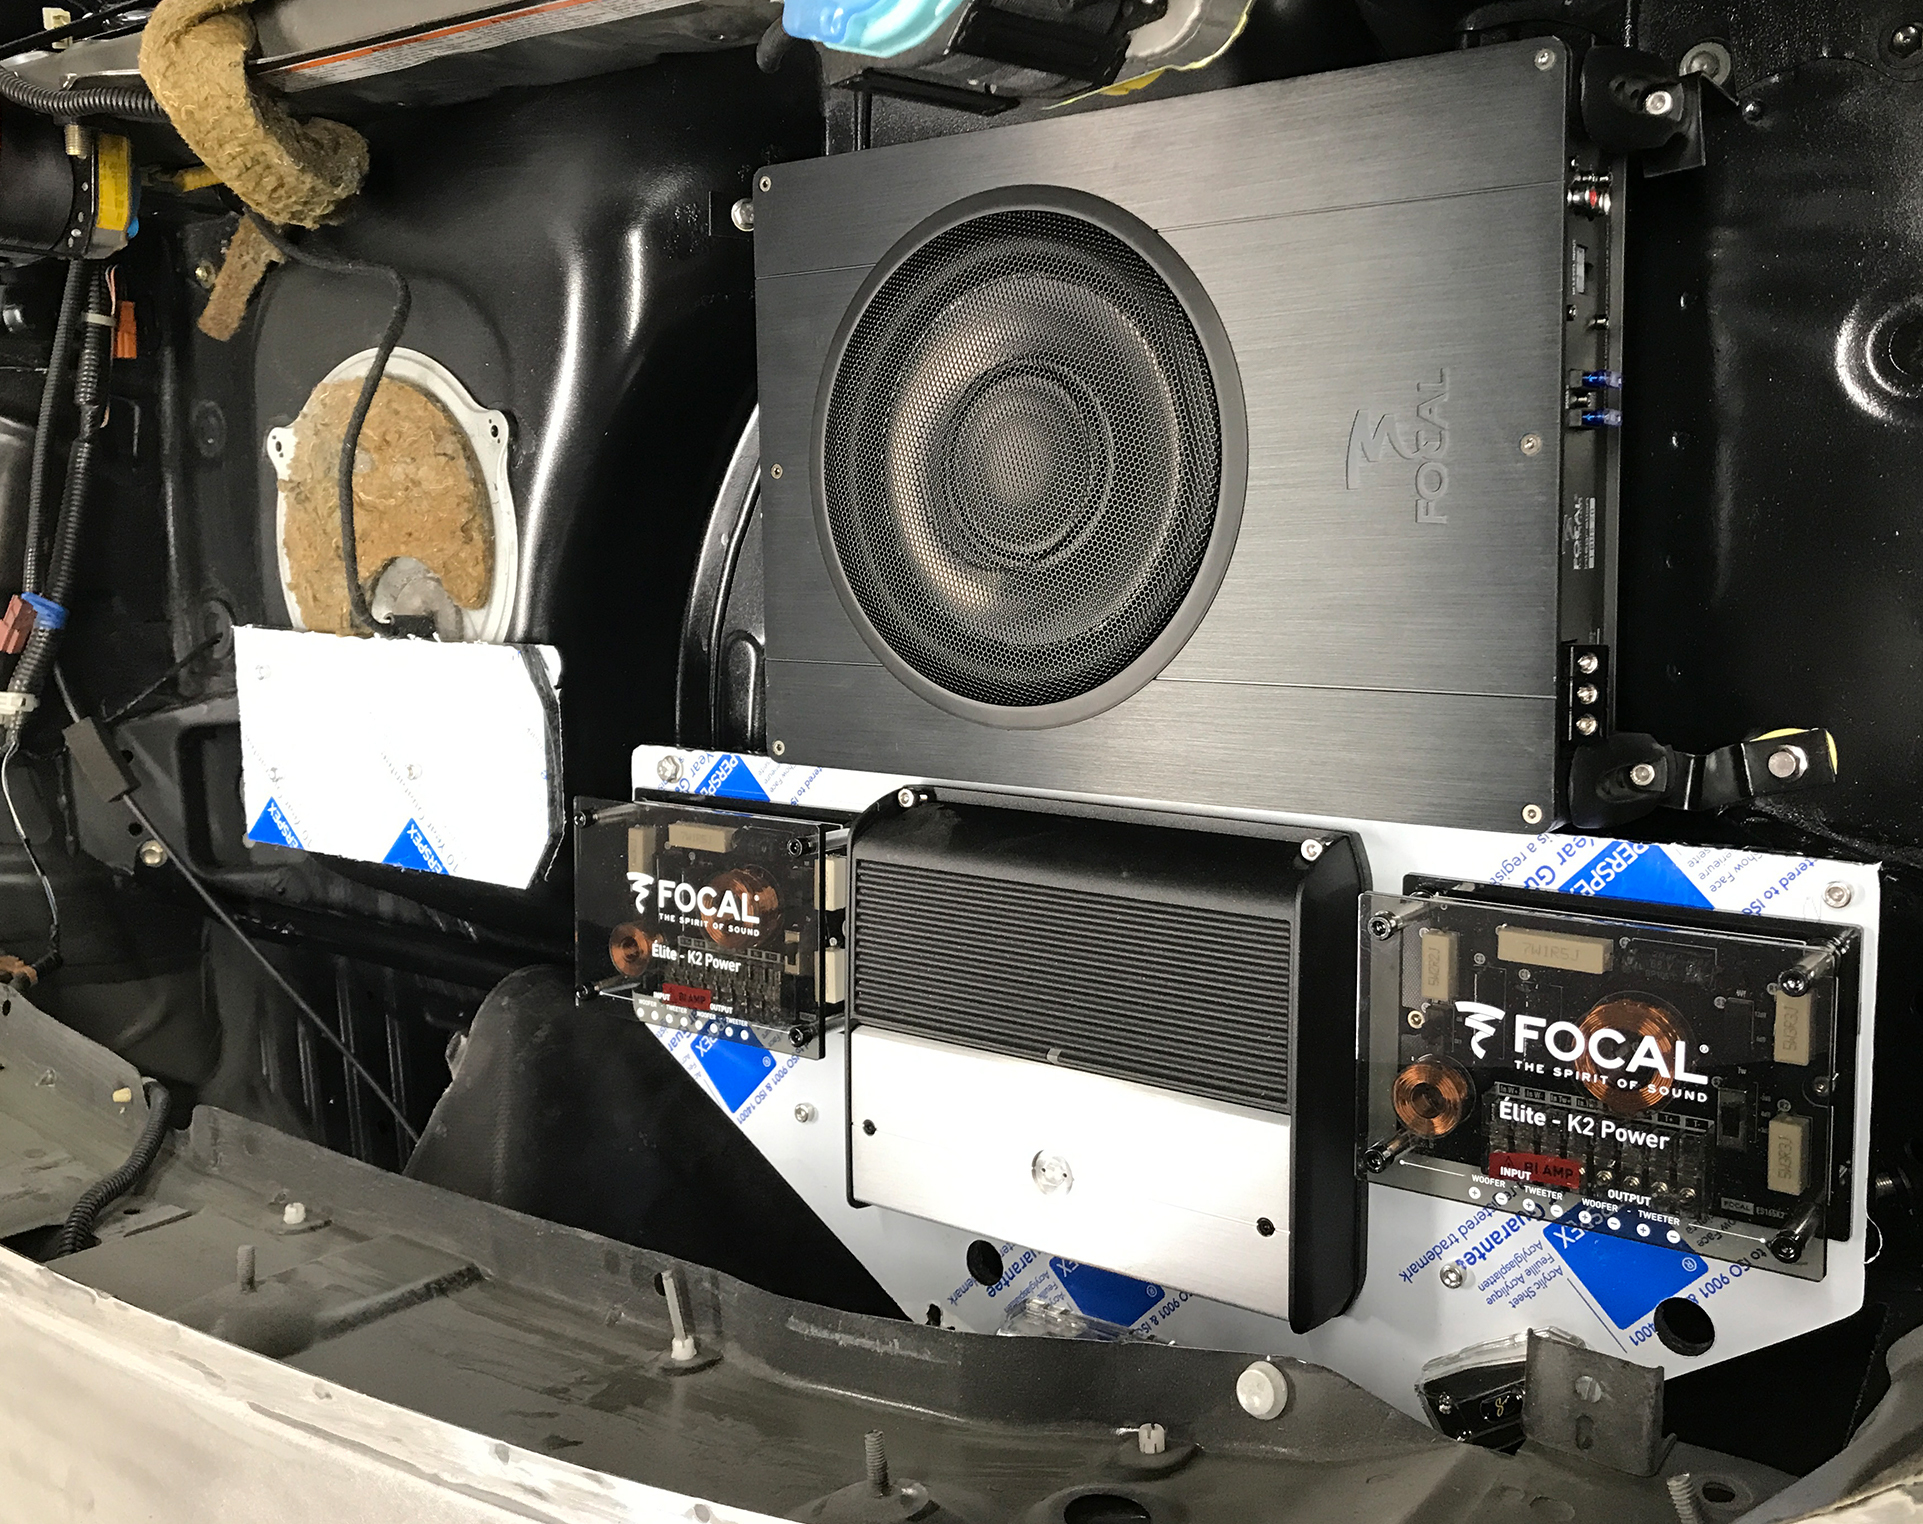
After I was happy with the layout, I moved on to the next phase—making it from the acrylic sheet itself and creating brackets to support the installation board in place.
The small board above the fuel tank holds the secondary amplifier for the roll hoop protection speakers.
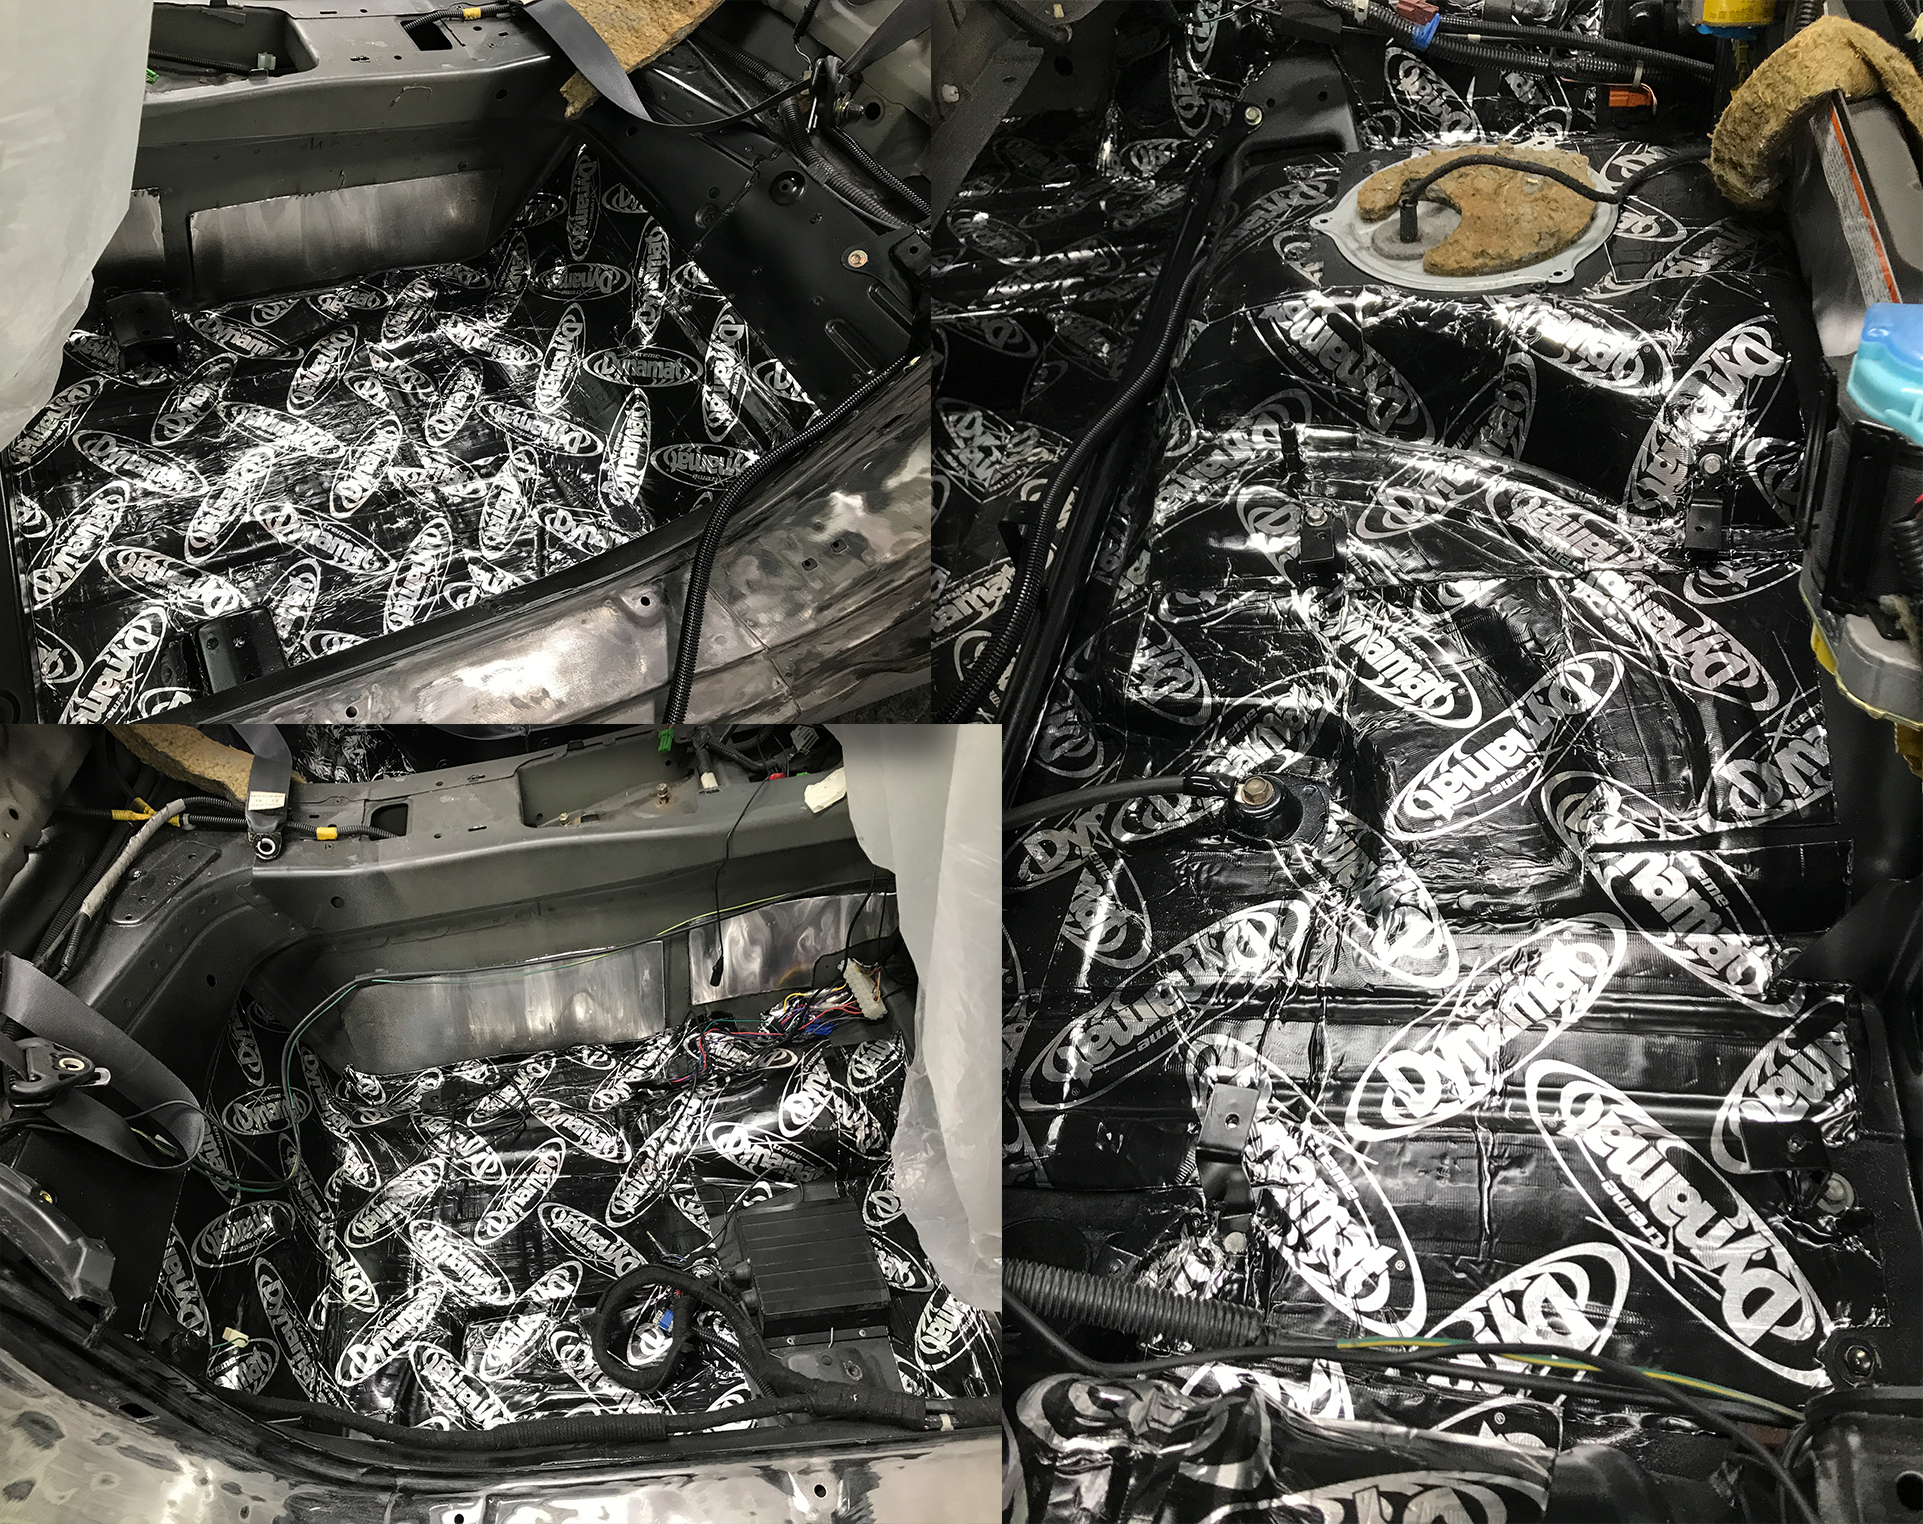
However, first, I needed to lay down the sound-deadening material to prevent unwanted vibrations. I opted for Dynamat—and yes, this isn’t going to be light or cheap.
I used 10 sheets of the standard Dynamat for the floor panels and 3 sheets of Dynamat SuperLite for the doors. The installation is very simple—cut the desired piece and use a small metal roller to press out any air bubbles.
I’m aware of some cheaper brands, and they would probably perform just as well as Dynamat. However, I didn’t feel like experimenting, and I didn’t want to compromise on quality.
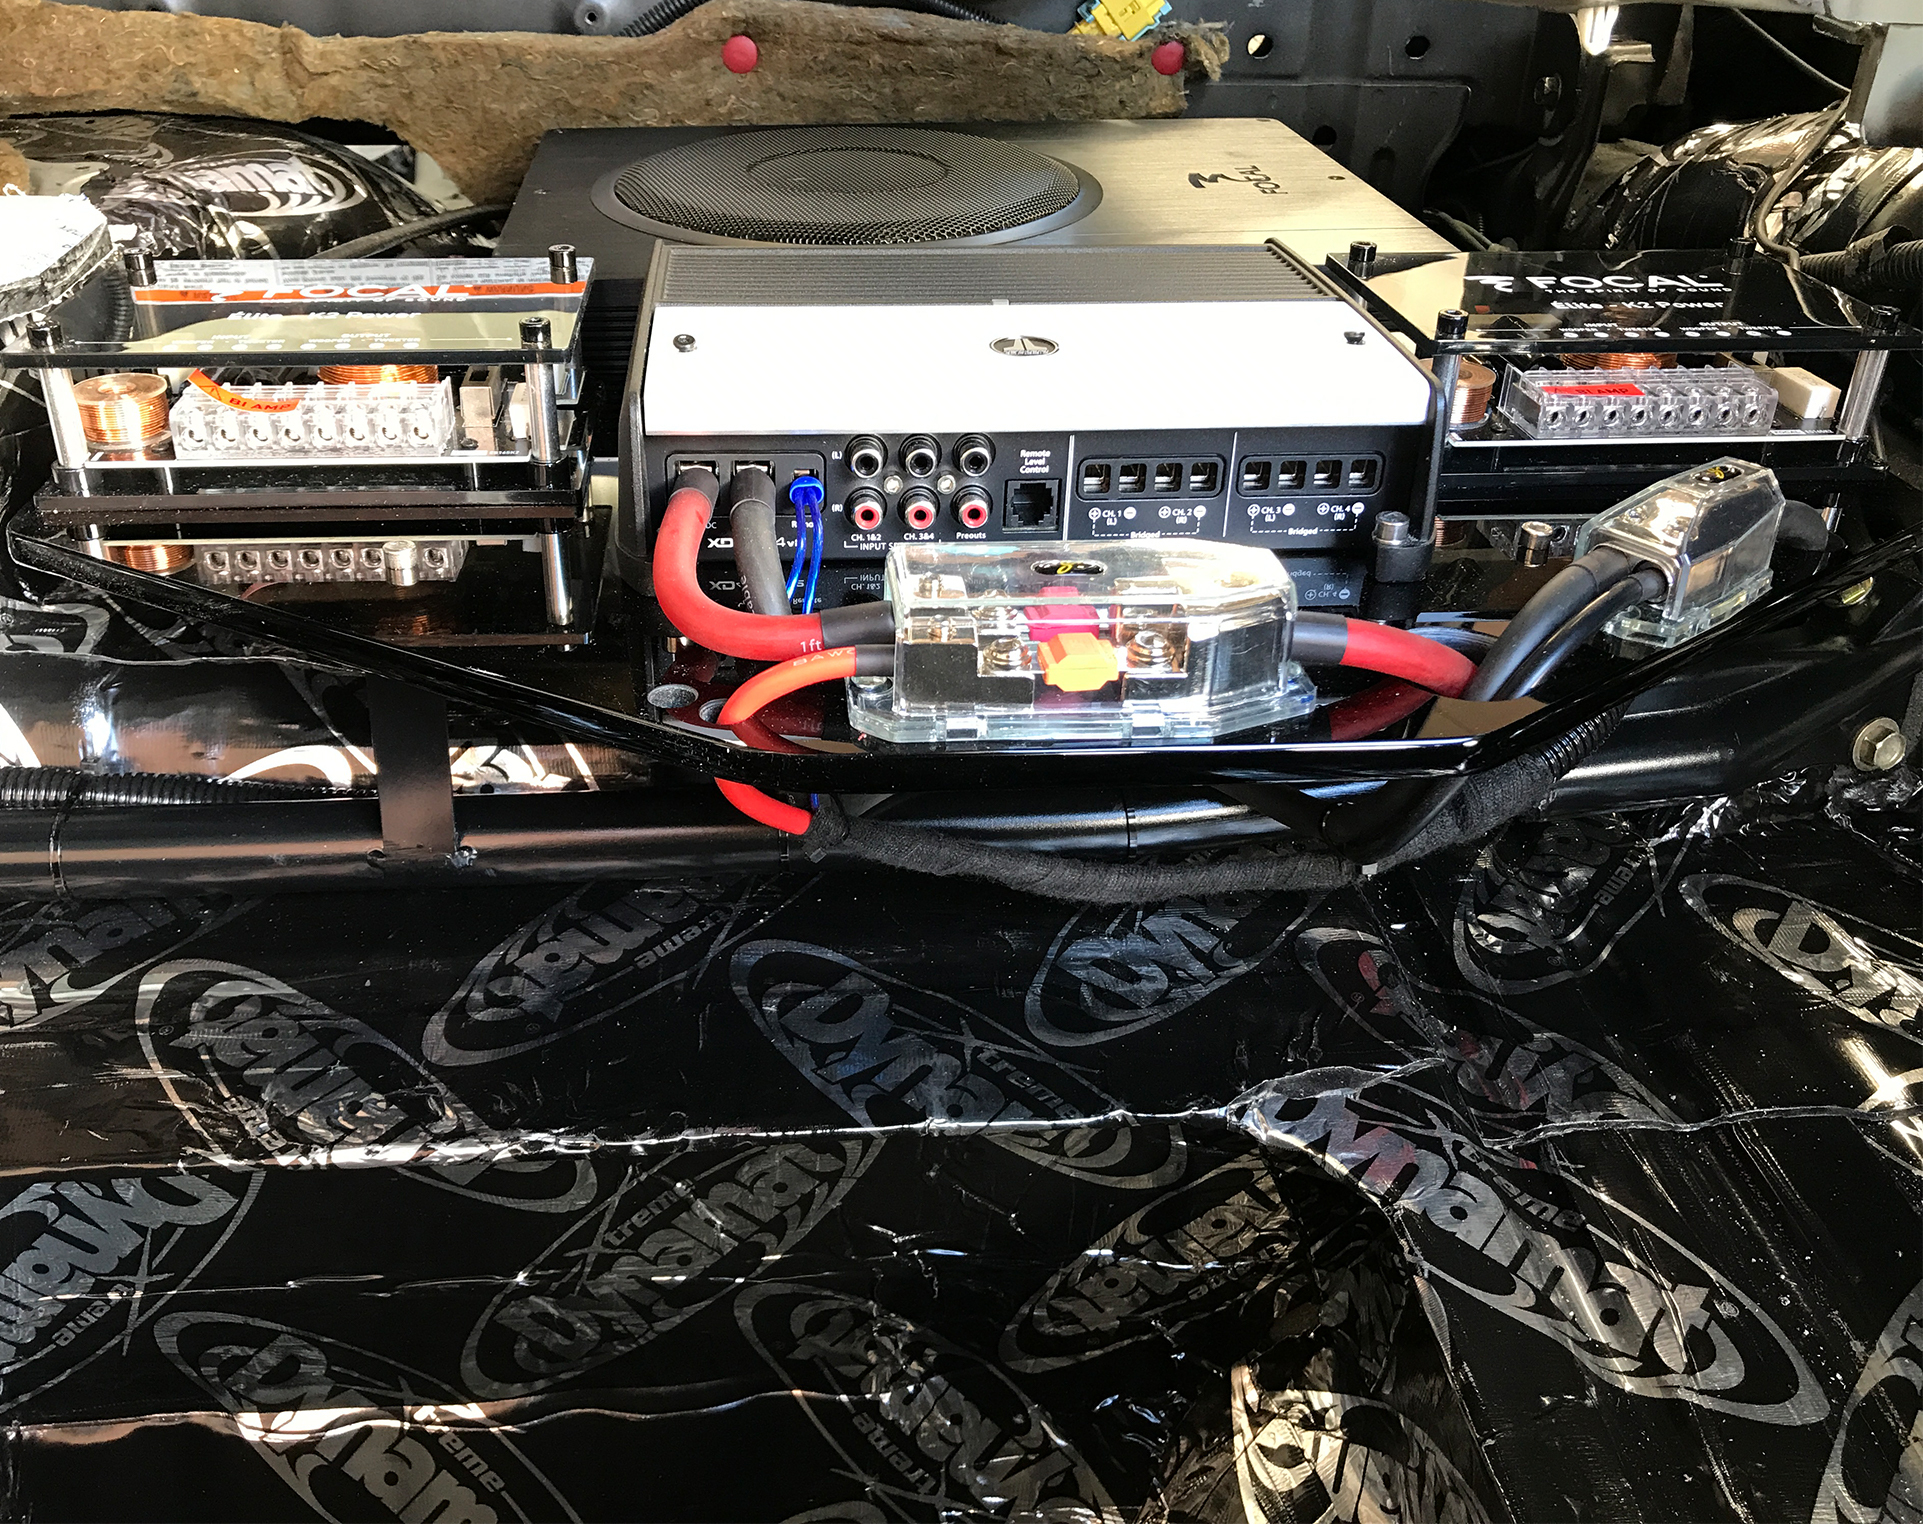
Once the sound-deadening treatment was done, it was time to install the amp, subwoofer, and wire the power supply.
The power system for such an installation requires a dedicated fuse placed right next to the battery on the positive wire. This is a safety measure—in case the wire insulation gets damaged and shorts against the chassis. The fuse is mounted on a bracket that I made from an aluminum sheet, giving it a factory-like look rather than something that feels like an afterthought.
I used the car chassis as the negative ground connection.
Remember When I Was Building the Engine?
Well, as part of the rebuild, I also upgraded the power wires. Here’s a comparison between the original and the new ones.
To make these, I used high-quality 4GA multi-core wires and a hydraulic crimping tool.
For the battery connection, I installed a multi-output battery terminal to replace the original one.
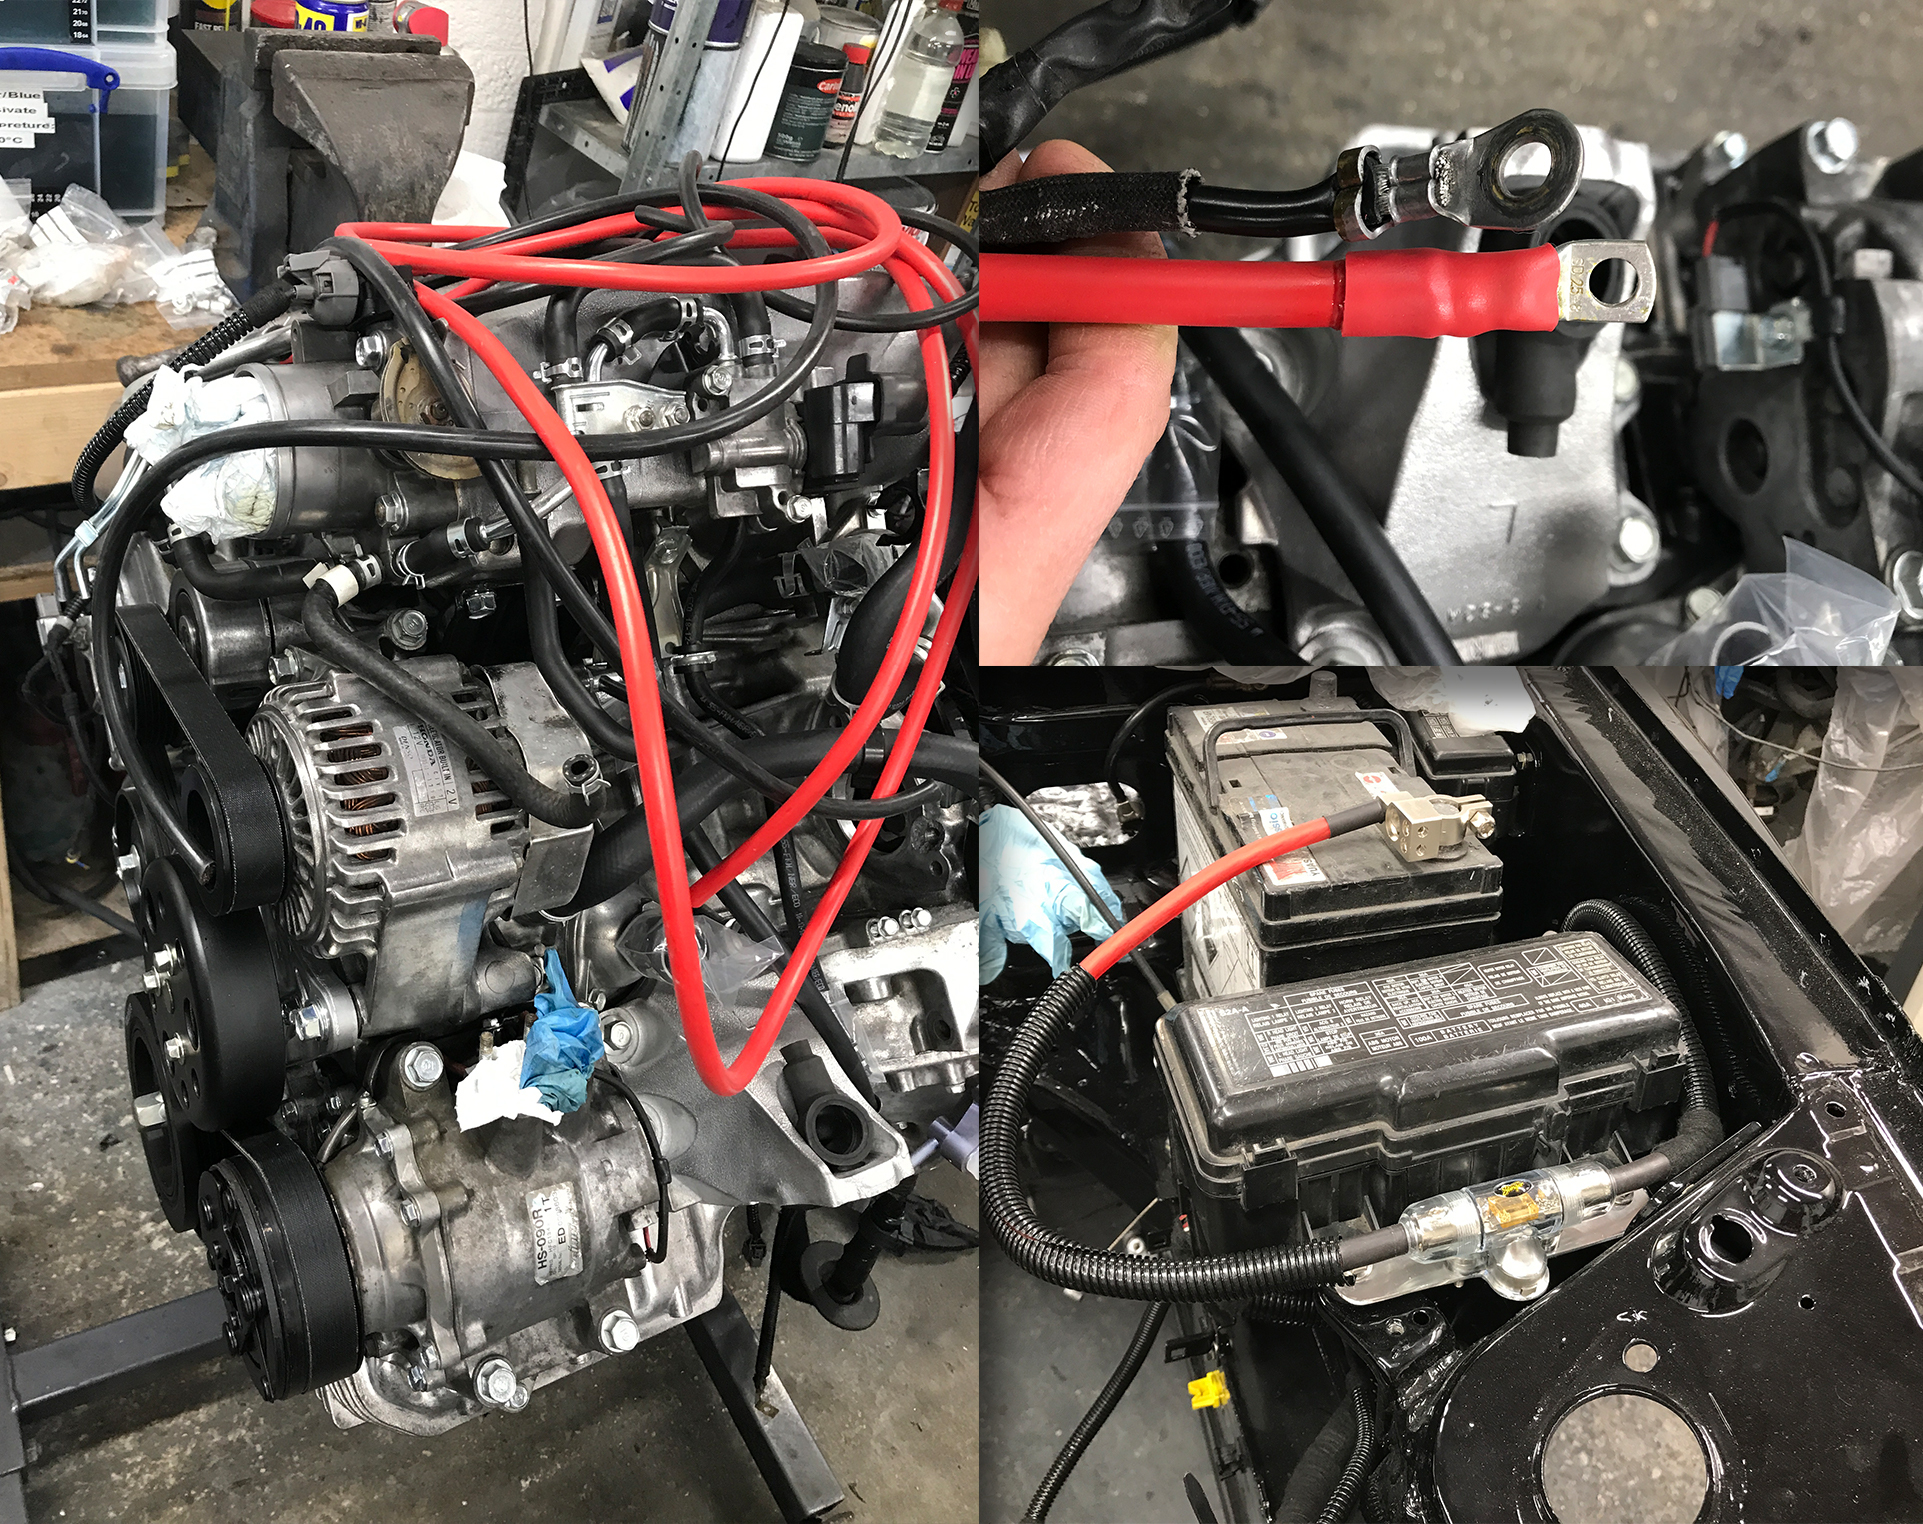
Now that I have power, I can connect the amplifiers and start the initial tuning process.
The 4GA wire runs from the battery straight to a secondary fuse box. This fuse box distributes power to the main amplifier, subwoofer, and secondary amplifier.
There is also a blue wire, which serves as the power ON/OFF control for the amplifiers and subwoofer. This is controlled by the head unit, ensuring that the battery doesn’t drain when the car is switched off.
Now to the Tuning Process
This is just the first stage of tuning. Before I even plug in the speakers, I want to make sure the amplifier is set correctly and that the sound is not clipping.
There are several ways to do this. Some dedicated tools use diodes to indicate clipping. However, I happen to have the ultimate precision tool for tuning any sound system—the mighty oscilloscope.
Well… at least I thought I had one.
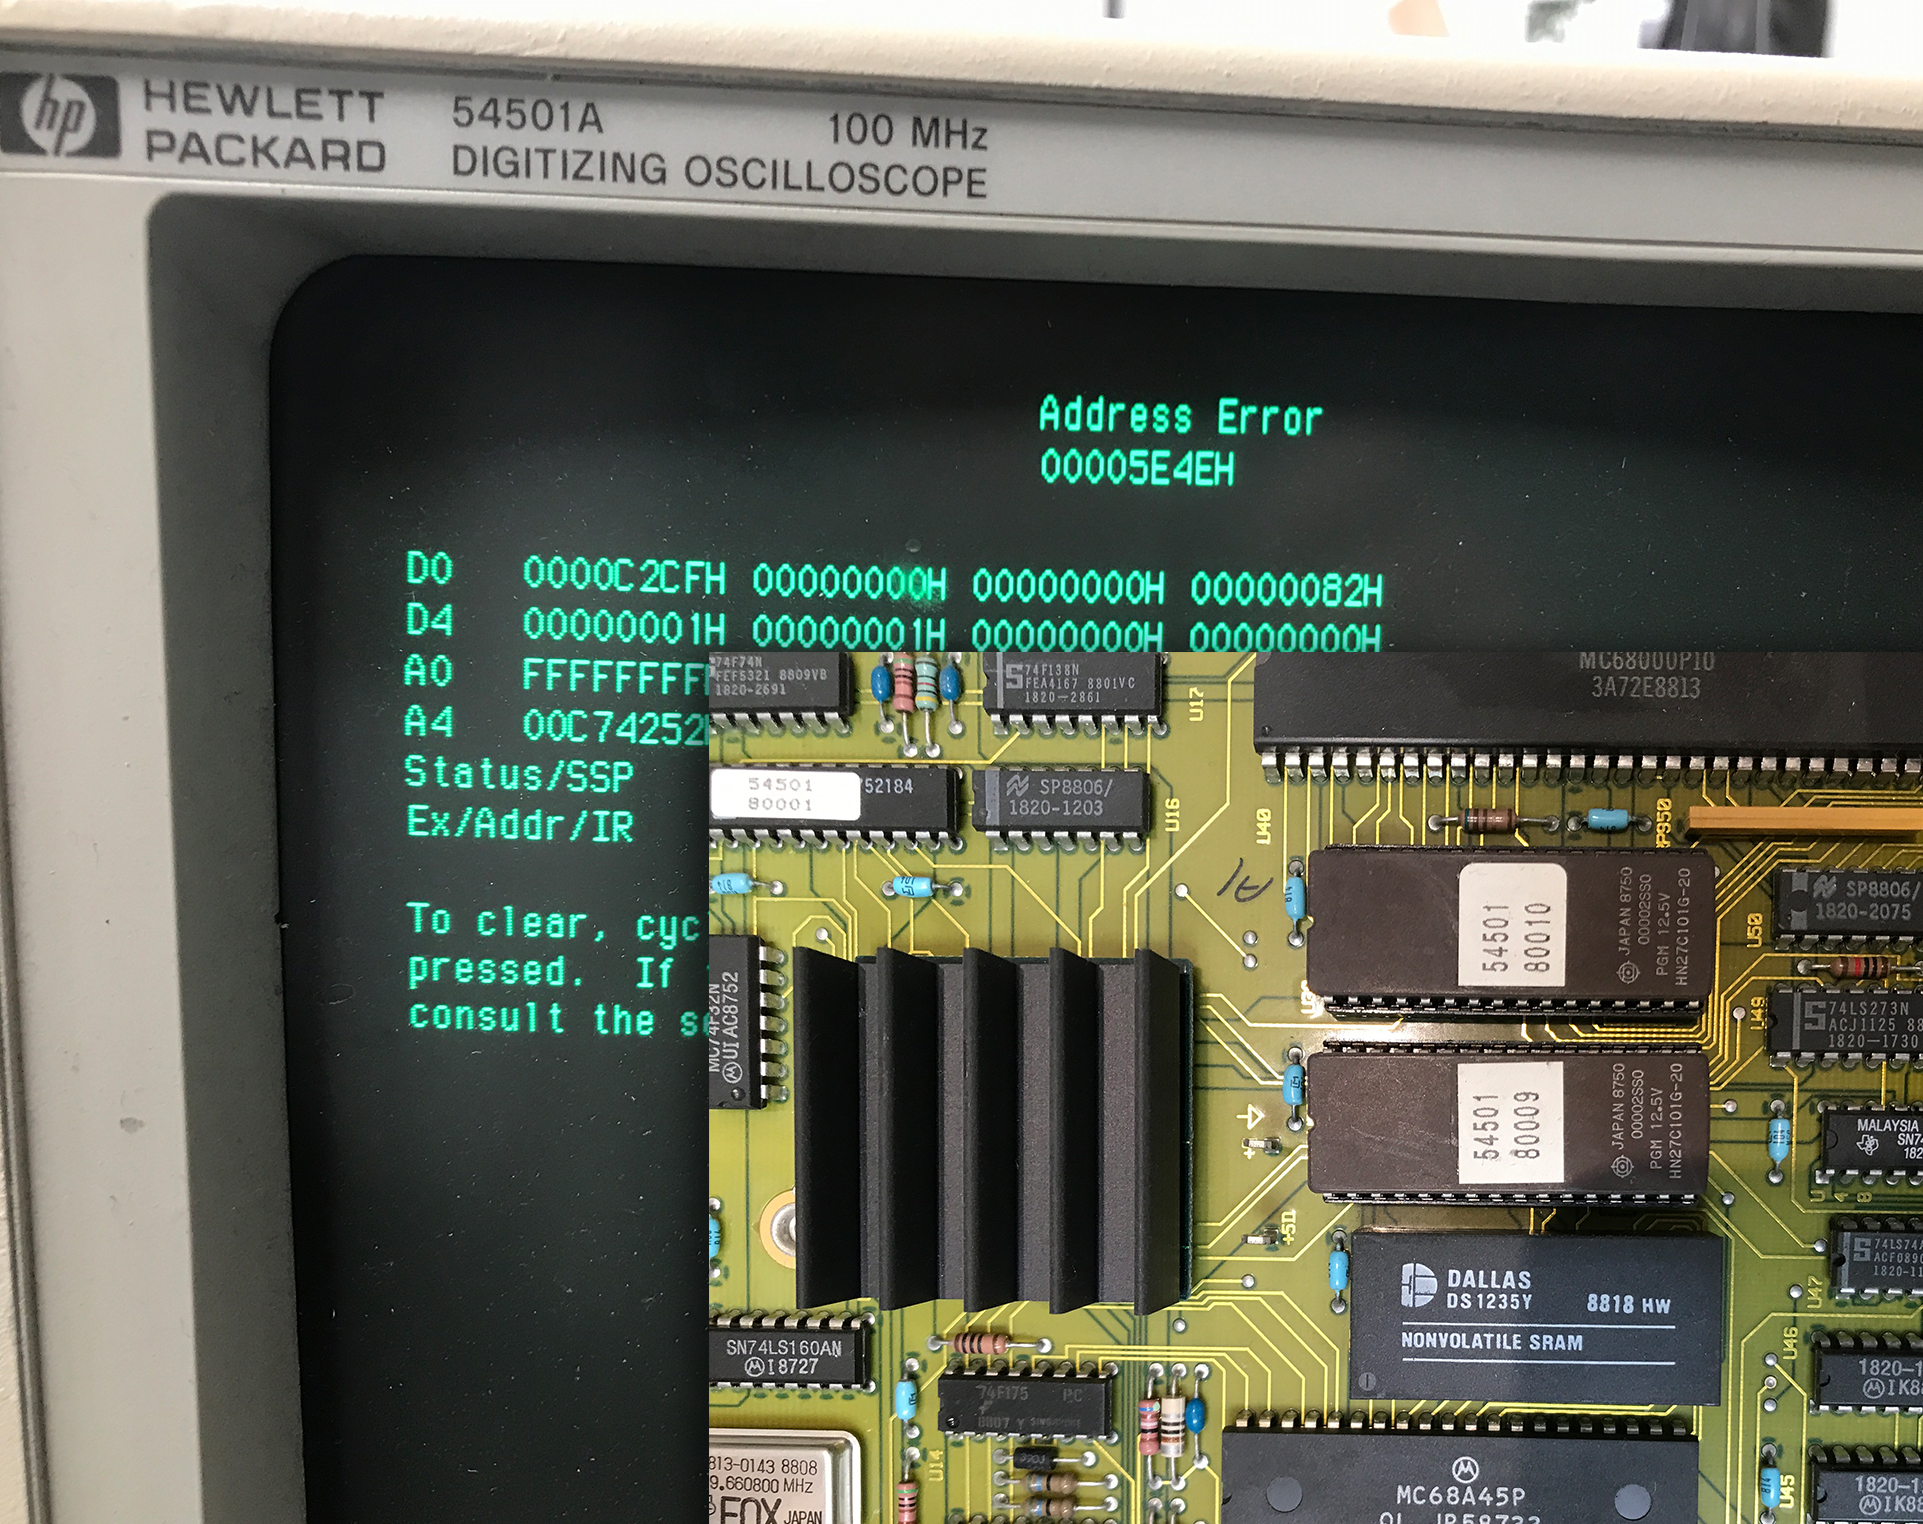
Long story short, my oscilloscope is several decades old, and I hadn’t used it for a few years. Unfortunately, when I tried turning it on, it gave me a memory error.
The good news? One of my previous careers was as an electronics engineer, so I was able to identify the faulty memory chip causing the issue. To my surprise, I was even able to buy a brand-new replacement—yes, still available to buy today!
I also discovered that these chips have built-in batteries that last around 10 years.
Well, at least I fixed it, and the tuning can now continue!
Tuning Process & Speaker Wiring Challenges
To outline the tuning process, I connected the head unit with the equalizer set to flat across all frequencies. Using my phone, I played a sound wave generator set to a sinusoidal wave.
With the sound level set high, I began tuning the amplifier gain to the point where the wave remained clean and clear without clipping the tops. I repeated this for all four channels.
The subwoofer level will be adjusted later once the speakers are installed.
Fast Forward a Bit…
Skipping ahead to the point where the car has been resprayed, the doors have been refitted, and the anti-roll hoops (from the 2006+ model) have been installed. The interior is still not in place at this stage.
To connect the speakers, I decided to use the recommended speaker cable and needed two 39ft rolls of it. The cable in question? Focal ES25—100% oxygen-free copper wire.
The Brexit Dilemma
Sourcing this specialist speaker wire turned out to be quite tricky—and thanks to Brexit, also insanely hilarious.
Hear me out.
The wire is made in France, yet, thanks to Brexit, I couldn’t find a single company in Europe that would ship it to the United Kingdom.
Instead, I had to buy it from the USA and have it shipped across the ocean. Mind-boggling.
Well, I’m not getting into politics, but there’s a Brexit benefit for you right there.
Now, some might point out, "You could have just used any 13AWG oxygen-free wire."
But I wanted a matching speaker wire for my set of speakers.
USB connectivity & Speaker Setup
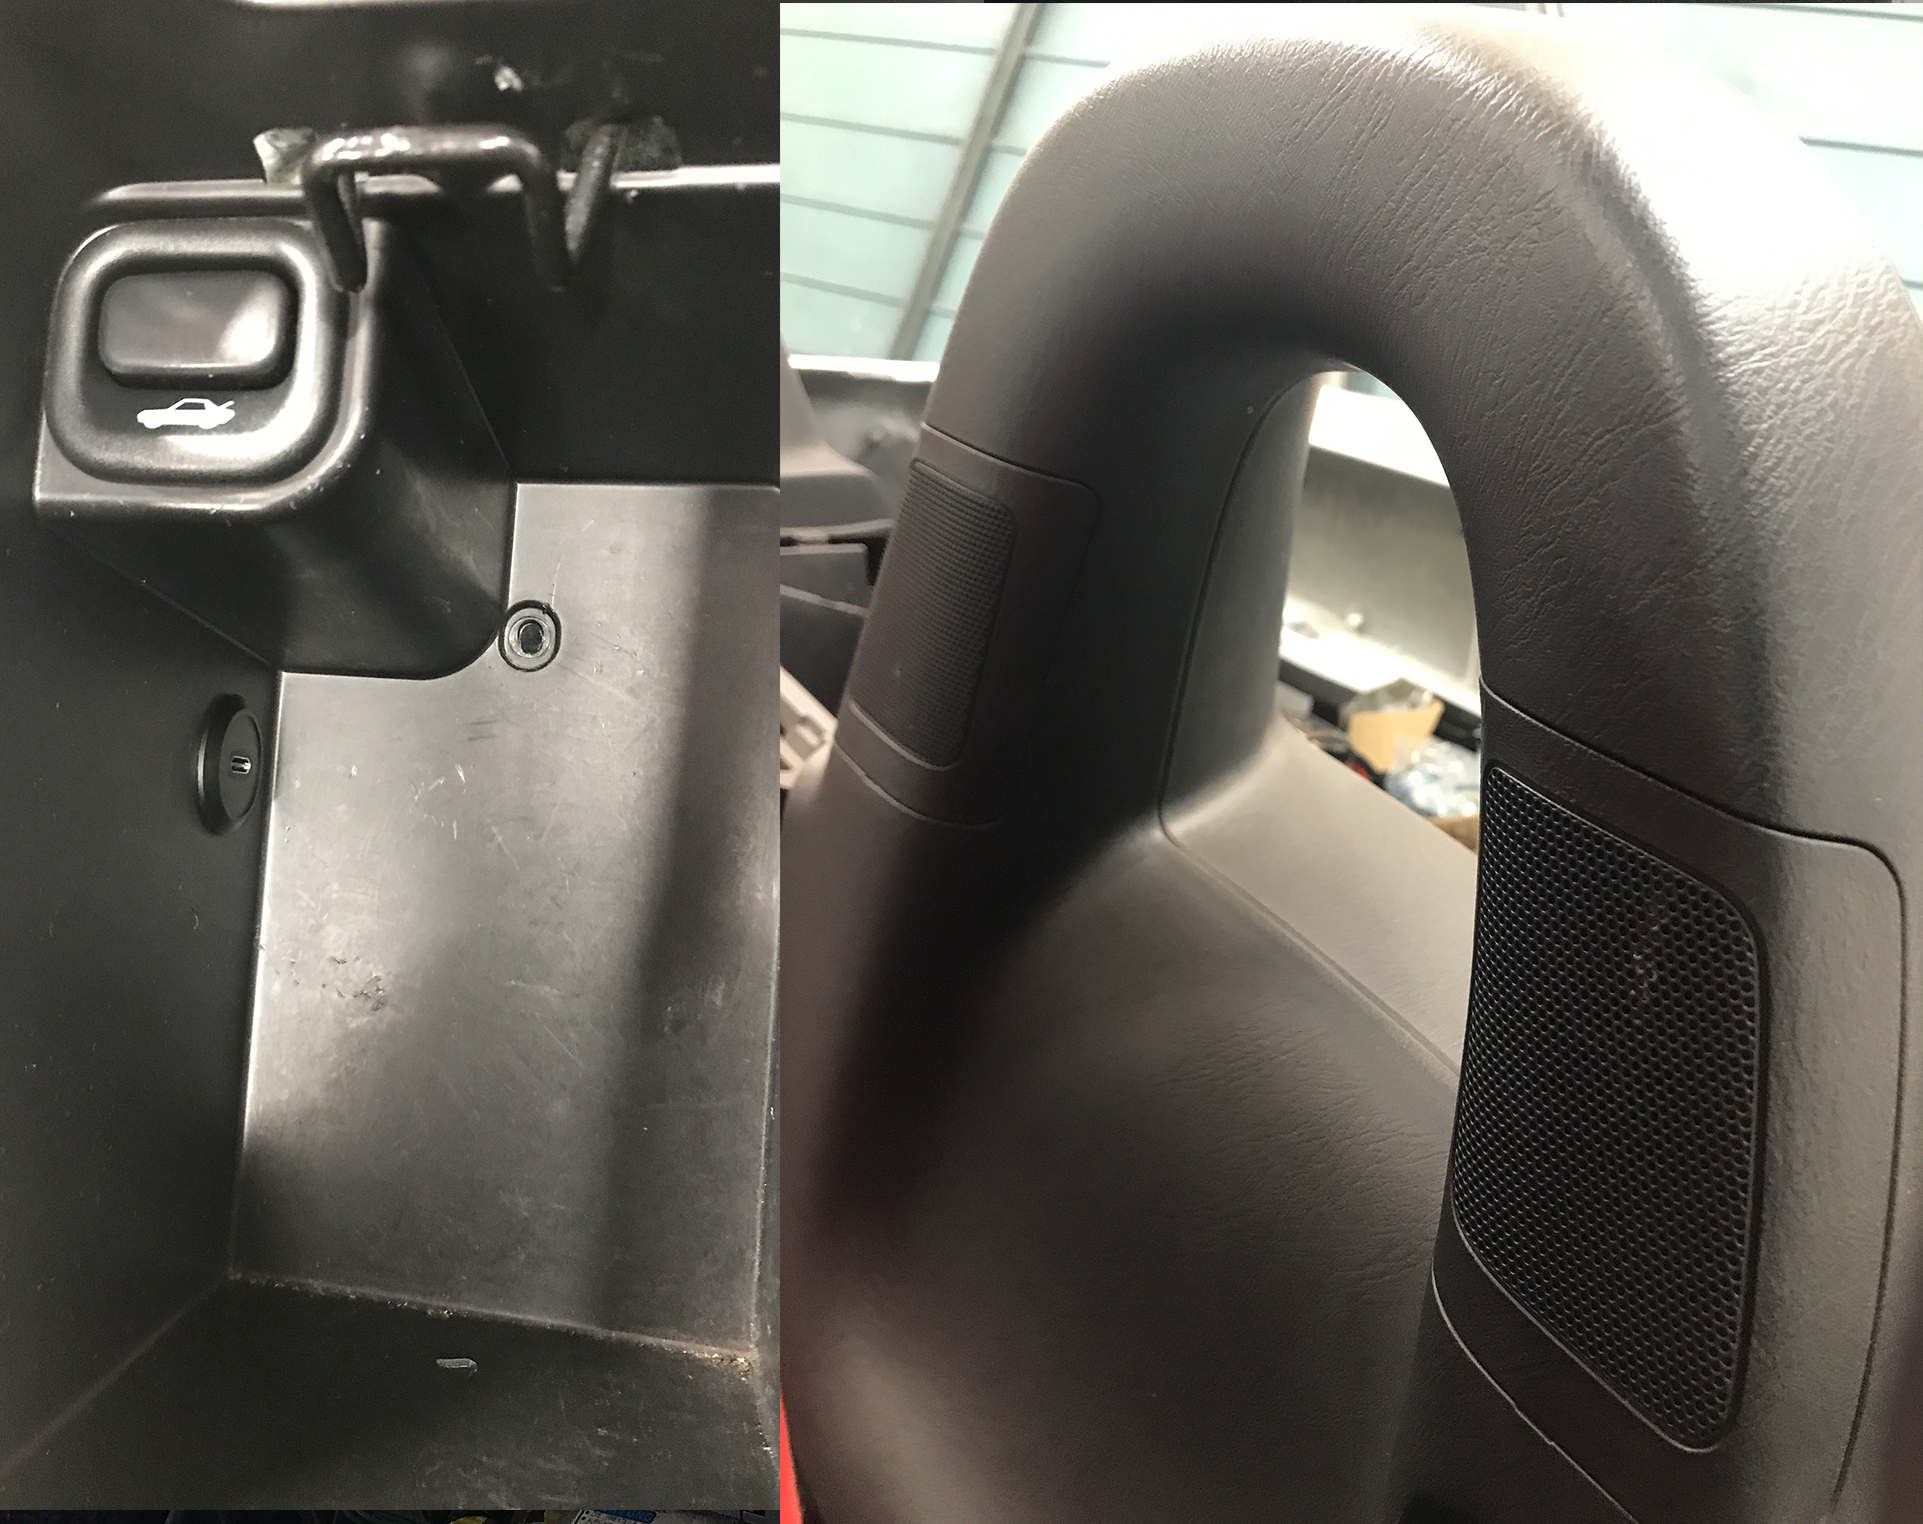
To hide my phone while charging or in case I need to use a wired connection to the head unit, I decided to install a hidden USB-C connector inside the glove box compartment.
As for the built-in crash hoop speakers, they serve only as sound fillers—filling the space behind the head with mid-high frequency sound, creating a more surround-like experience.
Although I purchased an upgraded set of speakers recommended by Modifry, they are currently sitting in the box. I might install them at some point, but I didn’t want to irreversibly modify the existing setup or cut through the original covers.
That’s a project for future me.
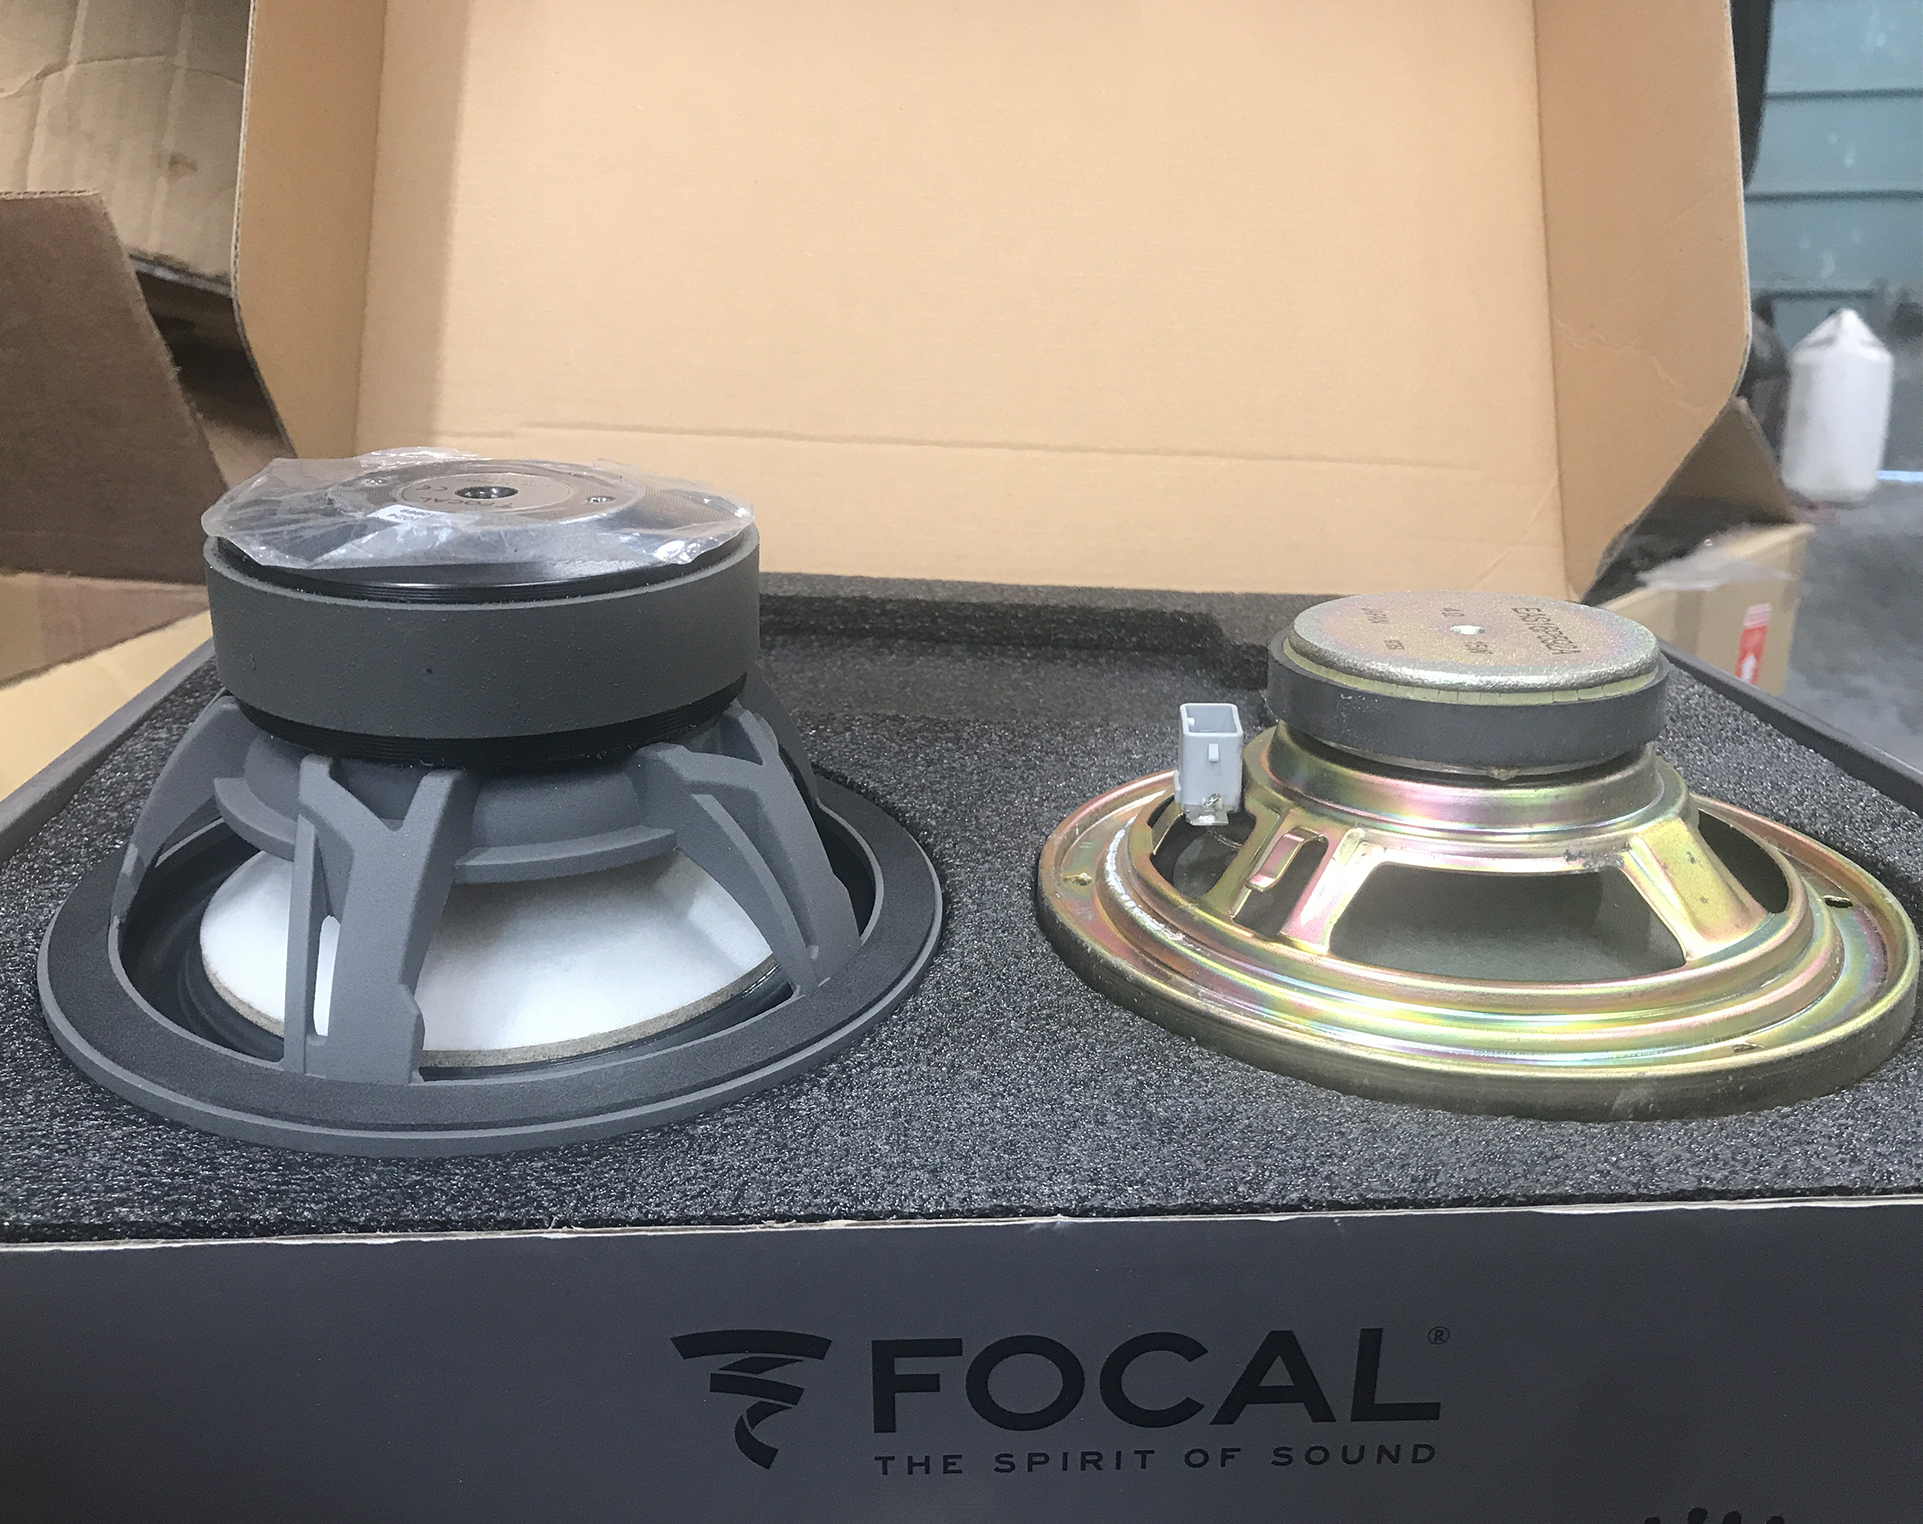
Comparing the Original Honda Speaker vs. the New Focal ES 165 K2
These speakers were chosen specifically because their depth is right at the limit of what can be fitted without modifying the door cards.
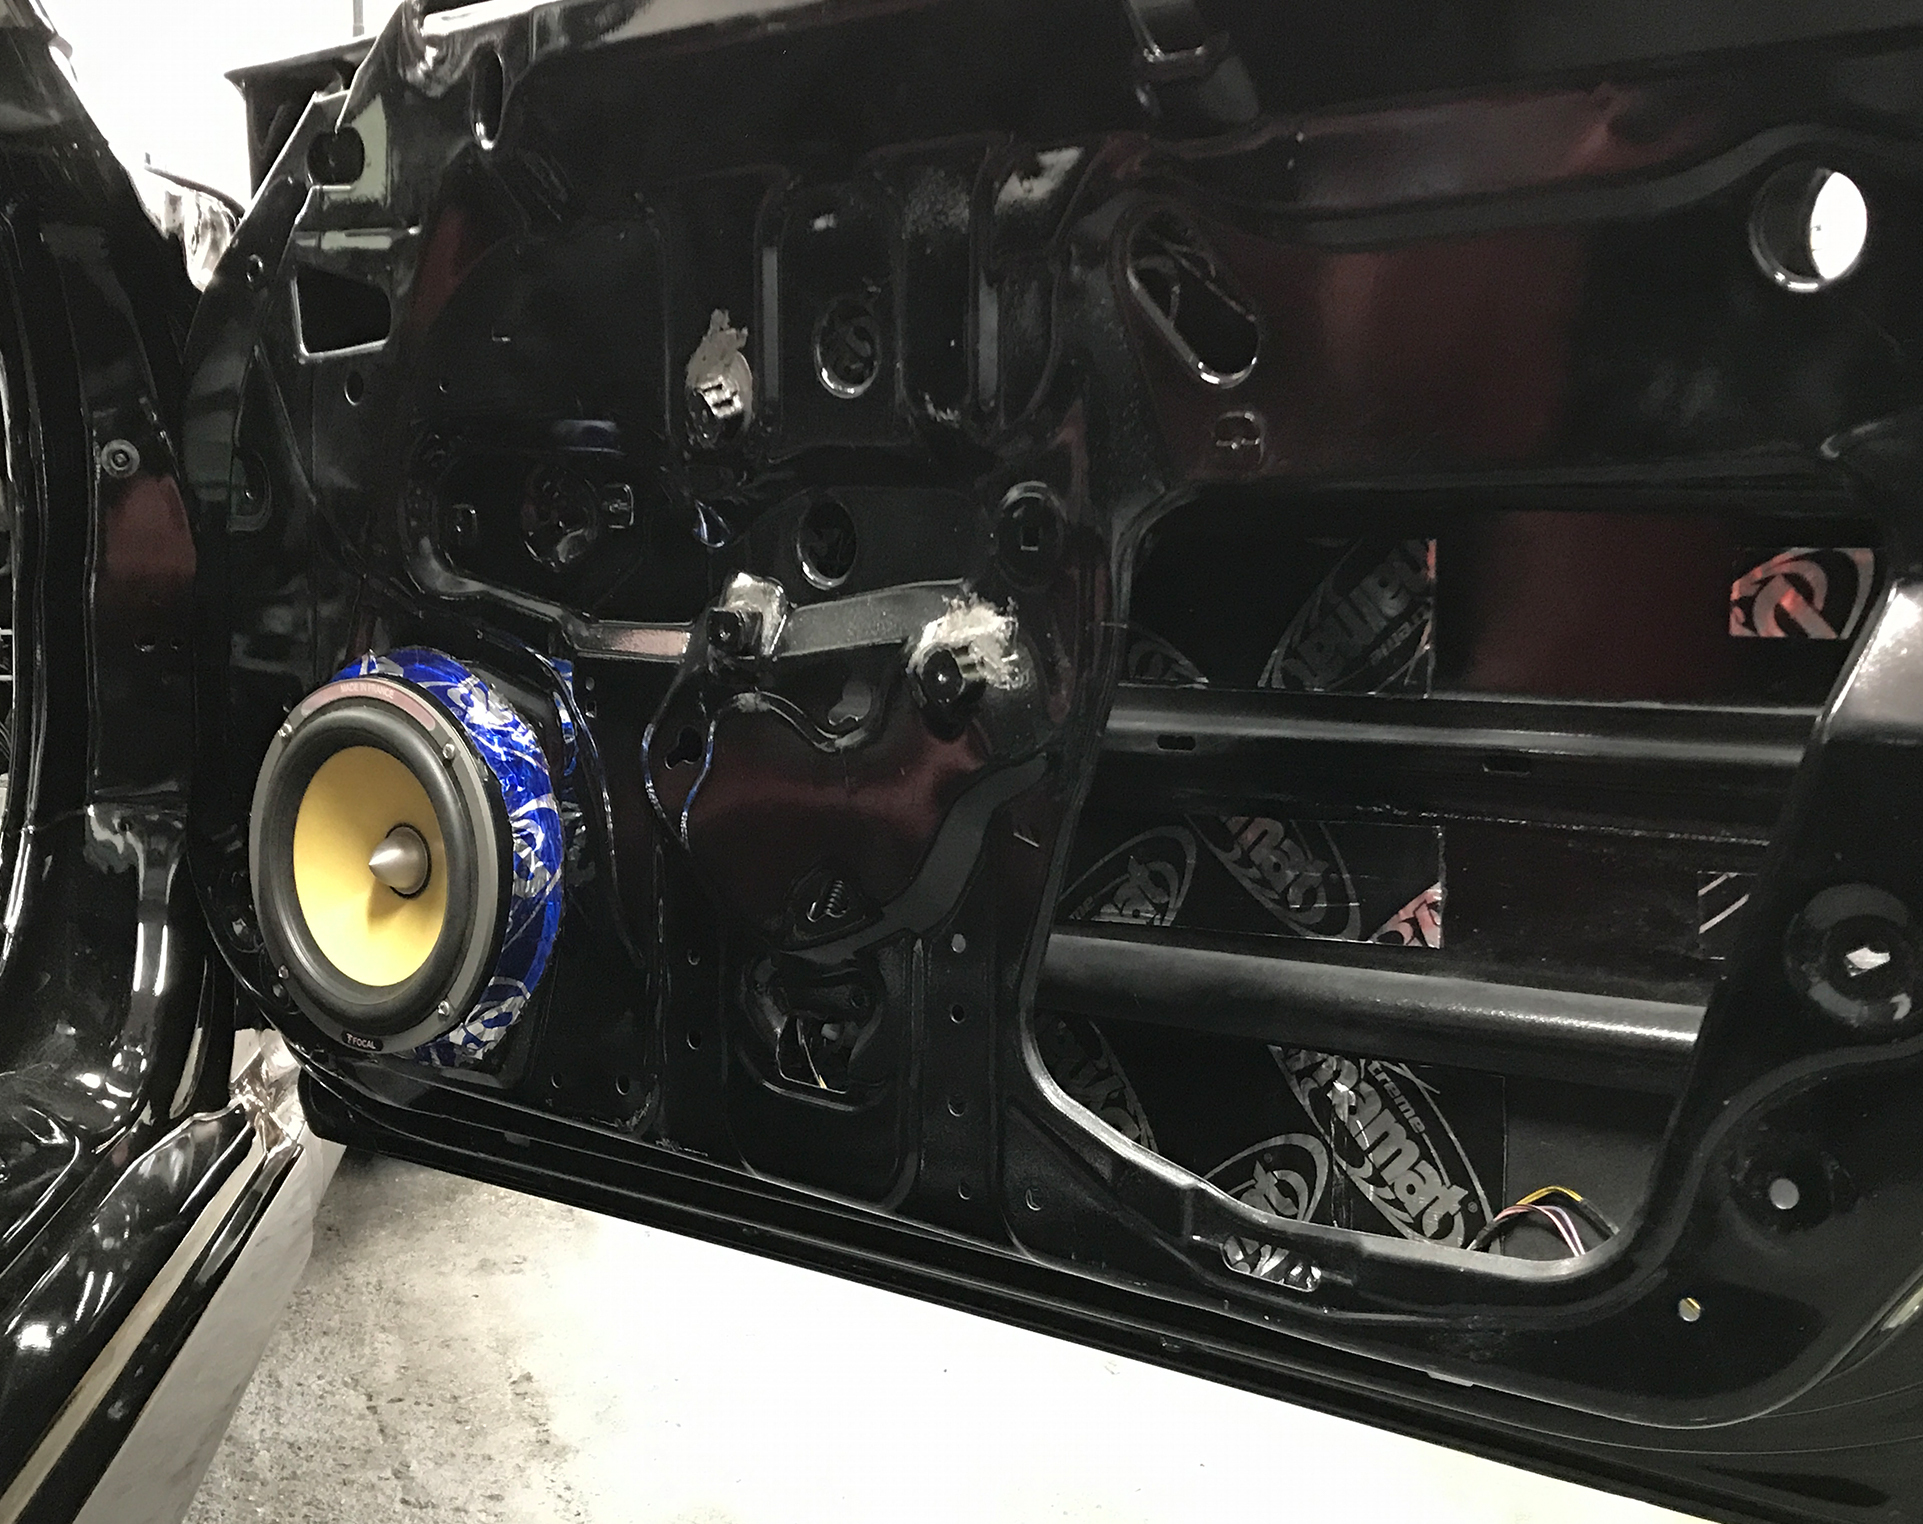
Now, installing the speakers where they belong. The large open space was later covered with sound-deadening material.
Installing the Head Unit
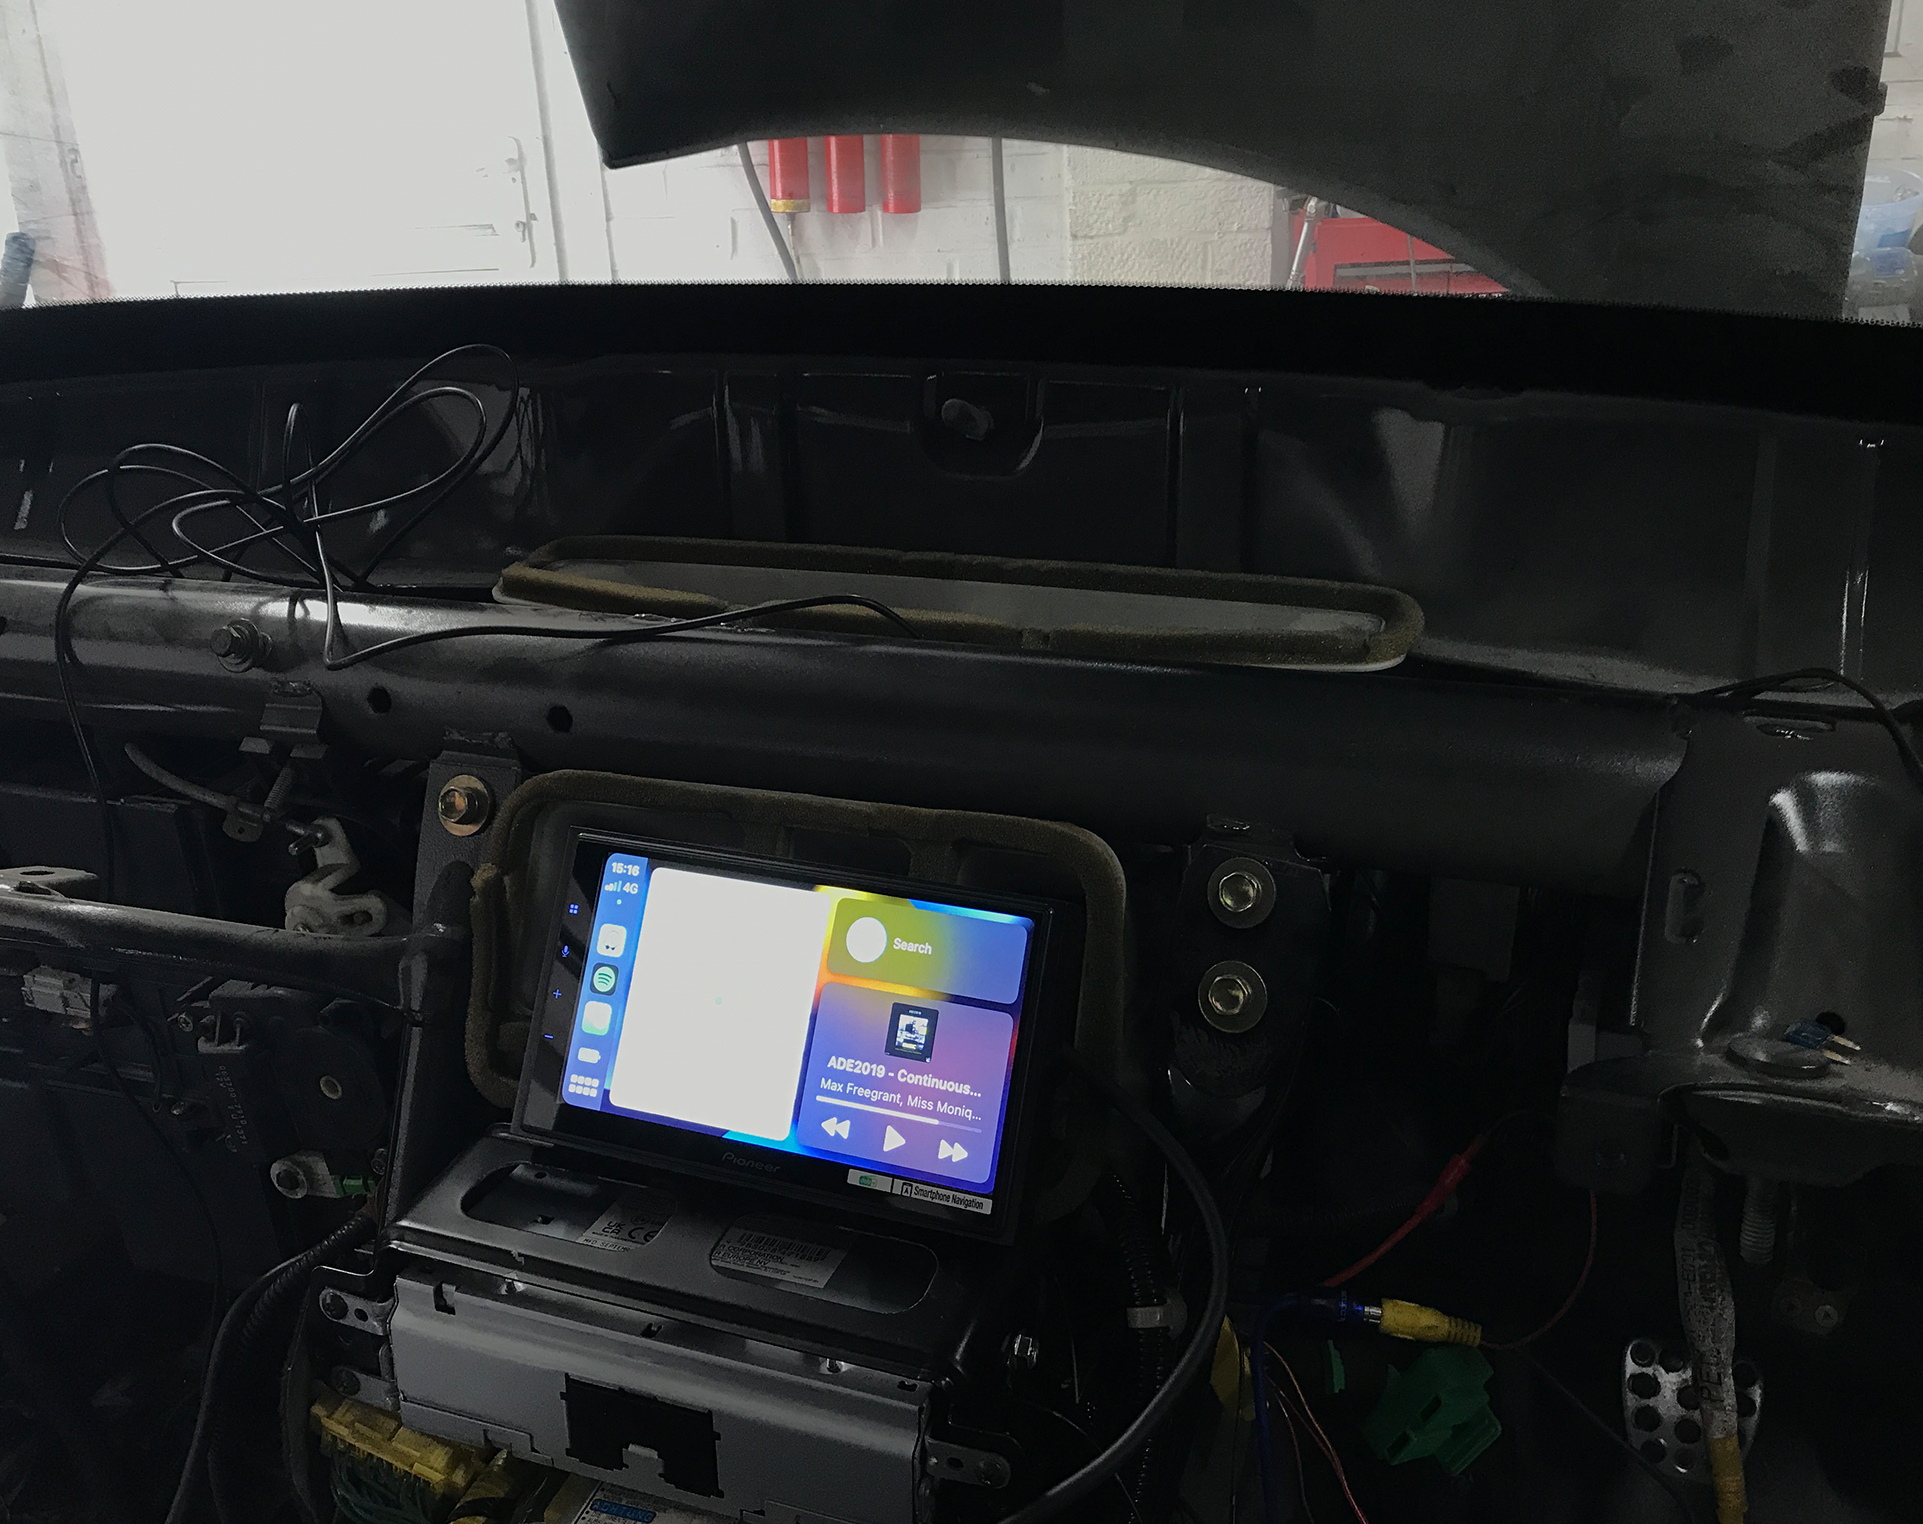
Let’s start installing the head unit. As mentioned earlier, I wanted a double-DIN unit, and I had a cunning plan for how it would be installed.
The head unit itself is single-DIN and fits perfectly into the factory single-DIN slot. The display is a separate unit and can be mounted anywhere using an extension cable.
This detachable screen will become even more important in the next installation step, as you’ll see shortly.
A Surprise Issue to Fix First
Well, there was one more surprise hiding—one I knew I had to resolve first.
One of the previous owners installed an aftermarket head unit. That wouldn’t have been a bad thing—but the bad part is that they chopped off the original connector instead of buying a proper adapter harness.
So, while I was at TGM, I sourced this part of the wiring loom from one of the spare cars they had.
What Was the Cunning Plan for the Double-DIN?
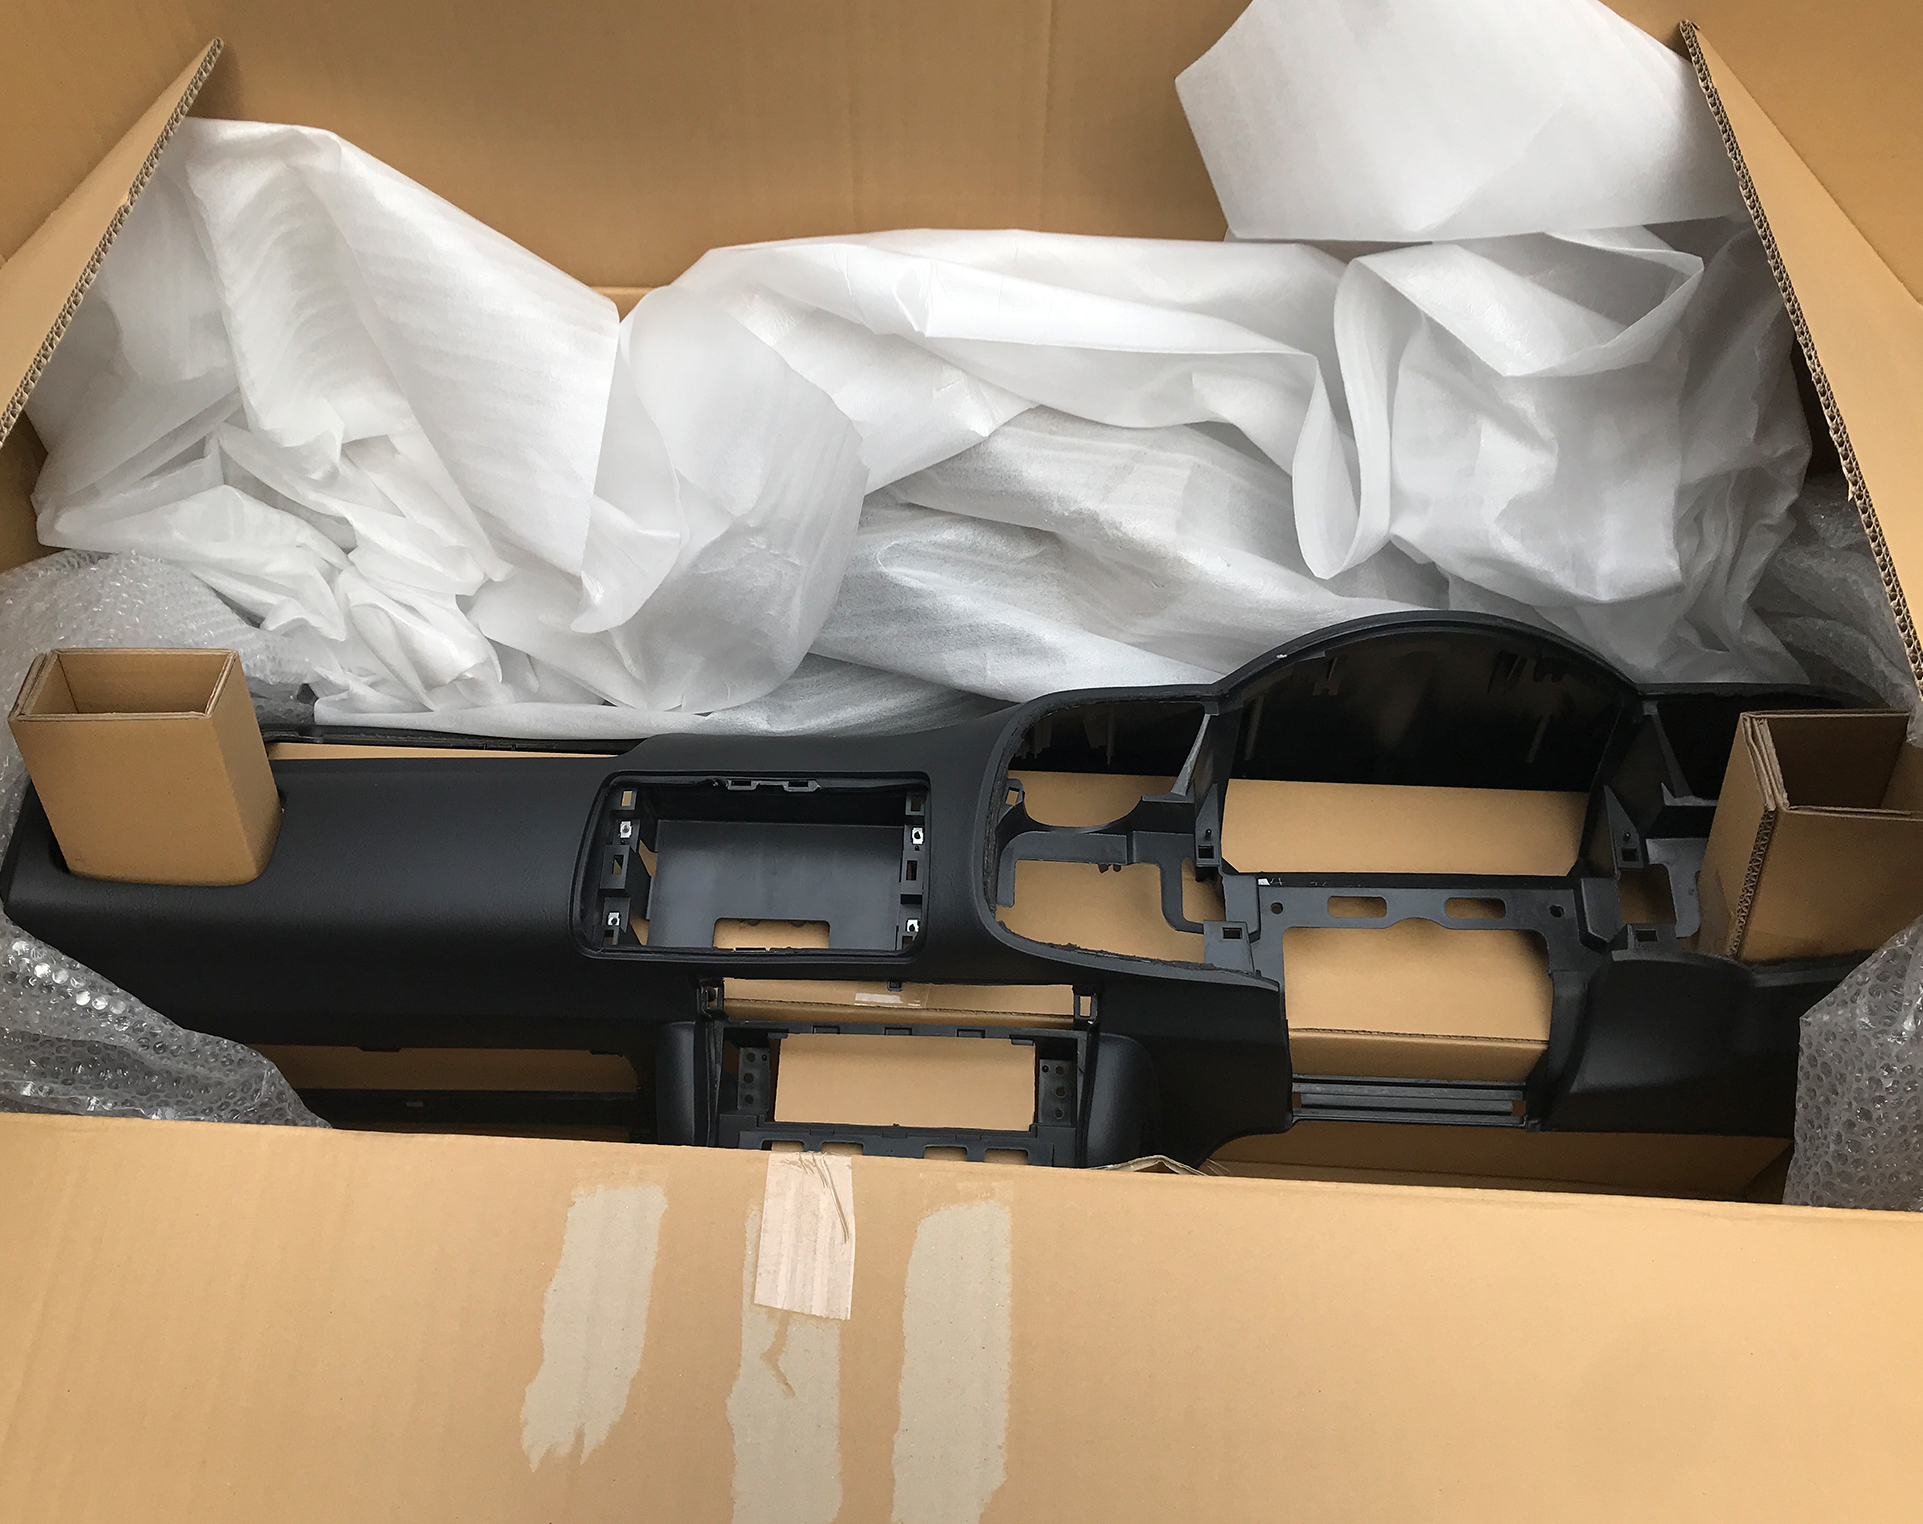
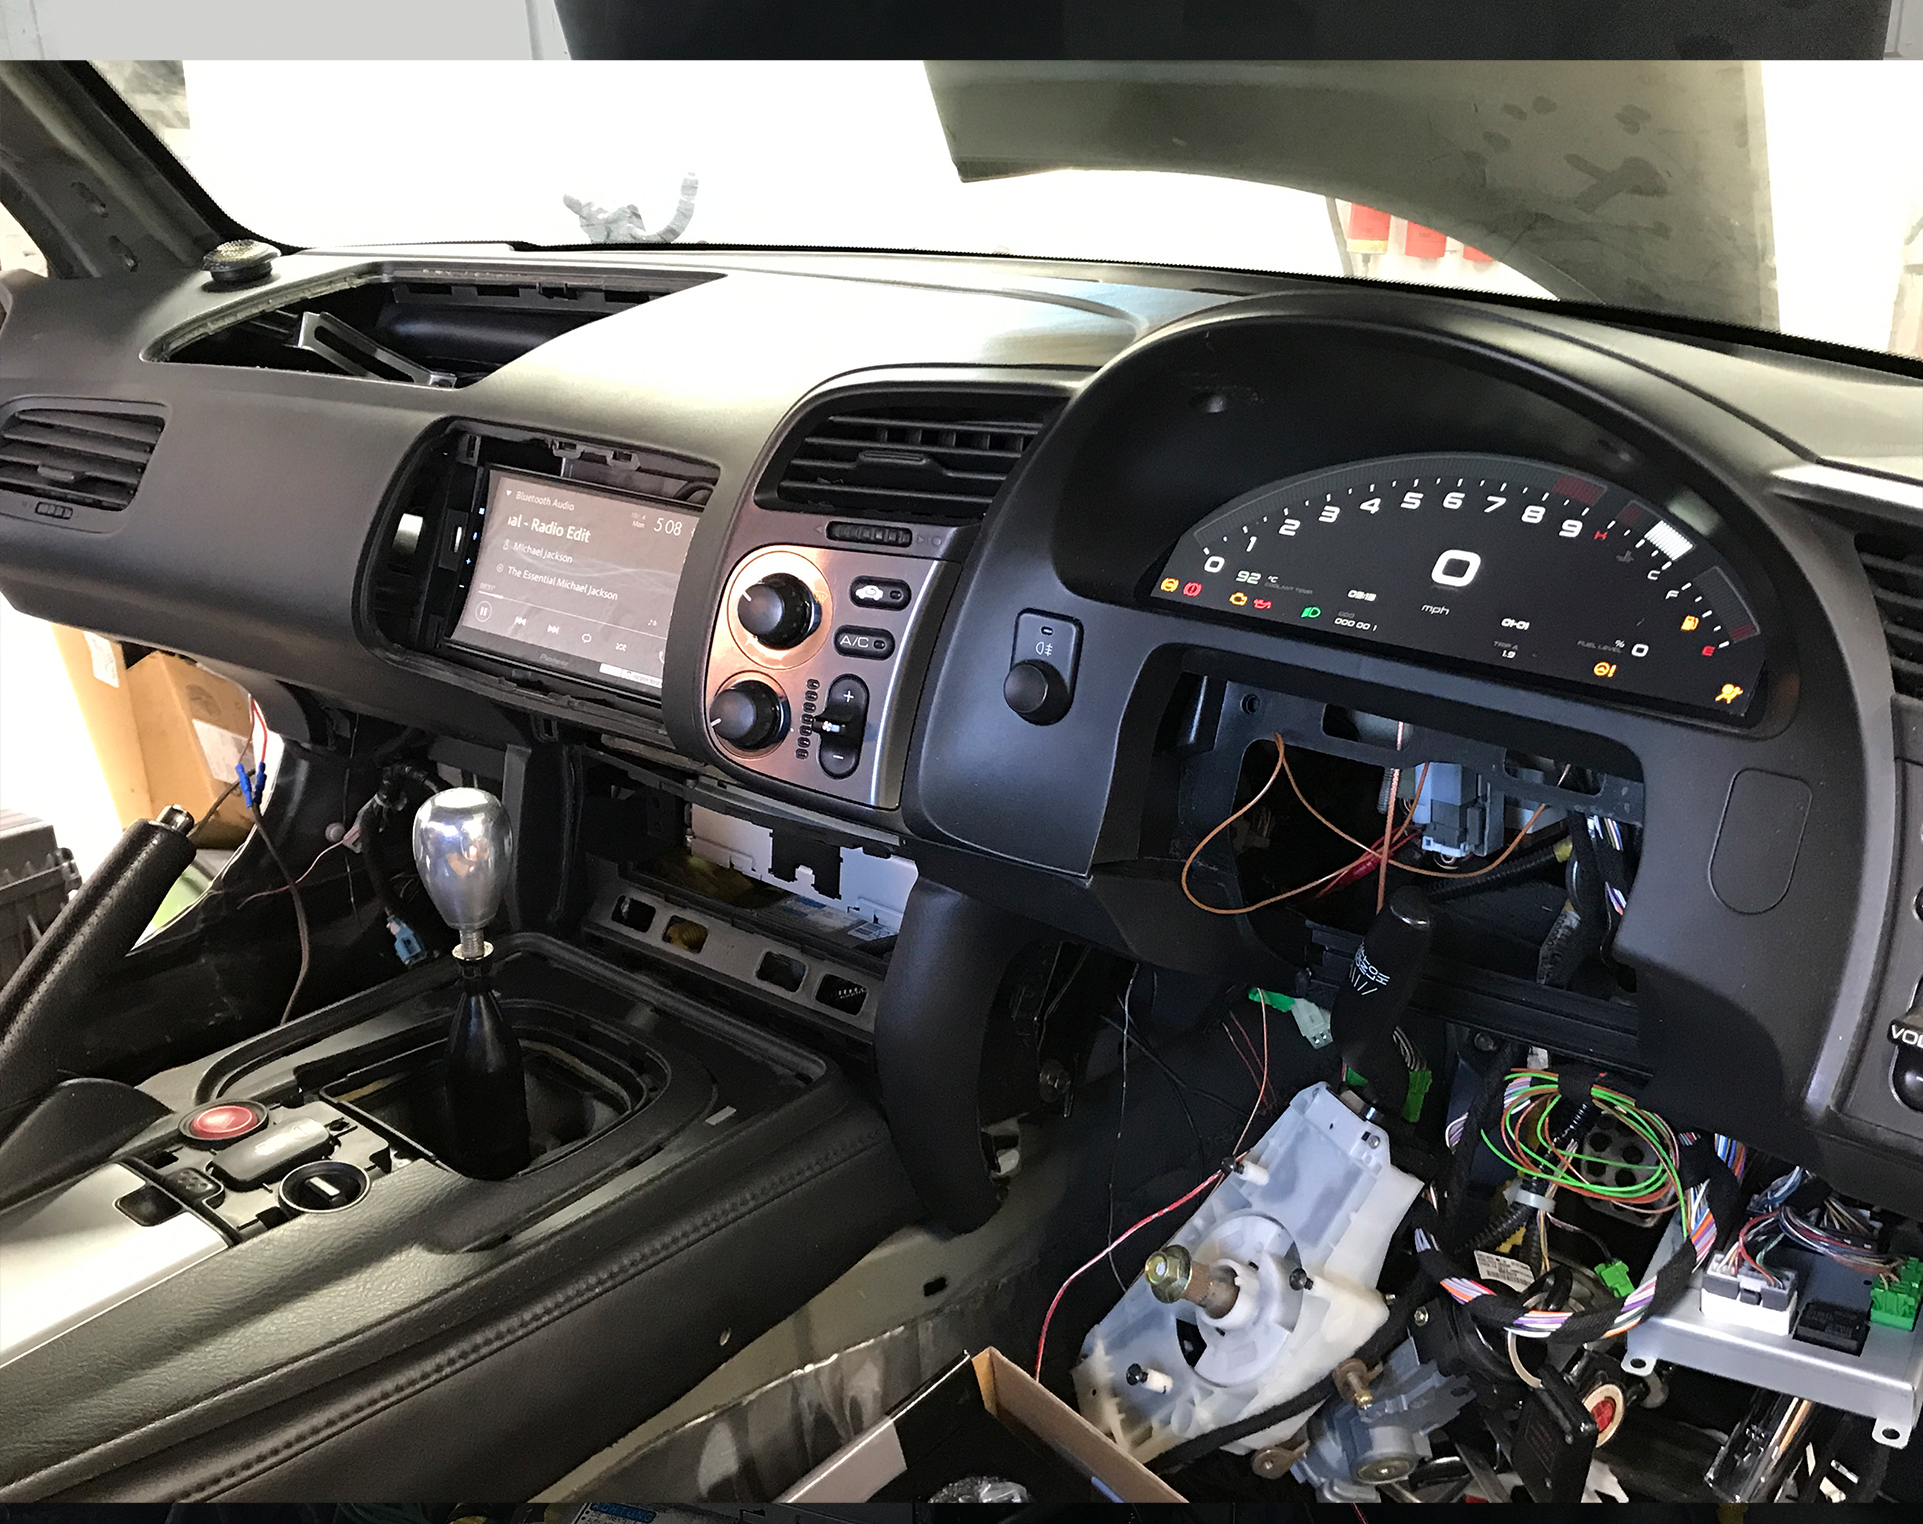
Well, the plan was to get a JDM dashboard. Unfortunately, even though I had the part number, the local dealer was unable to source one for me, as it was only available for the Japanese market.
I then turned my search to Japan, trying several sources. The prices—including shipping—varied wildly, ranging from £1,000 to £2,000 just for shipping. Some sellers even gave me a quote, only to later cancel my order.
But I didn’t give up. I finally found a company and ended up paying £1,300 in total—including shipping—plus taxes.
Yes, that’s right. I paid £1,300 just for the dashboard.
Have I mentioned that this is the ultimate no-compromise build?
The Dashboard Installation
The dashboard fits perfectly. The only issue was the color of the airbag cover, but luckily, I was able to get one from TGM in Fleet, along with several other interior bits and pieces, for a very reasonable price.
There’s a lot going on, and I promise I will cover the instrument cluster in one of the next posts.
If you look closely at where the screen sits, you can see that the space is quite shallow, so I had to create a custom bracket to hold the screen in place.
I’ve seen people cut a hole and fit a double-DIN unit into that space for a fraction of what I paid for the JDM dashboard. However, I’ve also seen that the surround doesn’t sit perfectly in place, and the vinyl tends to crumble behind it—which is exactly why I wanted to go for the genuine one.
Tweeter Placement for Optimal Sound
Remember when I mentioned that the tweeters in the door cards are not in the optimal location for the best sound experience, as they project sound away from you?
I decided to fix this issue by mounting the tweeters in the A-pillars, ensuring that the sound beam is directed straight towards the head for the most optimal sound projection.
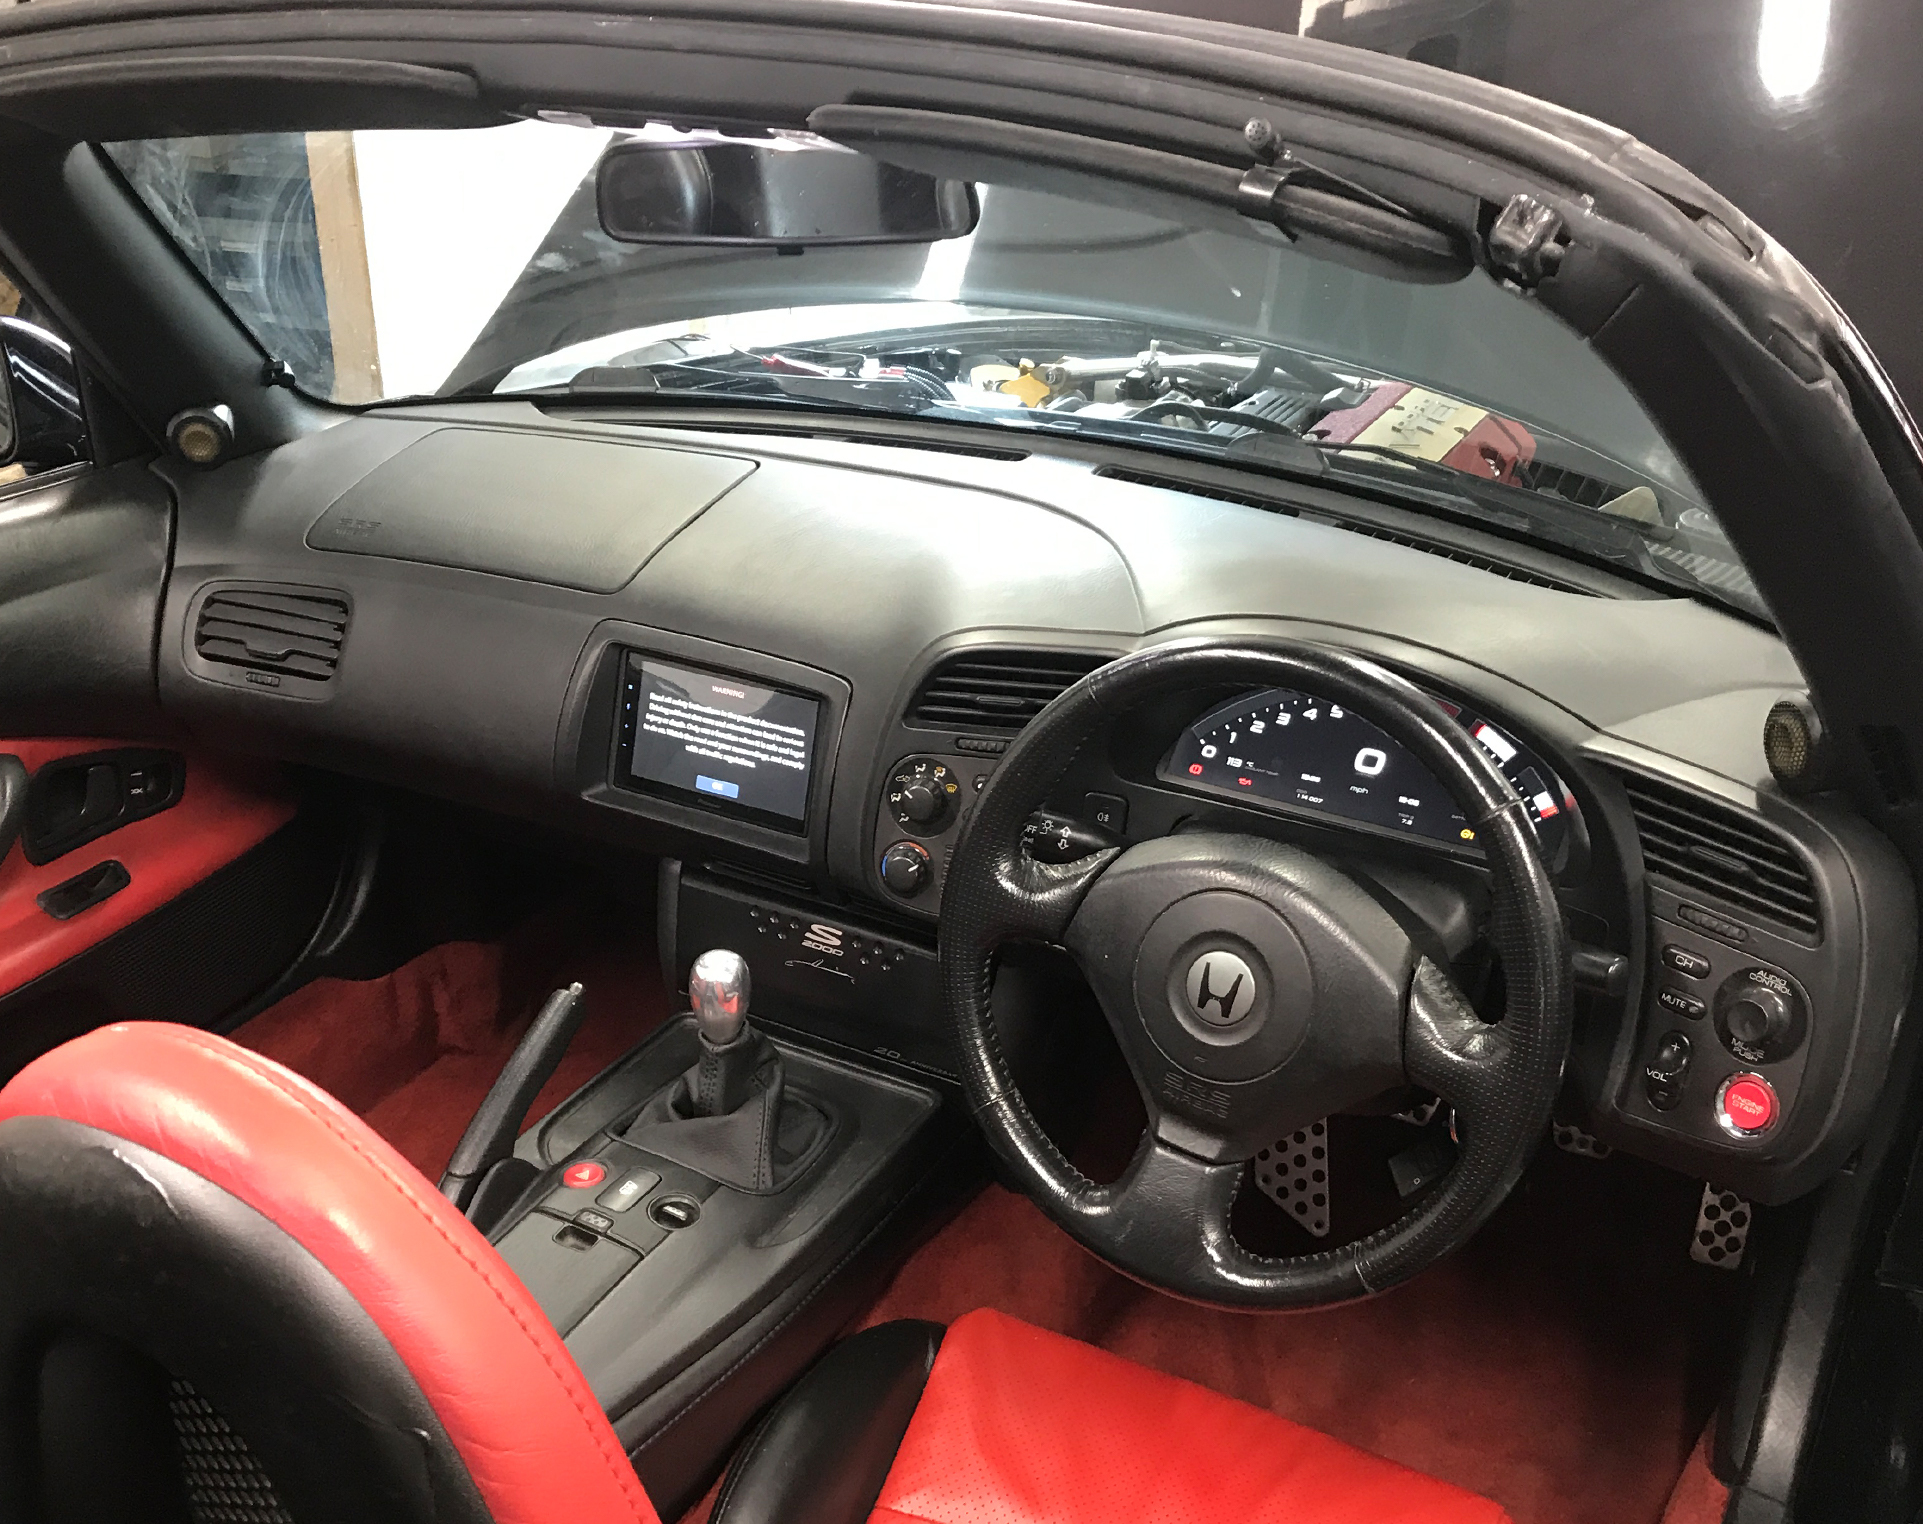
Once all the speakers were in place and the sound system was tuned, it was time to cover everything behind the carpet and call it done.
With the spare wheel cover in place, the entire system is completely hidden, and I haven’t lost an inch of space in the boot.
Wasn’t This a Long Chapter?
Surely, some might object to my build and perhaps even tilt their heads in disbelief at how expensive this must have been—especially after also getting a new dashboard and having it shipped from Japan.
In the next chapter, I will be covering the installation of the engine back into the car and the drivetrain.

